2. Accelerometer/Compass — The micro:bit has an onboard accelerometer that measures
gravitational force, as well as a compass that can detect its orientation using Earth’s
magnetic field.
3. Bluetooth/Radio — Communication is huge with the micro:bit. You can communicate with
your phone or tablet using BLE or between two or more micro:bits using the standard “radio.”
4. Temperature Sensor — No, the drawing is not numbered incorrectly! The microcontroller
doubles as a temperature sensor!
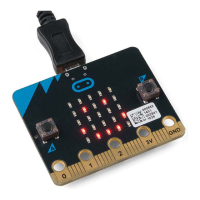
5. USB Port — Used to upload code to your micro:bit or power from your computer or laptop.
6. Reset Button — A button to reset your micro:bit and start your code over from the
beginning.
7. JST Battery Connector — A connector to hook up an external battery pack to your
micro:bit.
Hooking It Up
The micro:bit uses a microUSB cable to hook up to your computer or Chromebook. It is as simple as
plugging the cable into your micro:bit and the other end into an open USB port.
Once you plug your board in, you should see the small yellow LED on the back of your micro:bit light
up and possibly blink a few times. Then whatever existing program that was put on the micro:bit will
start running. If this is your first time plugging your micro:bit in, go ahead and play around with it a bit
— push buttons, shake it, and you will get a bit of an Easter egg.
Once your micro:bit boots up, check out your Finder if you are on a Mac, or your My Computer
Drives if you are on a PC. The micro:bit should show up as an external storage device with two files
stored in it.
 Loading...