the back can change that).
NC Not connected to anything on the Thing.
GND Ground (0V).
I2C Header
I 2 C is a very popular communication protocol in the embedded world. Whether you want to
hook the Thing up to a motion sensor, light sensor, digital-to-analog converter, or OLED
display, I2C is often the protocol of choice.
This header includes four pins – all that should be required to connect an I2C device up to the
Thing.
Pin
Label
ESP8266
I/O #
Notes
GND Ground (0V).
3V3 3.3V
SDA 2 Can either be used as ESP8266 GPIO2 or I2C serial data (SDA).
SCL 14
Can either be used as ESP8266 GPIO14 or I2C serial clock (SCL).
Also used as the SPI clock (SCLK).
This pinout matches that of most of our I2C-based breakout boards, so you can piggyback
them right on top of the Thing.
If you need the extra I/O, instead of I2C, the SDA and SCL pins can be used as GPIO 2 and
14 respectively. The SCL pin also serves as the clock (SCLK) for the ESP8266’s SPI
interface.
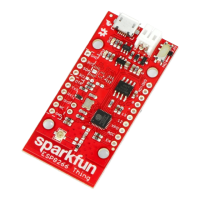
General I/O Header
The rest of the power, control, and I/O pins are broken out on the other side of the board.
They are:
Pin
Label
ESP8266
I/O #
Notes
GND Ground (0V).
VIN
USB connected: ~4.5V output LiPo connected (no USB): ~3.7V output
No supply: Can be used as a voltage supply input to the 3.3V regulator.
5 5 This pin is also tied to the on-board LED.
0 0
4 4
13 13 Hardware SPI MOSI
12 12 Hardware SPI MISO
XPD 16 Can be connected to reset to set the ESP8266 into deep sleep mode.
ADC A0 A 10-bit ADC with a maximum voltage of 1V.
EN ESP8266 enable pin. HIGH = on, LOW = off. Pulled HIGH on-board.
What happened to the rest of the GPIO pins? Why the eclectic pin-numbering scheme? We’re
taking what the ESP8266 gives us. Unfortunately, most of the remaining GPIO are connected