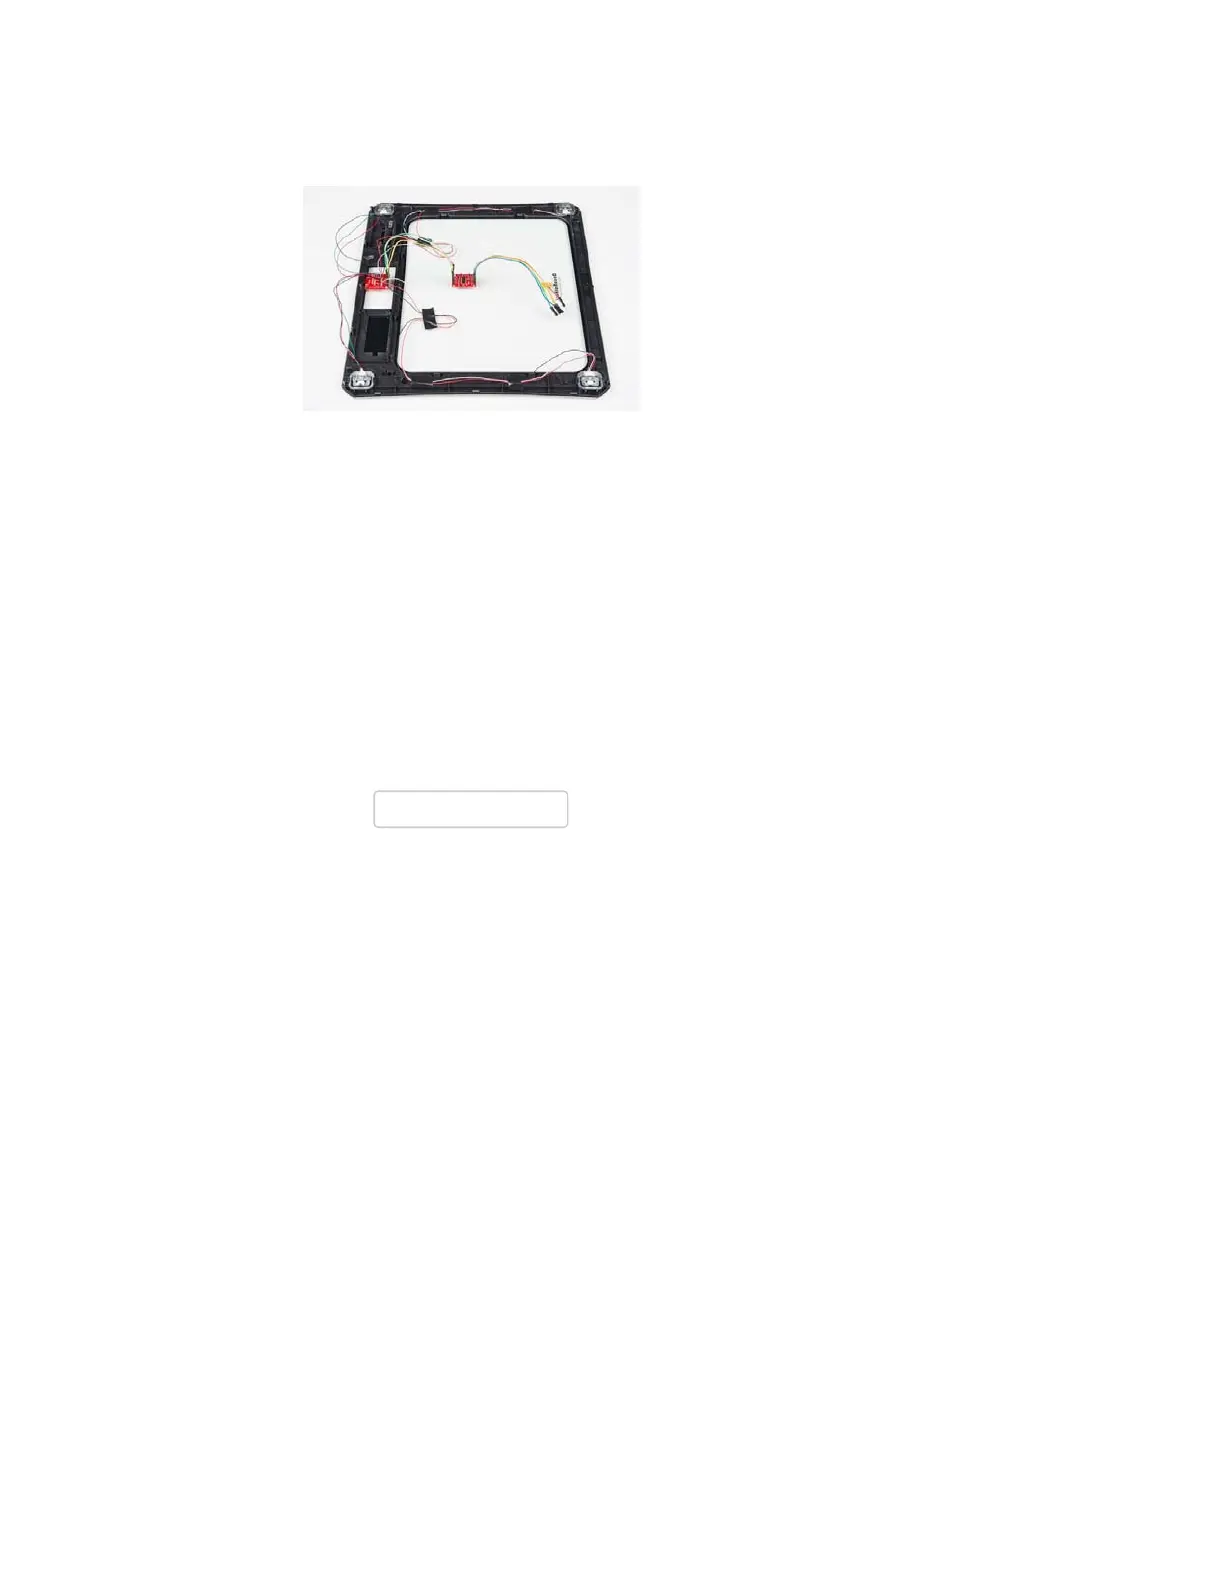
The combinator board hooks up the four load sensors in such a way that
two resistors in the wheatstone bridge configuration are constant values
and the other two are variable in this way:
To hook up the combinator board to the HX711 match the RED, BLK, WHT,
and GRN pins
Once you have the combinator board successfully soldered to the twelve
wires, you can now connect it to the HX711 amplifier board via the 4
standard load cell wires. You can use short jumper wires or if your
electronics are a long distance away from your scale consider using an
RJ45 connector and an ethernet cable to connect the combinator to the
HX711 amplifier.
Arduino Code
Now that you have your load cell, amplifier, and microcontroller hooked up,
you can add your code and start calibrating your setup.
You can download the most up-to-date code and libraries from the link
below.
GITHUB REPOSITORY
If you have never worked with downloading Arduino libraries or need a
quick reminder you might want to take a look at our tutorial on Installing
Arduino Libraries.
Or you can easily get started and running with everything in Codebender!
The first thing you will want to work with is the calibration code:
“SparkFun_HX711_Calibration”:
Page 8 of 10
 Loading...