In order to use the Pro Micro in your Arduino IDE, you need to add a few board definition files to it. That's what
we'll do in this section. Begin by downloading the Pro Micro addon files.
Note: These Arduino addon files only work with Arduino 1.5 and up. If you're using an earlier version of
Arduino, either update (and get some cool new features), or download the older version of the Addon.
With that downloaded, follow these steps to enable the Pro Micro in your Arduino environment:
1. The addon files are supplied in a zip folder, so you'll need to extract the files within first.
2. Find your Arduino sketchbook folder. If you don't know where it is, you can locate your sketchbook by
looking at the preferences dialog in your Arduino IDE.
3. If there isn't already one, create a folder in your sketchbook called 'hardware'.
4. Copy the 'sparkfun' folder that was unzipped in the first step into the 'hardware' folder.
Your directory structure should look something like ".../Arduino/hardware/sparkfun/avr."
5. Restart Arduino, and look under the Tools > Board menu. You should see a few new options, including
SparkFun Pro Micro, SparkFun Fio V3, and Qduino Mini.
If the boards are visible, select the option that matches your board. If you have a Pro Micro, make sure you
select the correct operating speed and voltage under Tools > Processor! At this point, select the COM port
that the Pro Micro enumerated on. Then head over to the next page where we'll upload our first sketch!
Example 1: Blinkies and Hello World!
The Arduino-standard Blink sketch won't have any visible effect on the Pro Micro -- there's no LED on pin 13. In
fact, the only LEDs on the board are the power indicator, and RX/TX blinkies. Unlike other Arduino boards, though,
we can control the RX/TX LEDs in our sketch. So let's get blinking!
Upload the RX/TX Blinky, Hello World Sketch
Copy and paste the code below into the Arduino IDE. In the Tools, make sure to select Board > SparkFun Pro
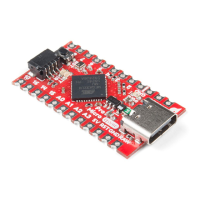
Micro and Processor > ATmega32U4 (5V, 16MHz). Also, don't forget to select the COM port that your board
enumerated to. Finally, upload it to your Qwiic Pro Micro USB-C.
[1]
 Loading...