base is often used in conjunction with a second unit set to 'Rover' to obtain the 14mm accuracy. Said differently, if
you’ve got a radio attached to the base and the rover, you’ll create an RTK system without any other setup and the
Rover will output super accurate readings.
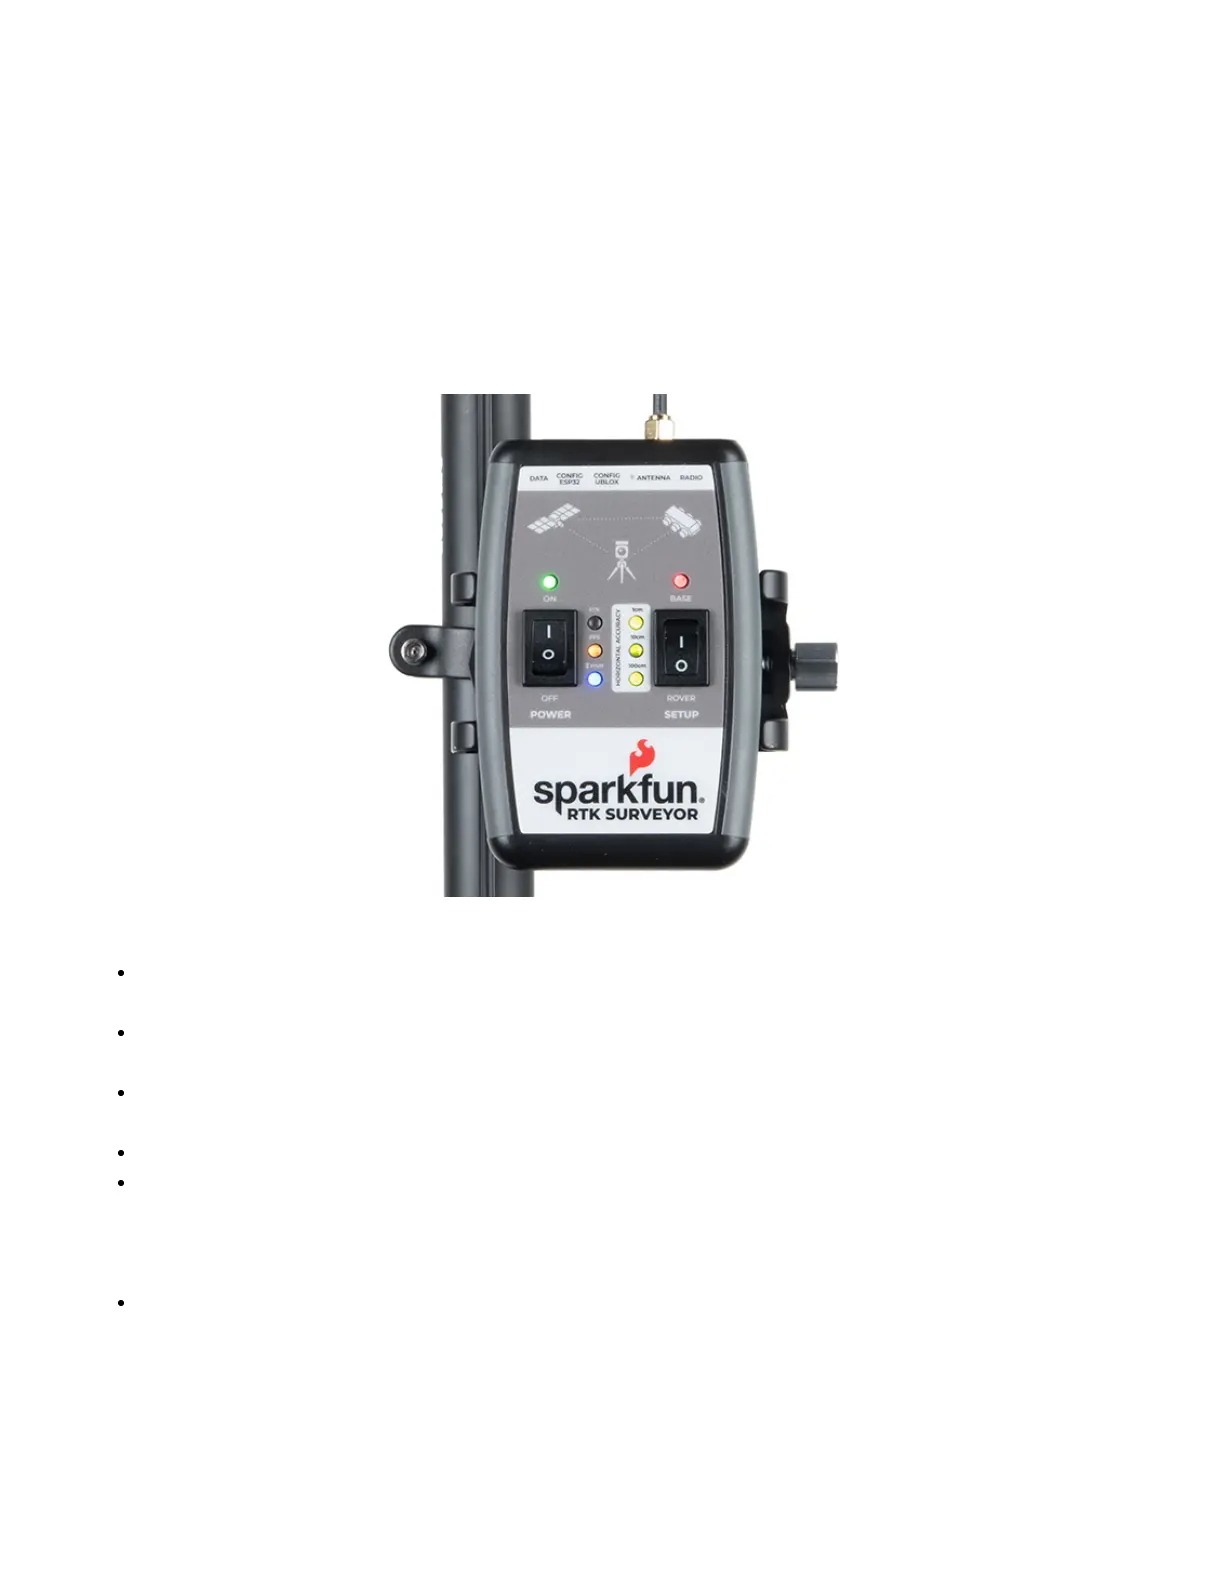
Power
The Power switch is self explanatory. When turned on the LED will turn Green, Yellow, or Red indicating battery
level. The RTK Surveyor has a built-in 1000mAh lithium polymer battery that will enable up to 4 hours of field use
between charging. If more time is needed a common USB power bank can be attached boosting the field time to
40 hours.
LEDs
There are a variety of LEDs:
Power - Blue when attached to power and charging / off when fully charged. Green/Yellow/Red when the
Power switch is turned on indicating the state of charge of the internal battery.
RTK - This white LED will be off when no RTCM correction data is received. Blinking indicates RTK Float is
achieved. Solid when RTK Fix is achieved.
PPS - Pulse per second. This yellow LED will blink at 1Hz when GNSS fix is achieved. You’ll see this LED
begin blinking anytime the receiver detects enough satellites to obtain a rough location.
PAIR - Blinks blue when waiting to be paired with over Bluetooth. Solid when a connection is active.
Horizontal Accuracy 100cm/10cm/1cm - These green LEDs illuminate as the horizontal positional
accuracy increases. 100cm will often be achieved in normal positioning mode with a good L1/L2 antenna.
10cm will often be achieved as the first few seconds of RTCM correction data is received, and 1cm will be
achieved when a full RTK fix is calculated.
BASE - This LED will blink red when the SETUP switch is set to Base and a survey is being conducted. It
will turn solid red once the survey is complete and the unit begins broadcasting RTCM correction data.
Connectors
 Loading...