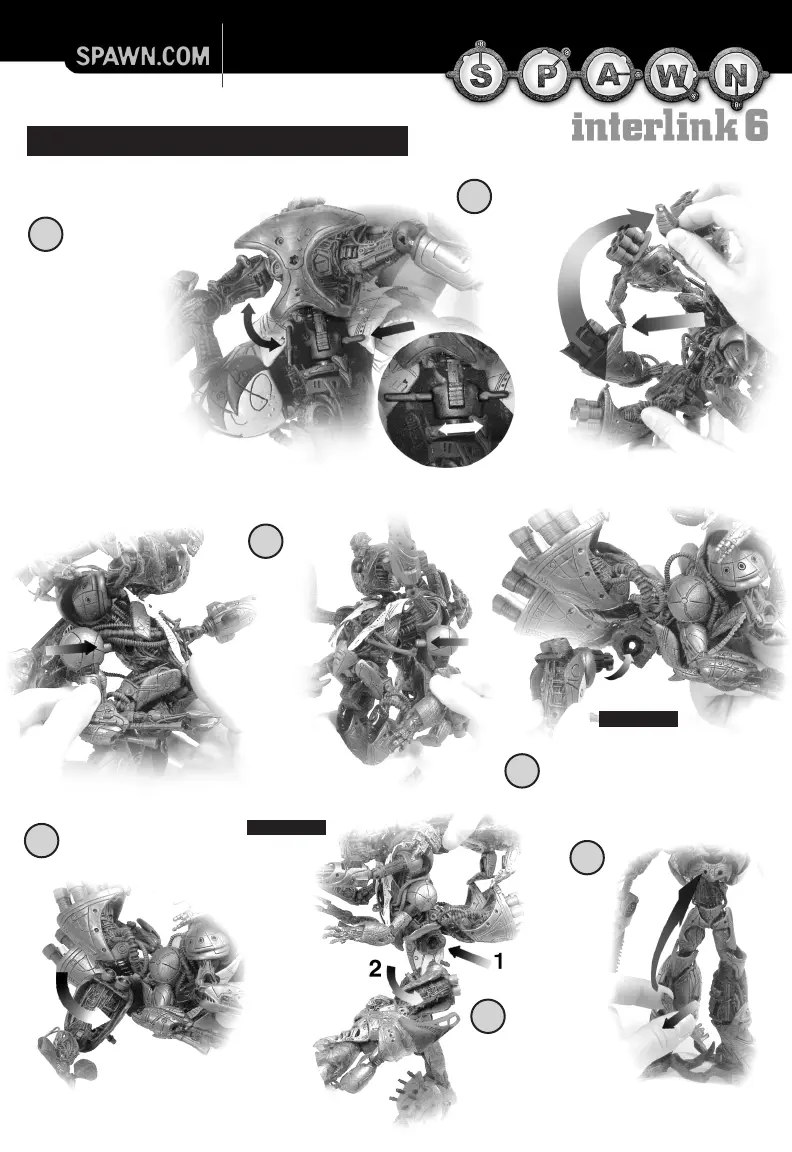
HD1’s foot plates
have a loop at
the end that
attaches to
hooks at
the back
feet of
TS2
There are two T-pins on
TS2 that slide into the
lower ball joint of HD1.
Slide the longer side of
the T-pin bar into one of
the side holes as far as
you can, allowing room
to rotate the other T-pin
bar to line up with the
other hole.
Then move
HD1 to be center in the middle of T-pins.
You may have to repin HD1 back onto head post of TS2
21
Arms
from
RL3
plug
into
holes
of
TS2
located
at the
side of
it’s
torso
22
RL3
≥
TO
≤
TS2
CONNECTING
The key lock tab from RL3’s jet pack pins
into holes in TS2’s chest block.
After inserting tab,
turn leg to lock in tab
23
LL4
≥
TO
≤
TS2
CONNECTING
Repeat same
procedure as
in step 22
and step 23
24
Remove
inner
leg
covers
on
RA5
and peg
into
chest
plate
25
20
19
ASSEMBLY
INSTRUCTIONS PAGE 3
STEPS FOR ASSEMBLING INTERLINK 6 - CONTINUED
 Loading...