Do you have a question about the Specialized Turbo SL and is the answer not in the manual?
Connect your Specialized Turbo E-Bike to the Mission Control app for full functionality and rider registration.
This document provides supplementary information for the assembly and use of Specialized Turbo/Turbo SL bicycles, particularly for "Ship to Home" deliveries. It is intended to be used in conjunction with the main Assembly Guide and User Manual provided with the bike.
The document emphasizes that the information provided is supplementary and should be read alongside the comprehensive Assembly Guide and User Manual. It highlights the importance of consulting these primary documents for detailed instructions and safety information.
The Specialized Turbo/Turbo SL bicycles feature an electric motor that provides assistance. The motor support activates as soon as the cranks are rotated and torque is detected, provided the system is powered on. This activation can occur in various scenarios, including active riding, when the bicycle is in a work stand, flipped upside down with cranks turning, or when walking alongside and pushing the bicycle.
Usage Feature: The motor provides assistance based on crank rotation and torque detection, enhancing the riding experience.
Safety Feature: A critical warning is issued regarding unintentional motor engagement. Users are advised to always turn off the battery when motor assist is not desired, especially when working on the bicycle or when there's a risk of accidental crank rotation. This prevents potential injury or damage from unexpected motor activation.
The document details the contents of the small parts box that accompanies the bicycle. This box contains essential tools and manuals necessary for assembly and initial setup.
Contents include:
Maintenance Feature: The inclusion of specific tools like a torque wrench and hex keys indicates that some level of user assembly and maintenance is expected, with the proper tools provided to ensure correct procedures.
To assist with the assembly process, Specialized provides an assembly instruction video accessible via a QR code.
Usage Feature: Users can scan the QR code with their smartphone camera to access a comprehensive assembly instruction video in their preferred language. This visual guide complements the written manuals, making the assembly process clearer and easier to follow.
Steps to access the video:
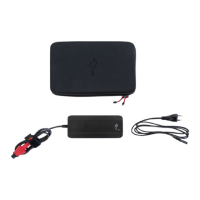
The bicycle arrives with a partially charged battery. It is imperative to fully charge the battery before the first ride.
Usage Feature: The Specialized Turbo battery charger is provided to facilitate charging. Users must refer to the main User Manual for detailed safety information and instructions on how to properly charge the battery.
Safety Feature:
Maintenance Feature: Proper charging procedures are crucial for battery longevity and safe operation. The document highlights specific actions to avoid during charging to prevent damage and ensure continuous charging.
The Mission Control App is a key feature for Specialized Turbo E-Bike owners, allowing them to maximize their riding experience.
Usage Feature: The app provides advanced control and customization options for the E-Bike. Users are encouraged to download and connect to the Mission Control App from their device's app store. QR codes are provided for direct download and to learn more about the app's capabilities.
Connecting the bicycle to the Mission Control App involves a few simple steps, depending on whether the bike is equipped with a TCU (A) or a MasterMind TCU (B).
Usage Feature:
The app allows for monitoring ride data, customizing motor settings, performing diagnostics, and accessing other features that enhance the E-Bike experience.
Registering the Specialized bicycle is essential to unlock the Lifetime Warranty against structural defects in material or workmanship for all Specialized-branded frames and forks.
Usage Feature: The registration process can be completed either through the Mission Control App or on Specialized.com. Users will need the bicycle's serial number, which is typically found on a sticker on the underside of the top tube, downtube, or underneath the bottom bracket. Specialized serial numbers usually start with prefixes like "WSBC," "WUD," "STT," or "STE."
Steps to register via Mission Control App:
Steps to register via Specialized.com:
Maintenance Feature: Registering the bike ensures that the owner benefits from the Lifetime Warranty, providing long-term support for potential structural issues with the frame and fork. This is a crucial step for protecting the investment in the bicycle.
| Motor | Specialized SL 1.2 Custom Lightweight Motor |
|---|---|
| Battery | Specialized SL1-320, fully integrated, 320Wh |
| Charger | Custom charger |
| UI/Remote | Specialized MasterMind TCU, ANT+/Bluetooth |
| Range | Up to 80 km (50 miles) depending on conditions |
| Frame | Varies by model |
| Fork | Varies by model |
| Rear Shock | Varies by model |
| Brakes | Varies by model |
| Drivetrain | Varies by model |
| Rear Derailleur | Varies by model |
| Shifters | Varies by model |
| Cassette | Varies by model |
| Chain | Varies by model |
| Crankset | Varies by model |
| Wheelset | Varies by model |
| Tires | Varies by model |
| Handlebar | Varies by model |
| Saddle | Varies by model |
| Seatpost | Varies by model |