Software & Manual CD
Remote Control
Remote Battery 1.5V (AAA x 2EA)
Quick Setup Guide Quick User Guide
Mouse for DxHS’s
Congratulations on purchasing your new HS DVR.
We hope that this Quick Setup Guide will help you quickly setup
and configure your new Speco Technologies DVR.
Thank you!
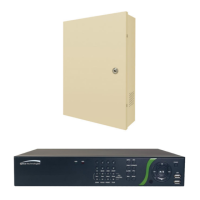
Product Components
Internal Connections
EZ Setup
Quick Setup Guide
Please go to www.specotech.com/software-updates.html for the latest software
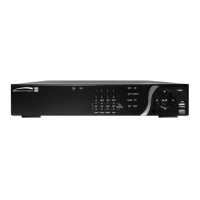
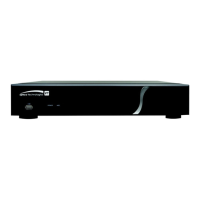
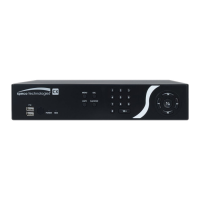
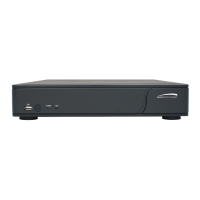
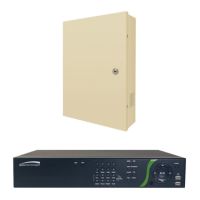
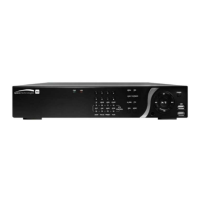
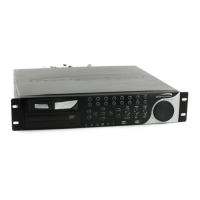
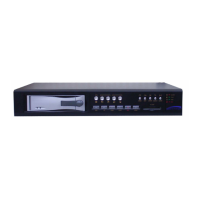
DVR Unit (HS Series)
Audio Cable
Adaptor (DC12V 5A)
& Power cable
(110V or 220V)
Rack mount (X 2EA)
Screw (X6EA)
1. Ground: Use for ground port.
2. VIDEO IN: Video input port.(For Analog & 960H cameras)
3. VIDEO OUT: MAIN – Composite Video Output / SPOT
– Spot Monitor
4. AUDIO IN & OUT: Four connectors for audio input and one
connector for audio output.
5. HDMI: HDMI output port. Connectors to the HDMI Monitor
6. VGA: VGA (Video Graphics Array) output port. Connects to the
PC VGA monitor.
7. E-SATA: External SATA port for extension storage.
8. AUDIO IN: Audio inputs connections for channels 5-8 or 5-16
through external cable
9. USB: USB terminal for video export or firmware upgrade
10. IP CAM: Network Second Terminal. No Internet access.
11. ETHERNET: RJ-45 Connector for LAN Connection, used for
Internet Connection
12. SENSOR IN, ALARM OUT, RS-485: External sensor terminal,
External alarm out terminal & RS-485 for PTZ Camera control
13. POWER: DC12V input
Power on the DVR
• Please follow the proper power on procedures to avoid damaging
the DVR.
• Connect all necessary components, e.g. monitor and cameras, before
powering the DVR.
• Check the type of power source before connecting the power adaptor
to the DVR. Only use the power supply that is included with the unit.
• To start the EZ Setup, right click on the mouse and select EZ SETUP
from the submenu
or the main menu button the main menu.
• Enter username and password. The default username is admin and
password is 1111.
• It is strongly suggested to change the password to prevent
unauthorized access.
EZ CAMERA
1. Select EZ CAMERA for CAMEAR SETUP, Click NEXT to proceed.
2. Configure individual cameras in the EZ Camera Setup.
• Select the Channel to configure.
• Select the Camera
Protocol and then click on the scan button; this
will scan the network
using the specified protocol.
• Select the desired Camera from the list, and then click on register.
• If necessary, click on Preview to Preview the camera, or Setup to
change camera settings.
EZ Network (Using an internet connection)
1. Select YES in case of setting the network using an internet connection.
2. Select Auto Configuration(DHCP) or Manual Configuration(STATIC)
and then click TEST Button. It will automatically setup the network
for the system.
3. Setup DDNS setting. DDNS(Dynamic Domain Name System) allows
a DNS name to be constantly synchronized with a dynamic IP address.
It allows using a dynamic IP address to be associated with a static
domain name. Refer to the full version manual for more information.
4. Click Finish to save the setup.
1. Select NO if the HS is not using an internet connection.
2. Select Auto Configuration(DHCP) or Manual Configuration(STATIC)
and then click TEST button when ready.
3. Input the Network Settings if Manual Configuration(STATIC) was
selected, and click TEST
4. Select OFF for ENABLE DDNS and click NEXT button.
5. Click Finish to save the setup.
1. Select EZ Record for Date/Time and Record Setup, Click NEXT to
proceed.
2. Description of EZ Record Setup is displayed, Click NEXT to proceed.
3. Set up the Date/Time settings and click NEXT to get to the record
setup.
4. Select Recording mode setup for Continuous/Motion and Setup, click
NEXT button.
5. Select Record video quality setup for Resolution and Setup, click
NEXT button.
EZ Network (Not using internet connection)
EZ Record setting
Speco Technologies DxHS Series DVRs
Rev. 14/7/14
D16HS
D8HS
Hybrid DVR