WALLS
5
WALLS
6
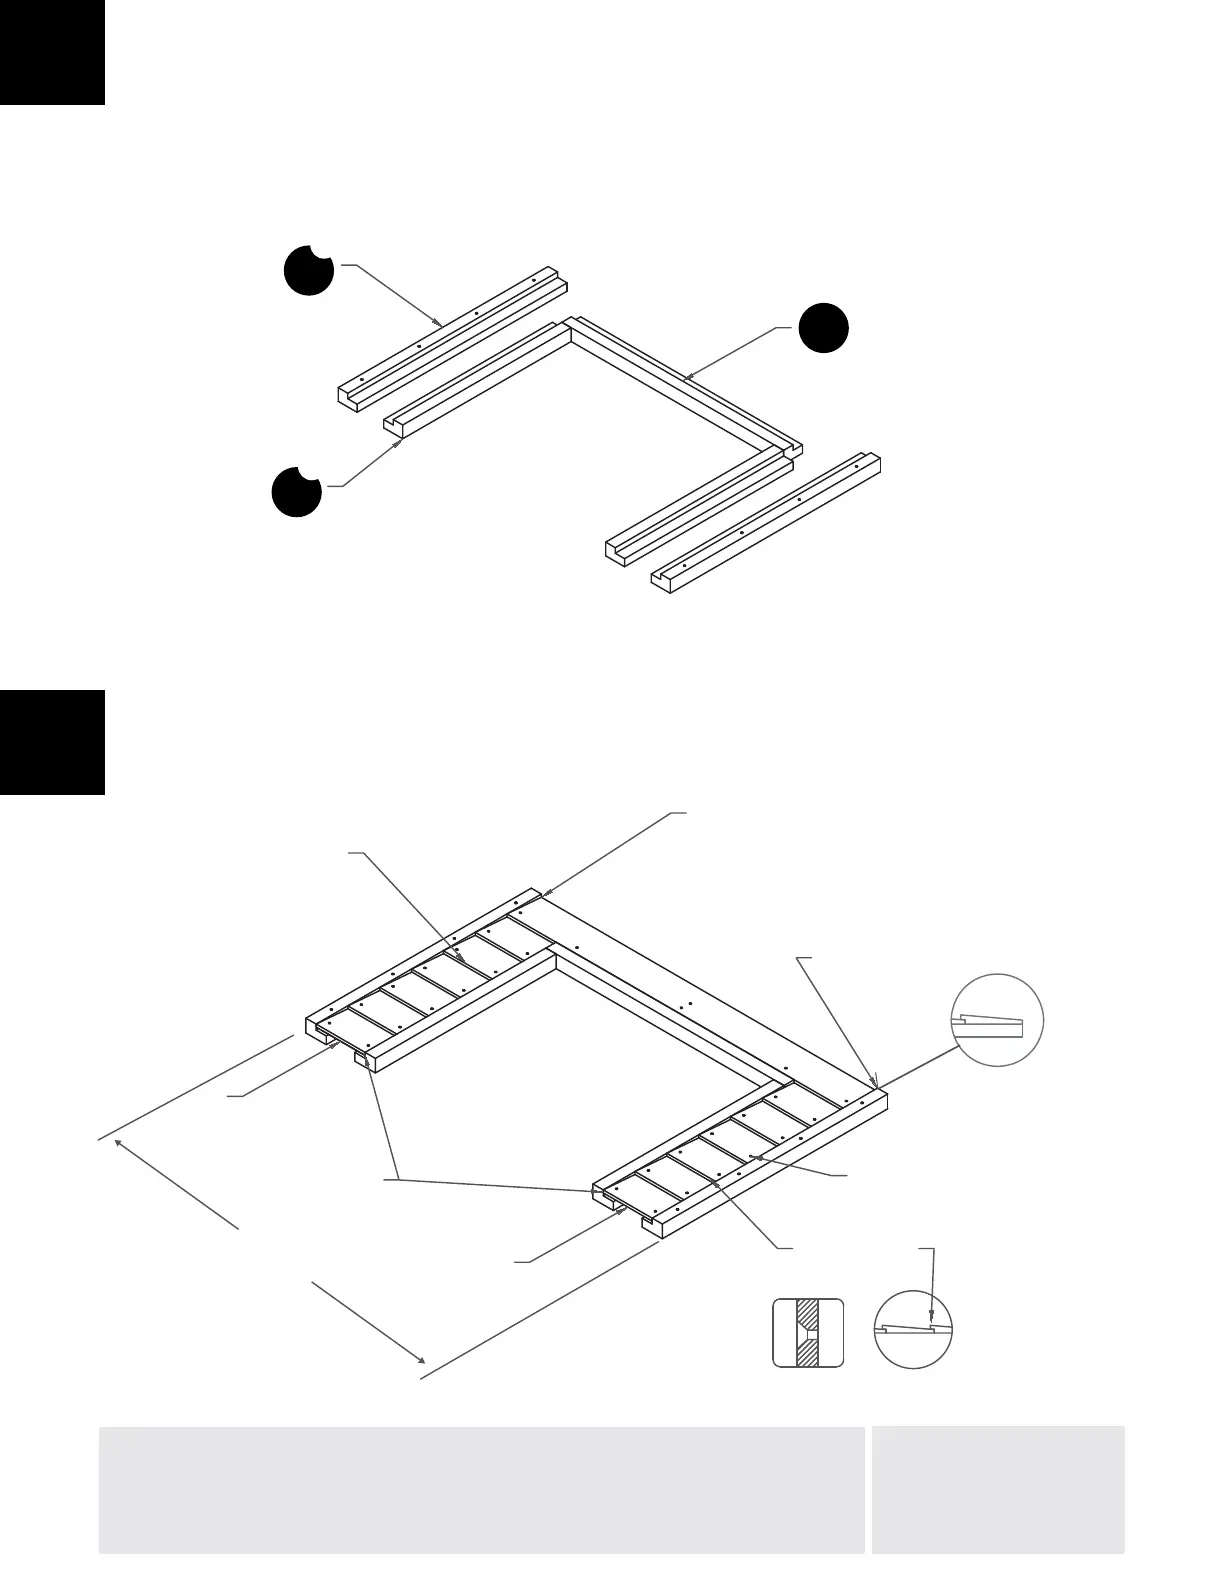
1. Layout parts and orient as shown.
2. Attach panels at top and bottom to square wall in the order shown.
3. Attach other panels as shown
Parts Required:
161 X12
156 X2
183 X1
185 X2
1. Layout parts and orient as shown.
2. Attach panels at top and bottom to square wall in the order shown.
3. Attach other panels as shown.
STEP 2
Place panels under
lap and against panel
groove in panel
STEP 1 - ATTACH TOP AND
BOTTOM PANELS FIRST
STEP 1
Flush to frame
STEP 3
#8 x 1" Wood Screw X30
STEP 1
Panel is flush to frame
5 WALLS
6
Install panel
against groove
SCREWS FLUSH
Parts Required:
161 X12 183 X1
156 X2 185 X2
1. Layout parts and orient as shown.
2. Attach panels at top and bottom to square wall in the order shown.
3. Attach other panels as shown.
Part 155
X2
Part 185
X2
Part 183
X1
STEP 2
Place panels under
lap and against panel
groove in panel
STEP 1 - ATTACH TOP AND
BOTTOM PANELS FIRST
STEP 1
Flush to frame
STEP 3
#8 x 1" Wood Screw X30
STEP 1
Panel is flush to frame at ends
5 WALLS
6
Install panel
against groove
SCREWS FLUSH
Parts Required:
161 X12 183 X1
156 X2 185 X2
155
2x
185
2x
183
35.00
[8]