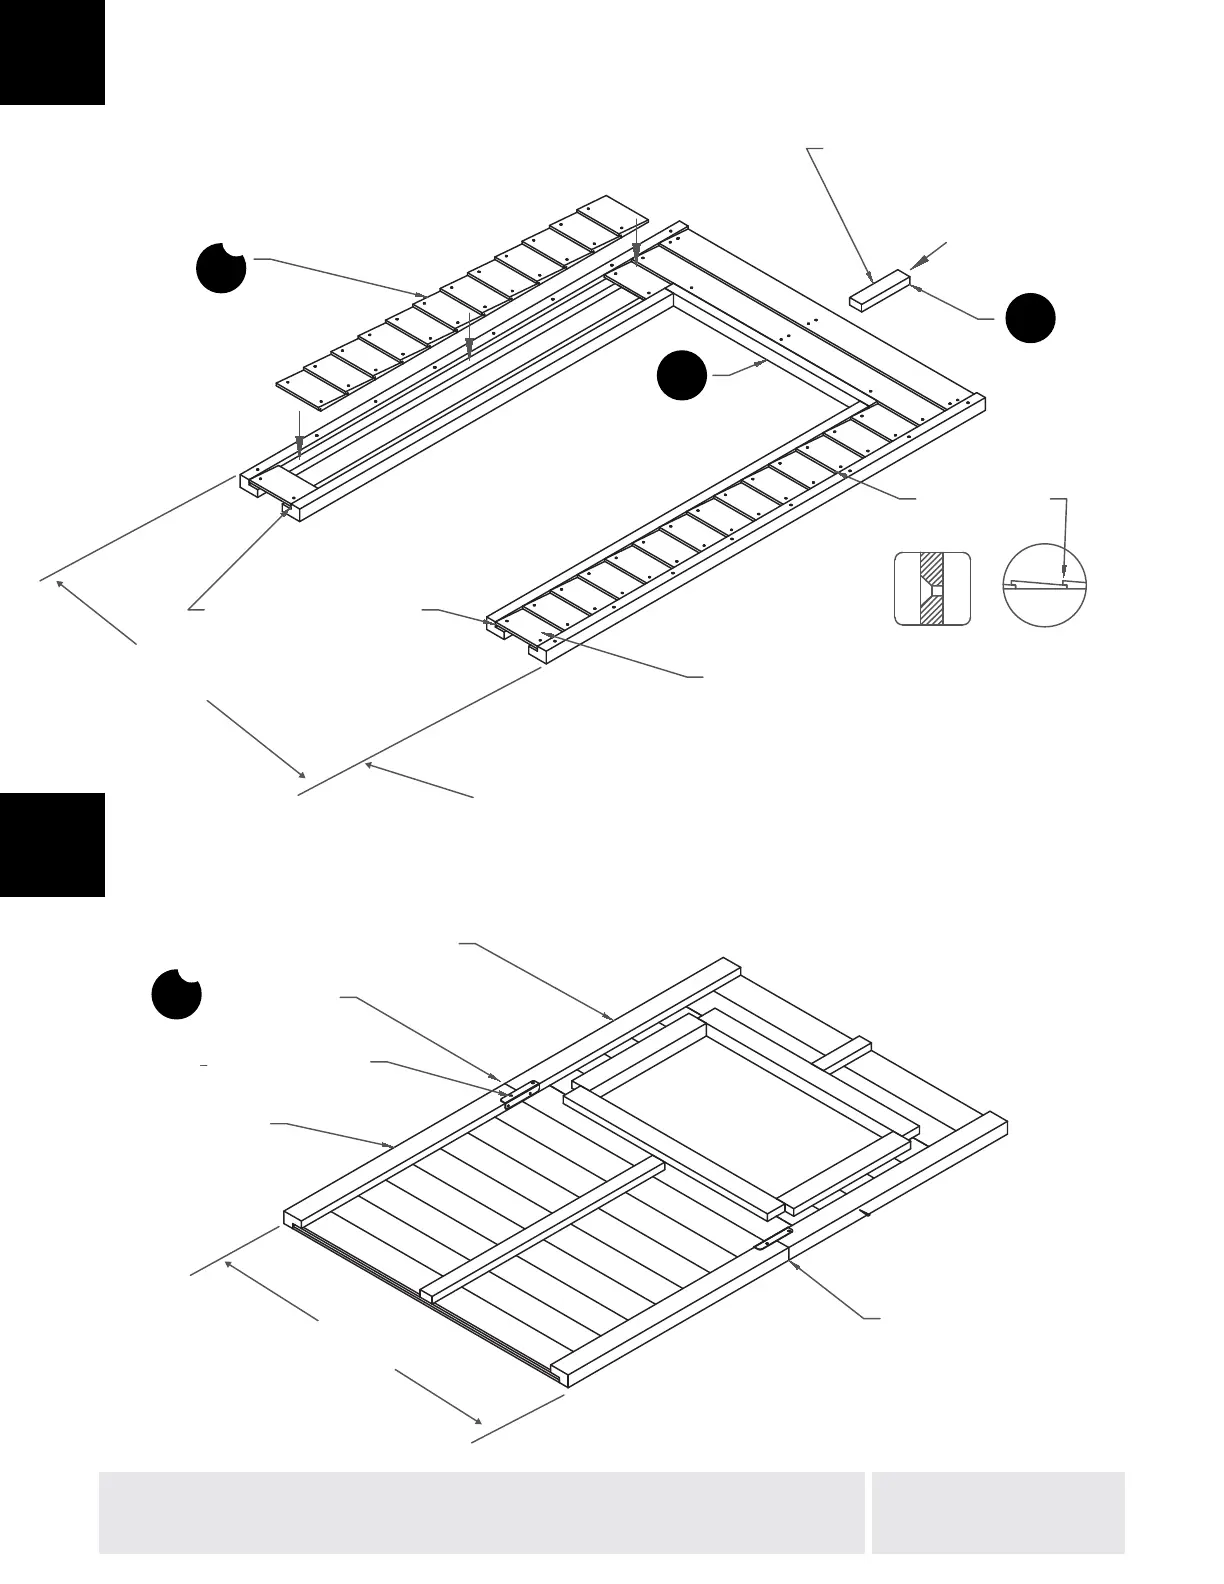
1. Locate all panels onto frame and attach.
2. Assemble TWO (2) Sidewall Assemblies as shown.
Parts Required:
151 X1
161 X26
WALL 2 X2
WALL 3 X2
WALLS
3
WALLS
ASSEMBLE (2) SIDEWALL ASSEMBLIES
4
1. Locate all panels onto frame and attach.
2. Assemble TWO (2) Sidewall Assemblies as shown
Attach (2) lower panels first, then
place all other panels onto frame
#8 x 1" Wood Screw X52
Last panels flush to frame
Part 161
X26
Part 151
Locate 151 under panel and
centered on holes and against 183.
#8 x 1" Wood Screw X3
Parts Required:
151 X1 WALL 2 X2
161 X26 WALL 3 X2
Wall assemblies flush
Part WALL 3
Part WALL 2
Part 307 X2
Center on seam
#8 x
3
4
" Truss Head Screw
X8
3 WALLS
4
Install panel
against groove
SCREWS FLUSH
ASSEMBLE (2) SIDEWALL ASSEMBLIES
1. Locate all panels onto frame and attach.
2. Assemble TWO (2) Sidewall Assemblies as shown
Attach lower panel first, then
place all other panels onto frame
#8 x 1" Wood Screw X52
Last panels flush to frame
Part 161
X26
Part 151
Locate 151 under panel and
centered on holes and against 183.
#8 x 1" Wood Screw X3
Parts Required:
151 X1 WALL 2 X2
161 X26 WALL 3 X2
Wall assemblies flush
Part WALL 3
Part WALL 2
Center on seam
#8 x
3
4
" Truss Head Screw
X8
3 WALLS
Install panel
against groove
SCREWS FLUSH
Part 183
ASSEMBLE (2) SIDEWALL ASSEMBLIES
183
151
307
2x
161
26x
35.00
[8.9]
32.50
[82.]
Wall should be this measurement