EasyManua.ls Logo

Spin Master Rubik's Coach Cube User Manual

Spin Master Rubik's Coach Cube
32 pages
To Next Page IconTo Next Page
Page #1 background imageLoading...
Page #1 background image
CHALLENGE
LEVEL
A Simplified Process
for Learning the Rubik’s Cube.
SOLVE QUICKER WITH STICKERS!
INSTRUCTION GUIDE
Question and Answer IconNeed help?

Do you have a question about the Spin Master Rubik's Coach Cube and is the answer not in the manual?

Spin Master Rubik's Coach Cube Specifications

General IconGeneral
Product TypePuzzle Cube
ManufacturerSpin Master
Product NameRubik's Coach Cube
Puzzle CubeYes
MaterialPlastic
Age Range8 years and up
Number of Players1
Recommended Age8 years and up
ColorMulti
Educational ObjectiveProblem Solving

Summary

Rubik's Coach Cube Instruction Guide

Overview of the 8 Solving Steps

Rubik's Cube Fundamentals

Cube Structure and Pieces

Details the cube's faces, layers, and types of pieces (center, edge, corner).

Understanding Turn Types

Defines standard, counterclockwise, and double turns with visual aids.

Interpreting Cube Turn Diagrams

Identifying Cube Faces

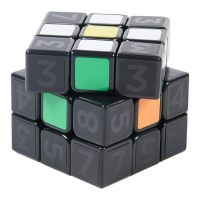
Visual guide to the standard faces of the Rubik's Cube.

Decoding Turn Notation

Explains how to read diagrams for clockwise, counterclockwise, and double turns.

Step 1: Creating The Daisy

Solving the First Petal

Guidance on matching white edge pieces with their center colors.

Step 1: The Daisy - Petal Placement Techniques

Position 3 & 4 Petal Solutions

Detailed instructions for solving petals from specific starting positions.

Position 5 Petal Solution

Instructions for solving the final petal in Position 5.

Step 1: The Daisy - Completing the Petals

Example 1: Petal Maneuvering

Demonstrates moving petals without disturbing solved ones.

Example 2: Avoiding Conflicts

Shows how to move petals while keeping solved ones in place.

Step 1: The Daisy - Finalizing and Practice

Example 3: Bottom Face Petal

Instructions for solving a petal on the bottom face.

Example 4: Final Petal Insertion

Guidance for placing the last petal correctly.

Step 2: Forming the White Cross

Action 1: Aligning Edge Pieces

Matching edge pieces with their corresponding center colors.

Action 2: Moving Petals Down

Rotating the Front Face to move petals to the Bottom Face.

Step 2: White Cross - Completion and Review

Action 3: Completing Remaining Petals

Repeating actions to solve remaining edge pieces for the White Cross.

Revealing the White Cross

Flipping the cube to view the completed White Cross.

Step 3: Solving the White Corners

Introduction to Trigger Moves

Explains algorithms (Triggers) for moving corner pieces.

Performing the Right Trigger

Detailed instructions for the Right Trigger move.

Step 3: White Corners - Left Trigger and Initial Setup

Performing the Left Trigger

Detailed instructions for the Left Trigger move.

Setup for Corner Placement

Guidance on orienting the cube for placing white corners.

Action 1: Aligning Corner Colors

Aligning corner tiles with their matching center pieces.

Step 3: White Corners - Corner Insertion Actions

Action 2: Placing Left-Side Corners

Using the Left Trigger to place corners on the left side.

Action 3: Placing Right-Side Corners

Using the Right Trigger to place corners on the right side.

Step 4: Solving the Middle Layer

Step 5: Creating the Yellow Cross

Step 6: Completing the Yellow Face

Step 7: Positioning Yellow Corners

Step 8: Solving the Yellow Edges

Congratulations and Next Steps

Quick Reference Guide: Steps 1-3

Quick Reference Guide: Steps 4-5

Quick Reference Guide: Steps 6-7

Quick Reference Guide: Step 8

Related product manuals