IM-P402-44 AB Issue 15
11
3.3.2 Install the probe as follows:
- Ensure both male and female threads are in good condition.
- Use up to three turns (no more) of PTFE thread sealing tape on the probe thread.
WARNINGS: Do not use excessive tape. Do not use paste type jointing compound.
- Fit and tighten the probe by hand initially.
- Use a suitable spanner to tighten the probe. Under no circumstances use a pipe wrench.
- Due to the nature of a taper / parallel joint it is not possible to recommend tightening torque
figures.
- Do not overtighten - there should always be visible thread on the probe.
- Note: The probe thread will not 'bottom out' (i.e. probe body hexagon contacts the face of
the female screwed connection), unless there is excessive wear or an out-of-tolerance
female thread, in which case it will be necessary to replace or re-work the flange or connection.
3.3.3 Subsequent removal and refitting:
WARNING: Ensure boiler or vessel is depressurised and vented to atmosphere before
attempting to unscrew or remove the probe.
- Always use the correct size spanner - not a pipe wrench.
- Inspect male and female threads for signs of damage, which may have occurred through
overtightening, leading to torn threads or even localised cold welding (galling / picking up).
- If damage has occurred replace the probe.
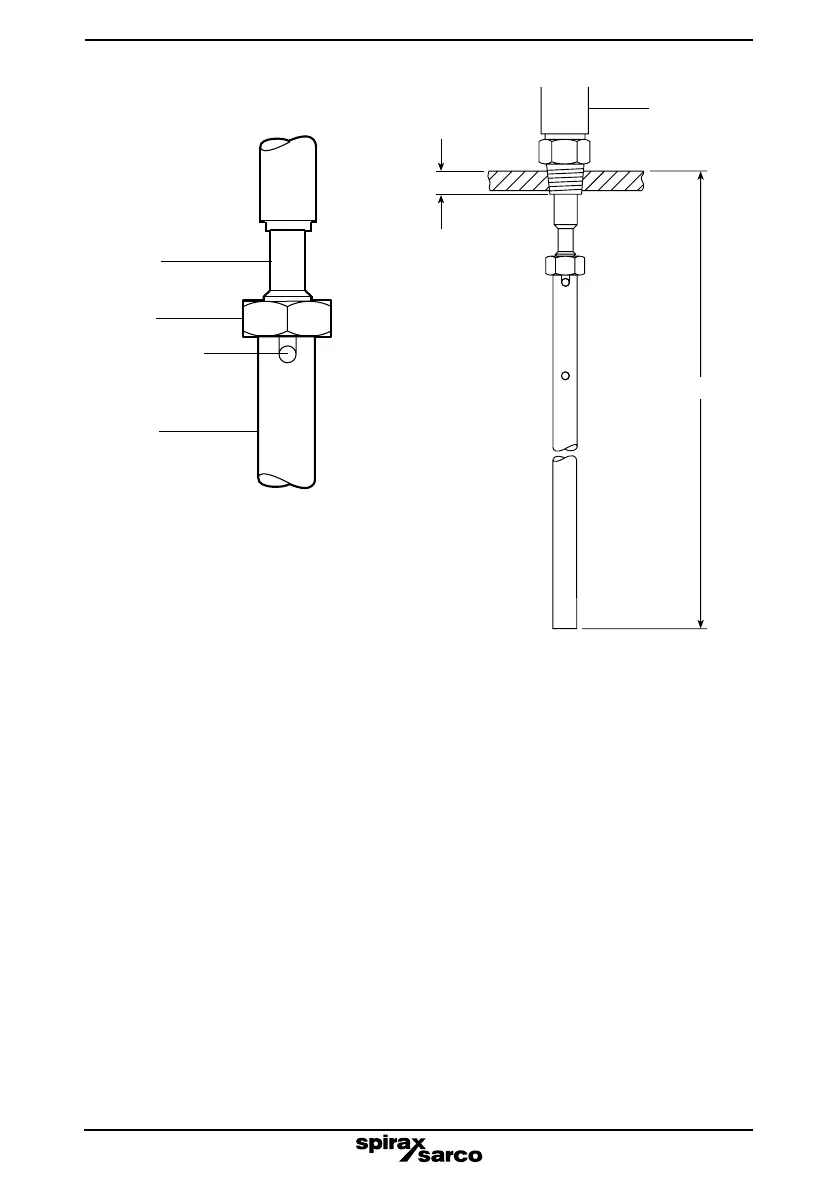
6 mm flat
Lock-nut
Retaining pin at
bottom of slot
Probe tip
Dipped length
Fig. 5
Fig. 6
Probe body
15 mm (½")
approximately