EasyManua.ls Logo

SPORTSPOWER MY FIRST SKYFLYER User Manual

SPORTSPOWER MY FIRST SKYFLYER
20 pages
To Next Page IconTo Next Page
Page #1 background imageLoading...
Page #1 background image
ASSEMBLY INSTRUCTIONS AND USER’S MANUAL
MY FIRST SKYFLYER METAL SWING SET
MODEL# MSC- 4580
FOR RESIDENTIAL USE ONLY
Save this instruction manual for future reference
For Customer Service, please call 1-866-370-2131 or visit www.sportspowerltd.net
Monday – Friday 9:00 AM – 5:00 PM Eastern Time
SPORTSPOWER LTD.
LEVEL 20, PARKVIEW CENTRE,7 LAU LI STREET, CAUSEWAY BAY, HONG KONG
Question and Answer IconNeed help?

Do you have a question about the SPORTSPOWER MY FIRST SKYFLYER and is the answer not in the manual?

SPORTSPOWER MY FIRST SKYFLYER Specifications

General IconGeneral
Product NameSPORTSPOWER MY FIRST SKYFLYER
CategorySwing Set
Maximum number of users1
Recommended Age3 years and up
Assembly RequiredYes
Age Range3 to 8 years
MaterialSteel
Safety FeaturesSecure harness, sturdy frame

Summary

Important Warnings and Instructions

Age Limit and Supervision Requirements

Specifies age/weight limits, supervision needs, and safety precautions for users.

Pre-Assembly and Setup Guidelines

Ensures adult assembly, supervision, parts check, and safe setup procedures.

Play Set Location and Ground Safety

Details safe placement, ground conditions, and fall zone safety requirements.

Important Consumer Information

Operating Instructions and Safety

Anchoring the Play Set

Corkscrew Anchoring Method

Details the corkscrew method for securing the swing set in hard soil.

Concrete Anchoring Method

Explains concrete footing installation for soft soil conditions.

Care and Maintenance Checklist

Complete Product Overview

Parts Identification

Hardware Identification

Assembly and Installation Steps

Step 1: Attach Top Legs

Connects Top Legs (D) to the Top Bar (A) using specified hardware.

Step 2: Attach Top Cross Bars

Secures Top Cross Bars (B) to the Top Bar (A) and Top Legs (D).

Step 3: Connect Lower Legs and Cross Rails

Attaches Lower Legs (E) and Cross Rails (F) to the main frame.

Step 4: Assemble Flying Saucer Frame

Connects Flying Saucer Tubes (R4, R5) to the Flying Saucer (R7).

Step 5: Attach Ropes to Flying Saucer

Connects Ropes (R1) to the Flying Saucer assembly using hardware.

Step 6: Secure Ropes to Top Bar

Loops U-Bolt (B3) and secures Ropes (R1) to the Top Bar (A).
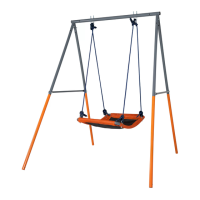
Manufacturer's Limited Warranty

Related product manuals