7
5
11 12
13
14
1516
9
10
WARNING - Treat any loaded rod with caution until you are sure it is properly installed or
uninstalled. Keep your face well away from any loaded rod.
NOTE - Follow the mat rod installation sequence. Do not install multiple mat rods in one
location. If you do not follow this sequence, it will be very difcult to attach the mat.
NOTE -
Each time you circle the trampoline, check that the center posts of the leg sections
are correctly seated under the trampoline frame. If they are not, adjust them before installing
any more rods. You may need to uninstall rods to release the tension.
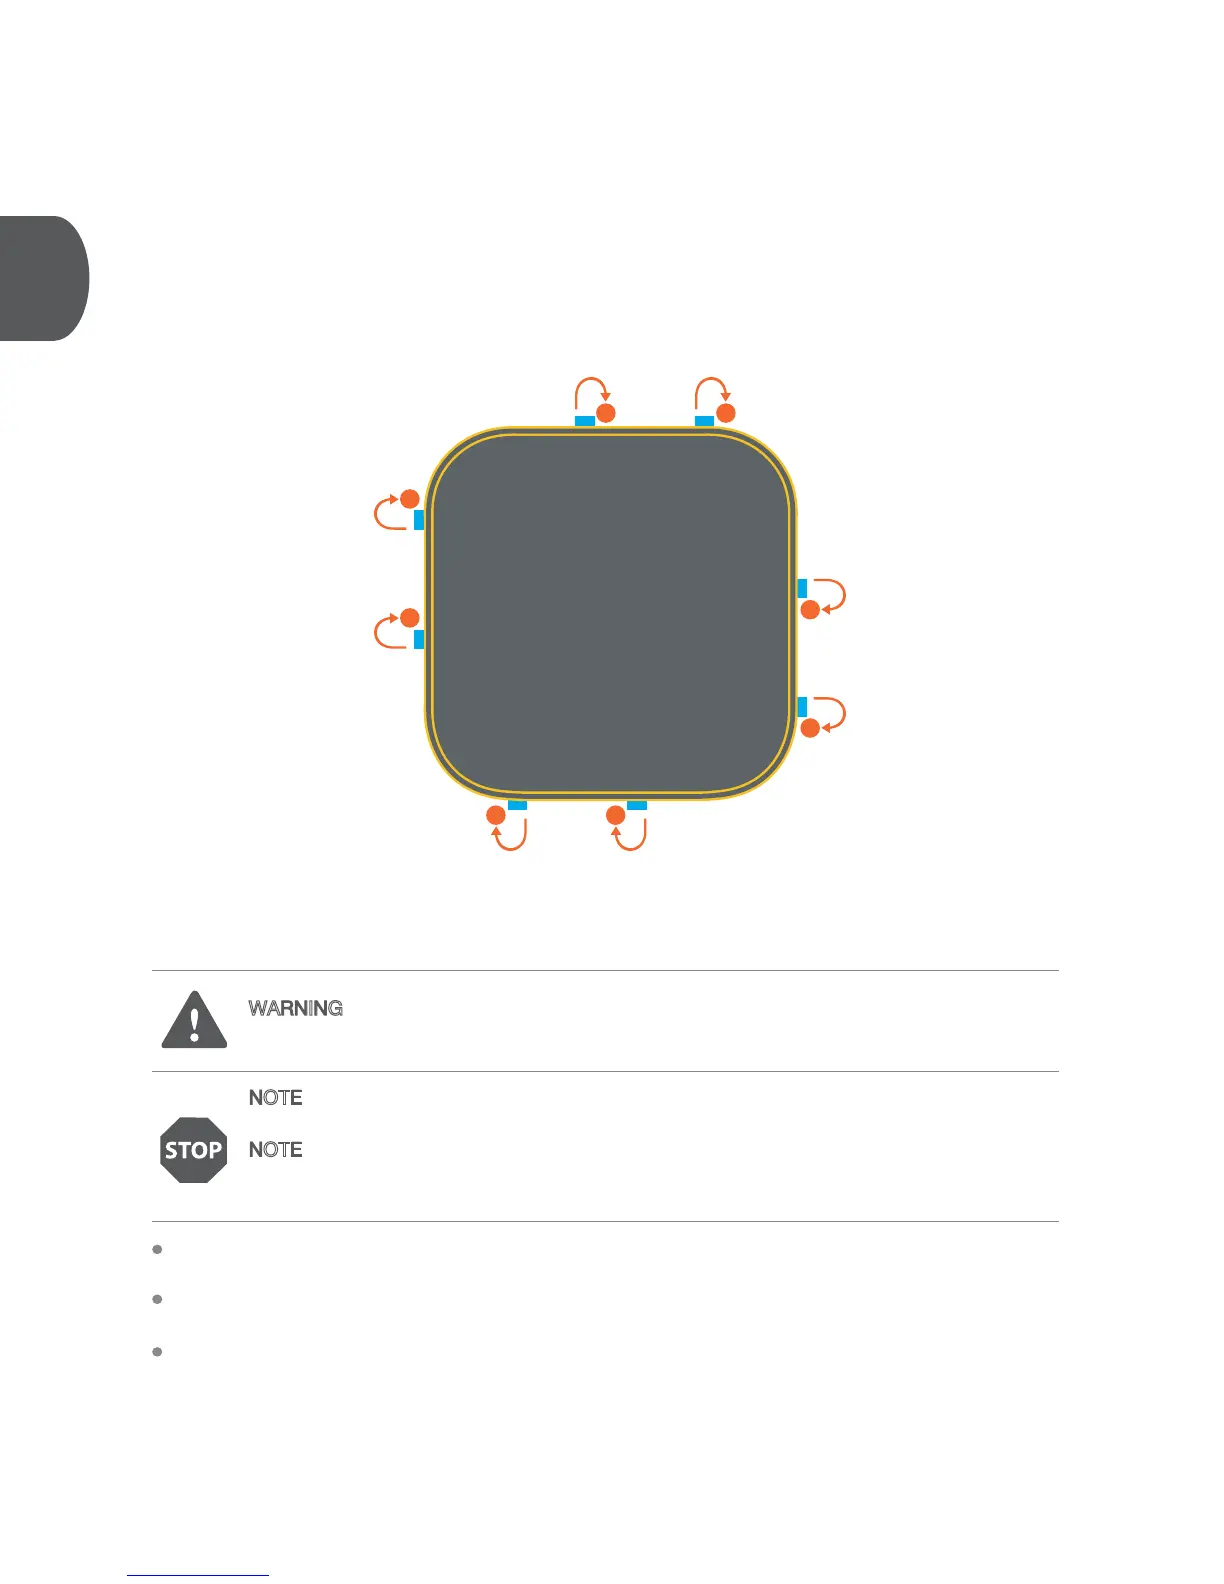
Go back to the very rst rod you attached to the mat in Step 6a. Now, moving clockwise, attach
ONE white mat rod next to the initially installed rod.
Moving clockwise around the trampoline, attach ONE additional rod next to each of the already
installed rods as shown above.
Continue circling the trampoline several more times following this sequence, installing only ONE rod
per grouping, until all the white mat rods are attached to the mat.