Do you have a question about the Springfree S113 and is the answer not in the manual?
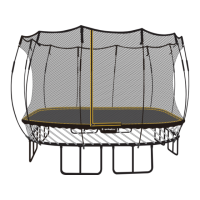
Details key specifications like mat diameter, net height, and maximum user weight for the trampoline.
Advises against dangerous activities like somersaults and solo jumping, emphasizing safe usage practices.
Recommends viewing instructional videos to aid in the assembly process via provided links or QR codes.
Outlines essential safety measures before assembly, including child safety, tool usage, and required clearance zones.
A comprehensive list of all parts included in the trampoline kit, with quantities and visual references.
Guidance on choosing a suitable assembly location and laying out all components before starting the build.
Instructions for assembling the trampoline frame by connecting curved and straight sections with bolts and nuts.
Details on attaching center posts to leg sections and preparing them for integration into the main frame.
Steps for fastening frame sections together using provided hardware, with warnings on tool usage.
Explains how to attach the trampoline legs to the assembled frame, recommending assistance for stability.
Instructions for positioning the trampoline mat inside the frame, ensuring correct orientation and tag alignment.
A crucial step to re-check and ensure all frame bolts are securely tightened before proceeding.
Details on inserting white mat rods through the net's edge holes and into the frame's rod sockets.
Guides on aligning specific net tags with corresponding frame markers to ensure correct net placement.
Outlines the initial attachment of white mat rods, matching mat tags to frame stickers following a numbered sequence.
Provides warnings and safety tips for handling the mat rods, emphasizing caution and maintaining a firm grip.
Defines the distinct roles and actions for the 'inside' and 'outside' persons during mat rod installation.
Illustrates proper body positioning and hand placement for both individuals to facilitate secure rod insertion.
Explains how to leverage body weight and movements to push the white mat rods into their respective holders.
Emphasizes checking that each mat rod is fully seated in its socket to ensure structural integrity and safety.
Guides users to continue attaching mat rods in a clockwise pattern around the trampoline, maintaining even tension.
Reminds users to periodically check and adjust the seating of center posts as they proceed with rod installation.
Details the process of carefully pulling the safety net upwards and over the top of the white mat rods.
Advises inspecting the net for any snags or catches on the frame or hardware to prevent tears.
Instructions for unfolding, aligning, and securing the individual parts of the black net rods.
Guides on inserting the black net rods into the net pockets and securing them into the frame sockets.
Warns against attempting to remove or disengage rods that are under tension due to potential injury or damage.
Recommends the use of ground anchors for enhanced stability, especially in windy conditions, and advises on purchase.
Advises users to review all safety information and prepare for severe weather by moving or disassembling the trampoline.
| Brand | Springfree |
|---|---|
| Model | S113 |
| Category | Enclosure |
| Language | English |