Waukesha Cherry-Burrell Brand W60/W80 Valves Maintenance
08/2018 95-03022 Page 45
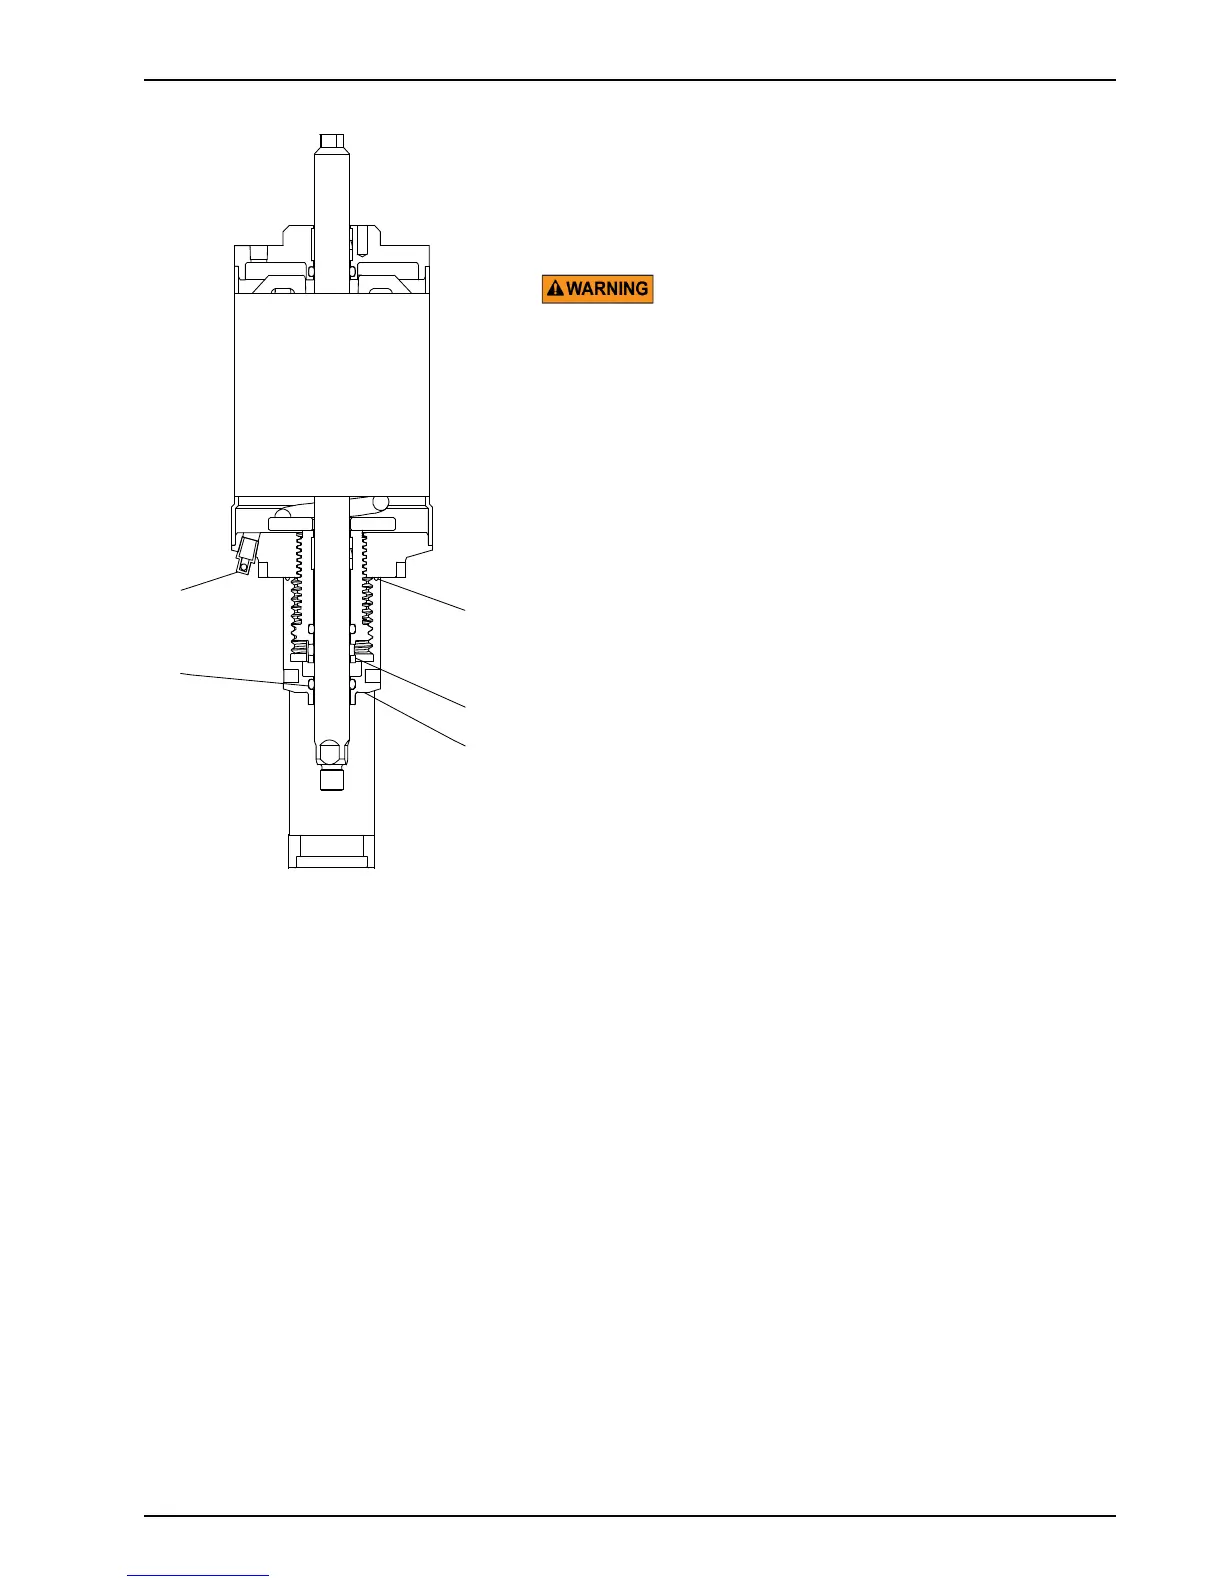
Air-to-Lower, Adjustable-Spring Actuator
1. Remove the valve from the body.
2. Shut off the air and disconnect the air supply line to the
actuator.
3. Disconnect/lockout the electrical power to the valve.
For Adjustable-Spring actuators, unload the spring adjustment
completely before attempting to service the actuator.
4. Using wrenches on the upper and lower wrench flats,
unscrew and remove the upper stem (Figure 42, item 1). Do
not remove the lower stem (item 3) as it locates an
internal support washer.
5. Remove and inspect the indicator area stem o-ring (item 6).
Remove the worn o-ring seal. Coat the new o-ring seals with
Dow Corning
®
#7 Silicone Lubricant or equivalent, and
replace them.
6. Inspect and replace the PTFE guide bearing (item 5) in the
indicator area as needed.
7. Reassemble the actuator in reverse order.
8. Once secure, screw in the adjustment screw (item 20) until it
is held by threads (not in its final position). Refer to
Adjustable-Spring Actuators: Pressure Setting (Table 3 on
page 17) for setting it to the desired loading pressure.
Figure 42: 4", 5", and 6" Air-to-Lower,
Adjustable-Spring Actuator
VA100-661
6