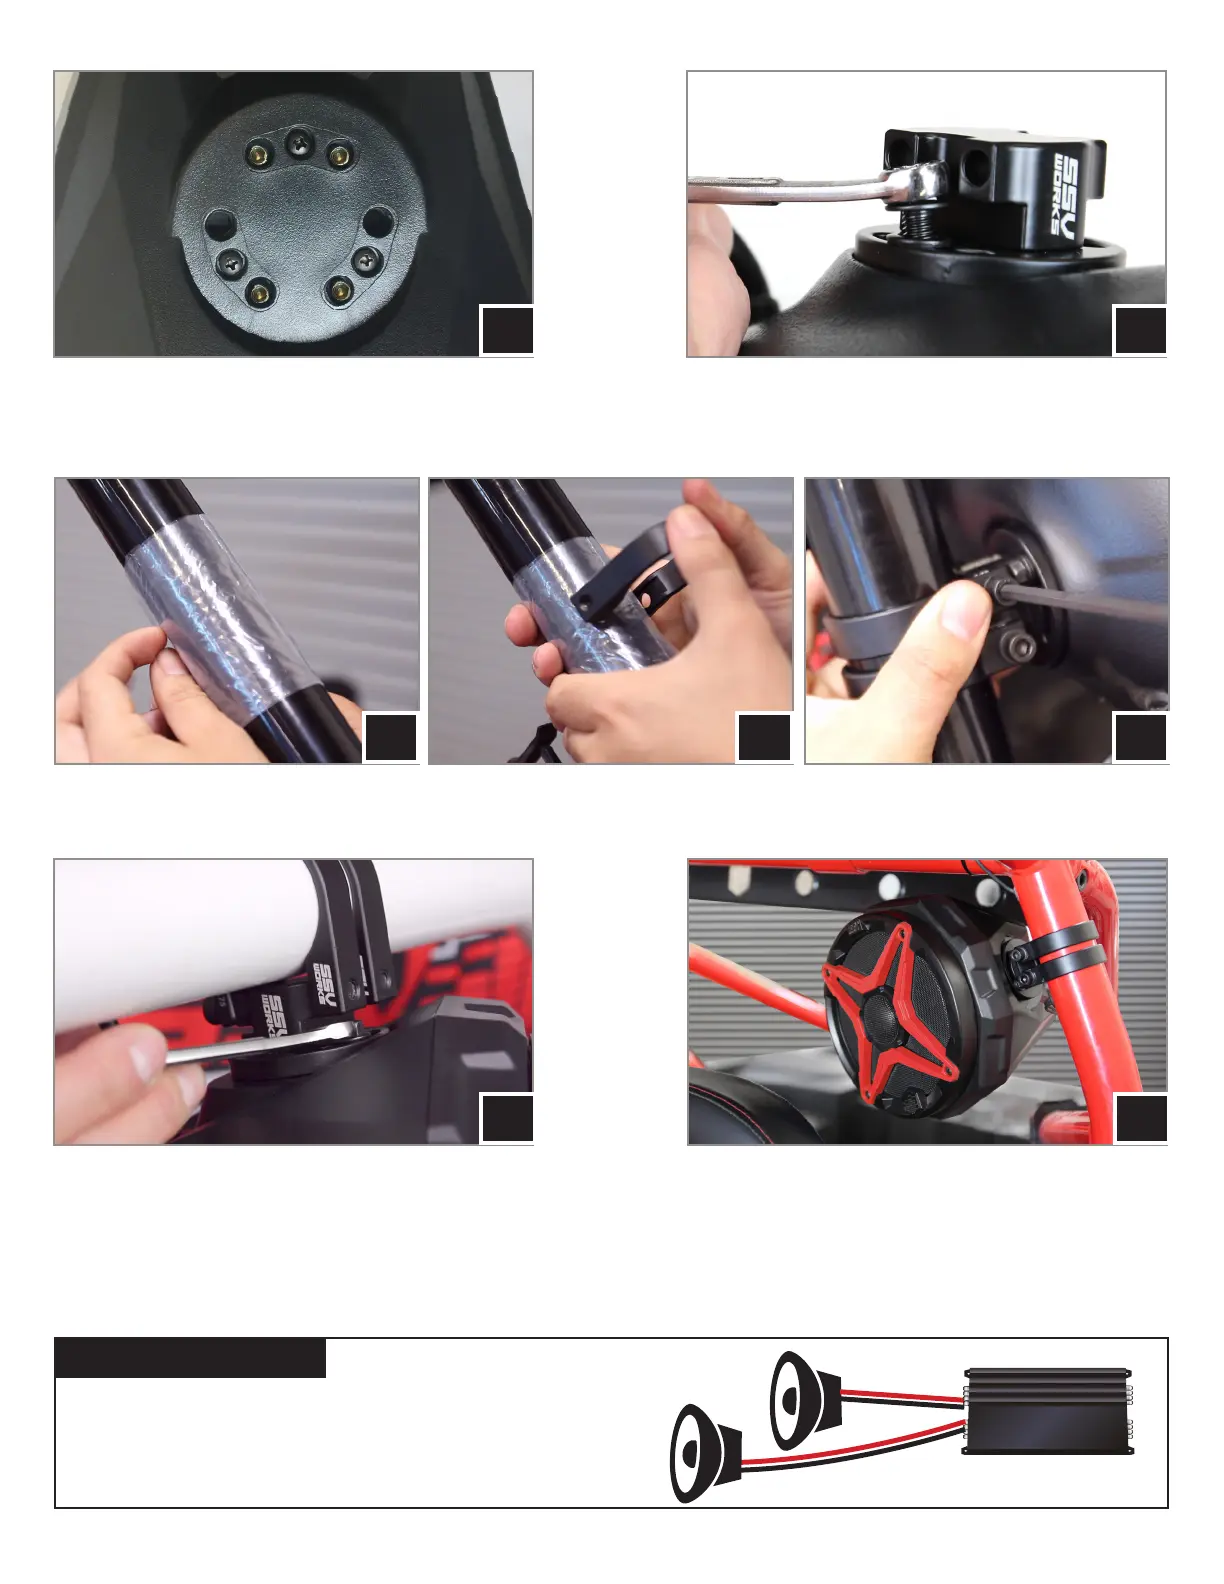
D. Position the speaker to your liking and tighen the hex head
bolts by hand with a 8mm wrench.
E. Route the speaker wire away from any moving parts and any
sharp metal, then connect to the amplier.
D E
A. Find the best orientation for the speaker on your bar and
screw in the Set Screws in the OPPOSITE holes of where the
clamp will install into.
B. Loosely install the clamp base to the cage mount pod with the
two (2) M6 hex head bolts and washers, place the cage mount
pod in the desired mounting location on the vehicle.
A B
C. Place both ring mounting clamps on the cage using the plastic bag to prevent scratching, place the cage mount pod in its nal mounting location and
secure to the clamps using the two (2) M6 allen socket head bolts and washers with a 5mm allen key.
C C C
© 2018 SSV Works, Oxnard, CA 93030 US2-C65 Rev. A 3-30-18
Connecting the US2-C65 using the pre-installed, two-pin connector will require an optional SSV Works plug-&-play harness (WP-H1149 - sold separately). If
you are not using the WP-H1149 harness, simply cut off the two-pin connector and follow the wiring instruction below.
WIRING INSTRUCTIONS
For proper sound, ensure the speaker polarity is correct connect
the “+” to the “+” and the “-“to the “-“from the speaker wire to the
amplier. If using with an SSV Works complete system refer to the
amplier wiring instructions for more detailed wiring information.
“+”
“+”
“
-
”
“
-
”
 Loading...