Introduction
The Quick Start Guide provides basic information for installation,
identification of connectors and visual indicators, and configuration f or
the ST Engineering iDirect MDM3315. ST Engineering iDirect strives to
produce documentation that is technically accurate and easy to use.
Feedback is welcomed. Send comments to documentation@idirect.net
using ref erence 59284.
Product Description
The MDM3315 Satellite Modem is supported on multiple platforms to
cover the widest range of markets and applications. The modem shares
a wide range of key features and can be easily mixed in a single satellite
network on either Velocity or Dialog platforms. The modem is extremely
flexible, as it can leverage several different return waveform technologies
across multiple platforms: ATDMA, MF-TDMA, high-rate SCPC and Mx-
DMA MRC, which seamlessly combines MF-TDMA flexibility with on-
demand variable bandwidth allocation of SCPC while guaranteeing the
highest efficiency and availability. The MDM3315 also supports wideband
operations up to 500 Msps in the forward channel, enabling service
providers to set-up any type and size of network on HTS/VTS.
The modem supports a wide range of fixed IP services, including
Internet/ intranet access, VoIP, enterprise connectivity, maritime, and
multicasting services. With data rates up to 150/70 Mbps, the MDM3315
can also be used in backhauling applications. The wideband receive
capability makes the MDM3315 a perfect fit for usage on HTS satellites.
The modem’s ease of installation through multilingual web GUIs allows
service providers to deploy their services quickly, in a cost-effective way.
Related Documents
The f ollowing documents provide information about installing and using
ST Engineering iDirect equipment and software. Each document exists
per equipment type.
• Product Sheet, available at www.idirect.net
• User Guide, available at the ST Engineering Service Desk; see Getting
Help f or contact details
• Compliance and Safety Guide, hard copy included in the shipping box
Getting Help
Main Website: www.idirect.net
Main Phone EU: +32 3 780 65 00 | Main Phone US: +1 703-648-8000
Support and Training Services: www.idirect.net/support-and-training/
Warranty, RoHS, WEEE, Declaration of Conformity
Complete ST Engineering iDirect hardware product statements for the
equipment are available in the following documents:
• Compliance and Safety Guide (hard copy included in the shipping box)
• Declaration of Conformity (hard copy included in the shipping box)
Unpacking
The equipment ships in a carton box. To unpack safely, perform the
f ollowing:
• Inspect the shipping container and contents carefully; if damage or
other signs of mishandling are detected, inform the carrier, and either
ST Engineering iDirect or the reseller.
• Caref ully open the plastic shipping bag; take care when using a sharp
object.
• Remove items from the shipping bag; verify that items listed in the
order have been received.
• Do not discard the shipping box after unpacking; the box will be
needed if it becomes necessary to ship the equipment and accessories
to another location, or to return the equipment to ST Engineering
iDirect.
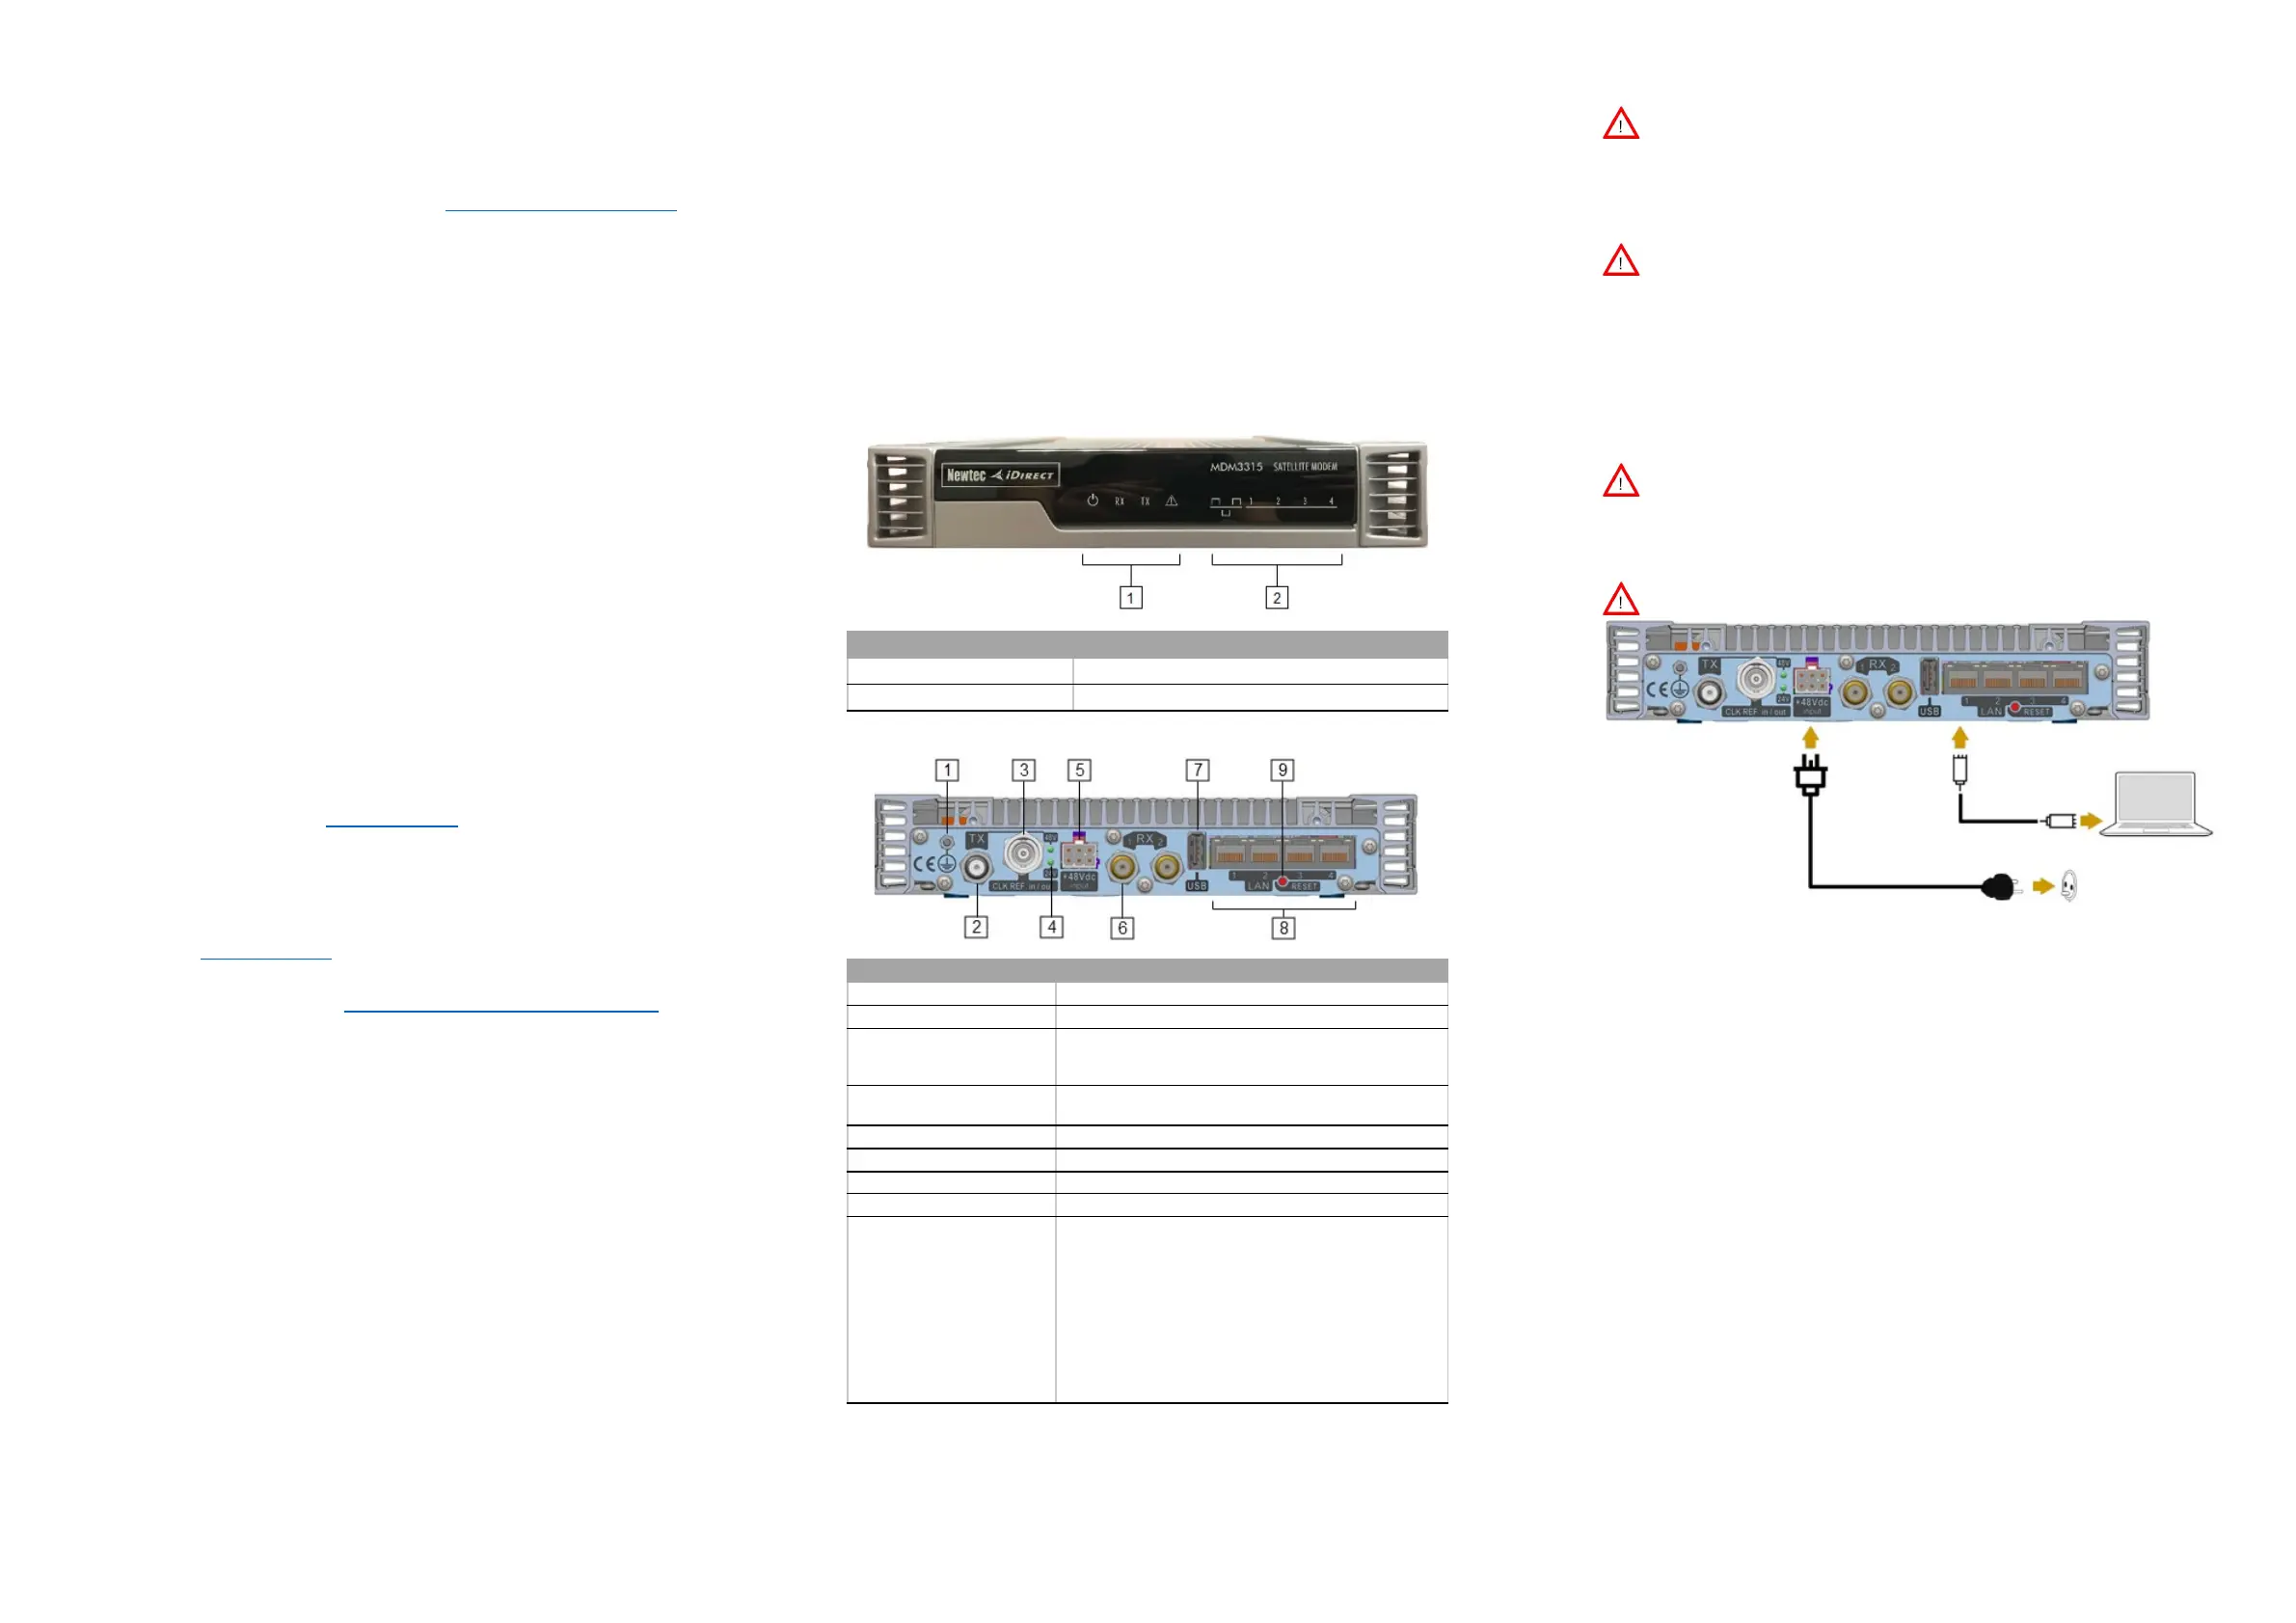
Physical Interfaces (Front)
Diagram Number and Label Description
1 - LED Status Indicators LEDs indicating the basic device status and alarms.
2 - LED LAN Indicators LEDs indicating the status of the LAN network.
Physical Interfaces (Rear)
Used for grounding the equipment.
L-band transmit connector.
3 - Clock Reference in/out
Clock reference which can be used as output for other
equipment, or as input to slave to an external clock
4 - DC Output LEDs LEDs indicating which DC output voltage is sent to the
connected BUC through the TX interface.
L-band receive connector. RX2 is for future use.
9 - Reset Button Multi-functional button:
• Press briefly to reboot the modem.
• Press and hold for more than 10 seconds or until
the LEDs start blinking to perform a factory reset.
This will reboot the modem and change all IP
settings back to the default factory settings.
Important Note: Do not use a metal or conductive
object to press the Reset Button. Use a plastic or
wooden object, such as a toothpick; make sure it is
Safety and Cautions
Warning - Please read the Compliance and Safety Guide before
you install and use the equipment.
Warning - Always unplug the power cord from the power source
bef ore installing or maintaining the equipment.
Installing the Equipment
Warning - Install and ground the equipment according to national
and local area codes and regulations. The equipment must be
permanently connected to the protective earth by a skilled person,
using the external earthing connection.
Warning - When mounting the device in a rack, make sure
enough space is available for proper air ventilation. Ensure the
device is securely sustained by L-profiles or another type of
support in addition to fixing it with the four front panel screws.
Connecting Power
Warning - The only way to shut down the device is to unplug the
power cord from the power source. Make sure that the power cord
is accessible and not obstructed when the device is operational.
Connecting to the Modem
Warning - Use an STP cable.
1. Plug the network cable into the modem's and your computer's Ethernet
ports.
2. Connect the power adapter provided in the box to the modem and a
wall outlet.
3. Set your computer IP address to 192.168.1.2.
4. Type the modem's default IP address in the address bar of the browser
on your computer: 192.168.1.1.
• Dialog - The Dialog Web User Interface will appear.
• Velocity - Log into the Velocity Terminal Web User Interface:
• User Name: admin
• Password: P@55w0rd!
Refer to the applicable Terminal User Guide (e.g., Velocity Terminal Web
User Guide, Dialog Modem User Guide) to complete the modem setup.

 Loading...