9
2. Remove drain plug from filter.
3. Drain filter tank completely and replace drain cap (Figure 13, Page 10).
4
. Cover with plastic or tarpaulin to protect from weather, but do not seal from
air circulation.
5. Protect from freezing.
Startup for Winterized Equipment:
1. Remove any temporary weather protection placed around system for shut-
down.
2. See “Startup”, Page 7, for reactivation of the filter.
3. Inspect all electrical wiring to pump for damage or deterioration over the
shutdown period. Have a qualified serviceman repair/replace wiring as
needed. Inspect and tighten all watertight connections.
4. Open all valves in suction and return piping.
5. Remove any winterizing plugs in system.
6. Drain all winterizing chemicals (if used) from system; flush system.
7. Close all drain valves and replace all drain plugs in system (see Page 10).
8. Fill pool with water to proper level (see pool manufacturer’s instructions).
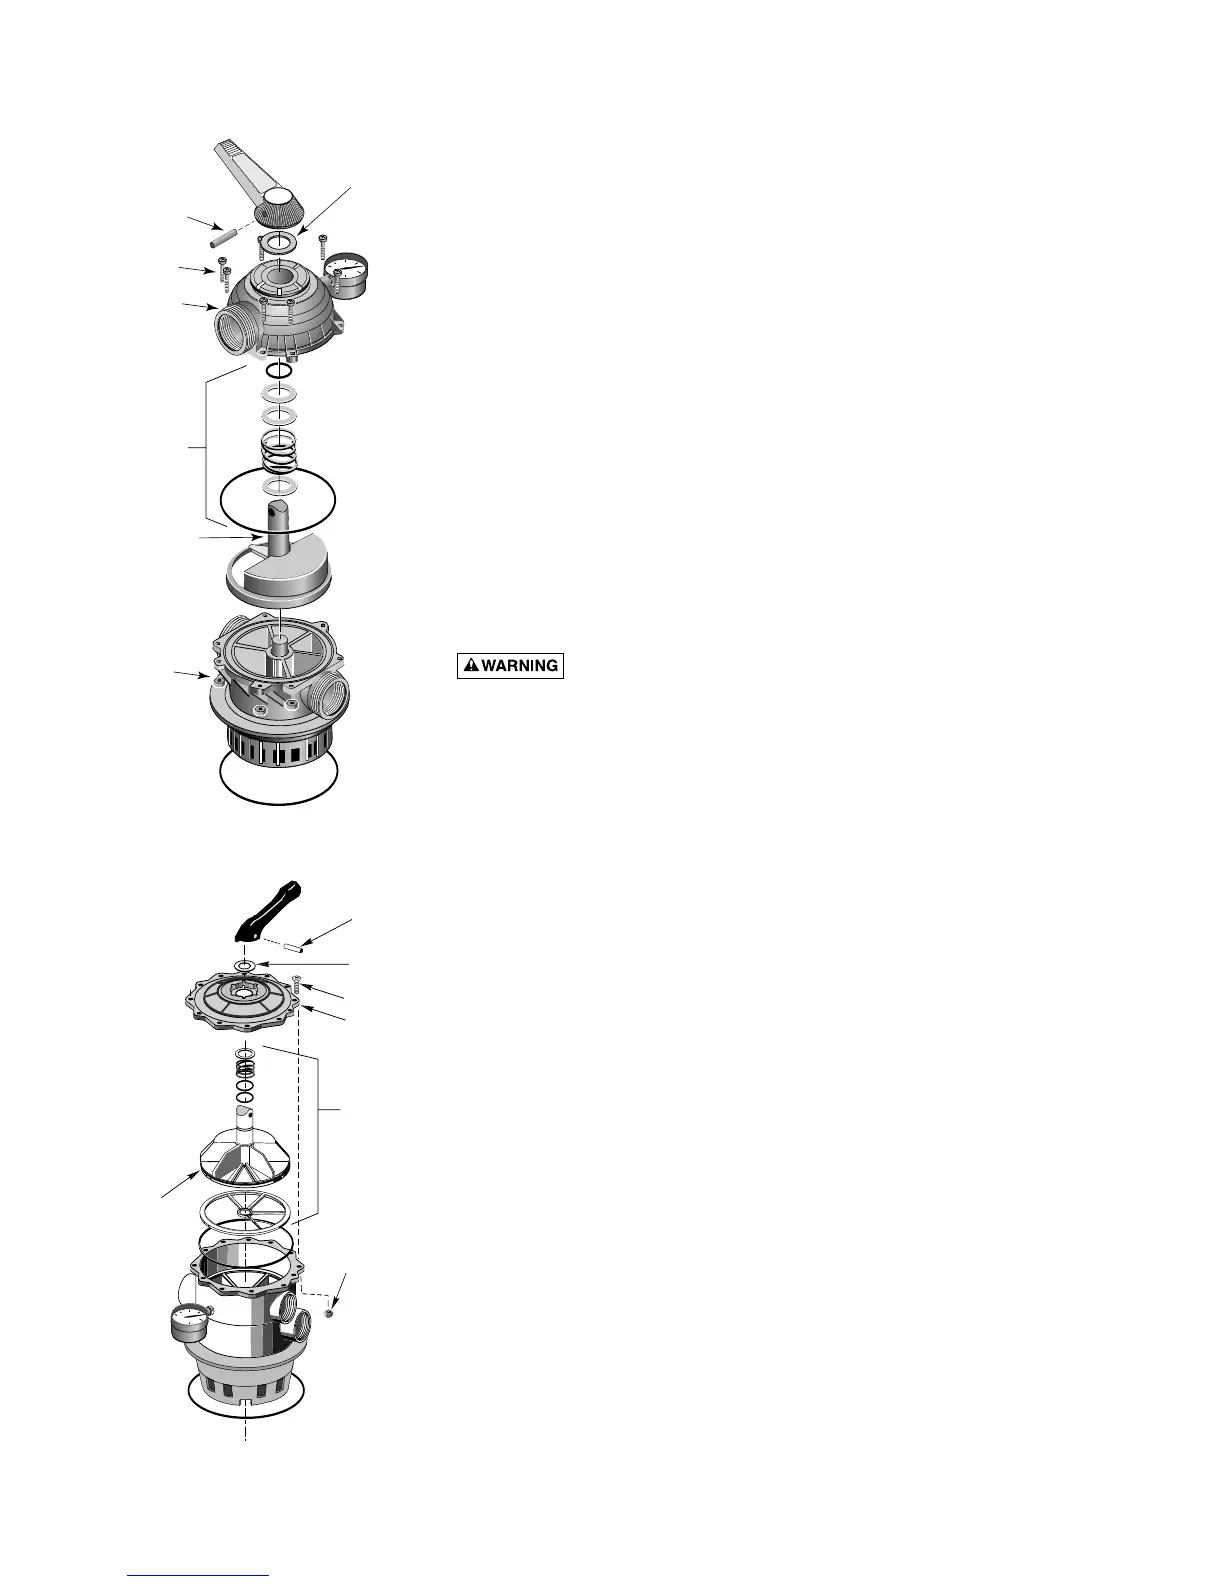
MULTI-PORT VALVE SERVICE
Hazardous pressure. Stop pump and release all pressure from sys-
tem before working on filter, valve, or clamp. Filter and valve design allows air
to bleed off automatically in normal service. However, always be sure pressure is
off system before working on filter, valve or clamp.
NOTICE: if Multi-Port valve is below pool water level, close suction and dis-
charge valves before disassembly to prevent draining pool.
Handle Replacement:
1. Stop pump.
2. Place handle in ‘FILTER’ position.
3. Remove pin (Key 1, Figures 12A and 12B) to disconnect handle. If it cannot
be removed by hand, use a hammer and center punch and lightly tap it out.
4. Remove handle; replace with a new one. Be sure new handle is in ‘FILTER’
position.
5. Replace pin.
Lid and Plug replacement:
1. Remove Handle (see ‘Handle Replacement’ above).
2. Remove plug:
A. Remove all screws and nuts (Key Nos. 2 and 6, Figures 12A and 12B).
B. Remove lid (Key No. 3) by pulling straight up while holding plug shaft
(Key No. 5) down with thumb.
3. Inspect Internal Parts:
Inspect plug and gasket spring, O-Rings, and internal washers (Key No. 4).
Replace if necessary.
R
E
C
I
R
C
U
L
A
T
E
B
A
C
K
W
A
S
H
C
L
O
S
E
D
W
I
N
T
E
R
I
Z
E
W
A
S
T
E
F
I
L
T
E
R
R
I
N
S
E
1
1
A
2
3
4
5
6
Aquatools
.
WATERFORD, WI.
5
3185
USA
7
44 0294
Fig. 12A: Valve Disassembly
(1-1/2” Multiport Valve)
Fig. 12B: Valve Disassembly
(2” Multiport Valve)
1344 1094
1
1A
2
3
5
6
4
 Loading...