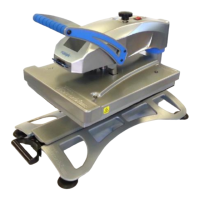
Fusion (Model XF)
Temperature Probe Replacement
2015-12-22
Technical Assistance: 1-(800)-727-8520
Manuals: hotronix.com/heat-press-manuals Page 1 of 11
1. Temperature Probe (P/N: 1-1272-1)
`
Required Tools:
2. Allen Wrenches (3/32”, 9/64”)
3. Needle-Nose Pliers
4. Scissors
5. #2 Phillips Screwdriver
6. 2mm Precision Flathead Screwdriver
7. Electrical Tape
CAUTION: Detach power cord before
proceeding
Lower heater but do not lock into place, such
that it rests gently on lower platen
1. Required Tools: Paper Clip
2. CAUTION: Turn off power and detach power cord
3. Insert the Paper Clip into the small hole on either
side of the housing
4. Press in the Paper Clip until two clicks are heard:
the first click releases the Controller bezel and the
second click ejects it from the housing as shown
5. Repeat the process on the other side of housing
6. Remove the old Controller and insert the new
replacement Controller
7. Press on the two latch points with your thumb until
a click is heard; if the Controller bezel does not sit
flush with the housing plastic, it has not latched
8. Plug in and turn on heat press to verify function
Controller Replacement Guide
Fusion IQ ( XF/XRF/XRF2)
Page 1 of 1
2018-04-26
1-800-727-8520
www.hotronix.com
Fusion [Model XF-IQ]
Adjustment Spindle
Fusion (Model XF)
Controller V4.5 & TRIAC Replacement
2015-03-08
Technical Assistance: 1-(800)-727-8520
Manuals: hotronix.com/heat-press-manuals
Included Parts:
1. Controller
2. Controller Overlay
3. Temperature strips
4. Zip ties
5. TRIAC
6. Adapter Harness (older models only)
7. 9-Pin Connector (where applicable)
Required Tools:
8. Allen Wrenches (3/32” & 9/64”)
9. #2 Phillips Screwdriver
10. #1 Phillips Screwdriver
11. 2mm Precision Flathead Screwdriver
12. Scissors
13. Wire Cutters (9-pin repair only)
14. Wire Strippers (9-pin repair only)
15. Permanent Marker (9-pin repair only)
CAUTION: Detach power cord before
proceeding
Page 1 of 9
Fusion (Model XF)
Adjustment Spindle Replacement
2015-10-26
Technical Assistance: 1-(800)-727-8520
Manuals: hotronix.com/heat-press-manuals Page 1 of 9
Included Parts:
1. Hub Caps
2. Spherical Washer
3. Washer
4. E-Clip
5. Adjustment Spindle
Required Tools:
6. Allen Wrenches (3/32” & 9/64”)
7. Flathead Screwdriver
8. Protective Eyewear (recommended)
CAUTION: Detach power cord before
proceeding
Lower heater but do not lock into place, such
that it rests gently on lower platen
1/8”