ASSEMBLY INSTRUCTIONS
8
4.3.
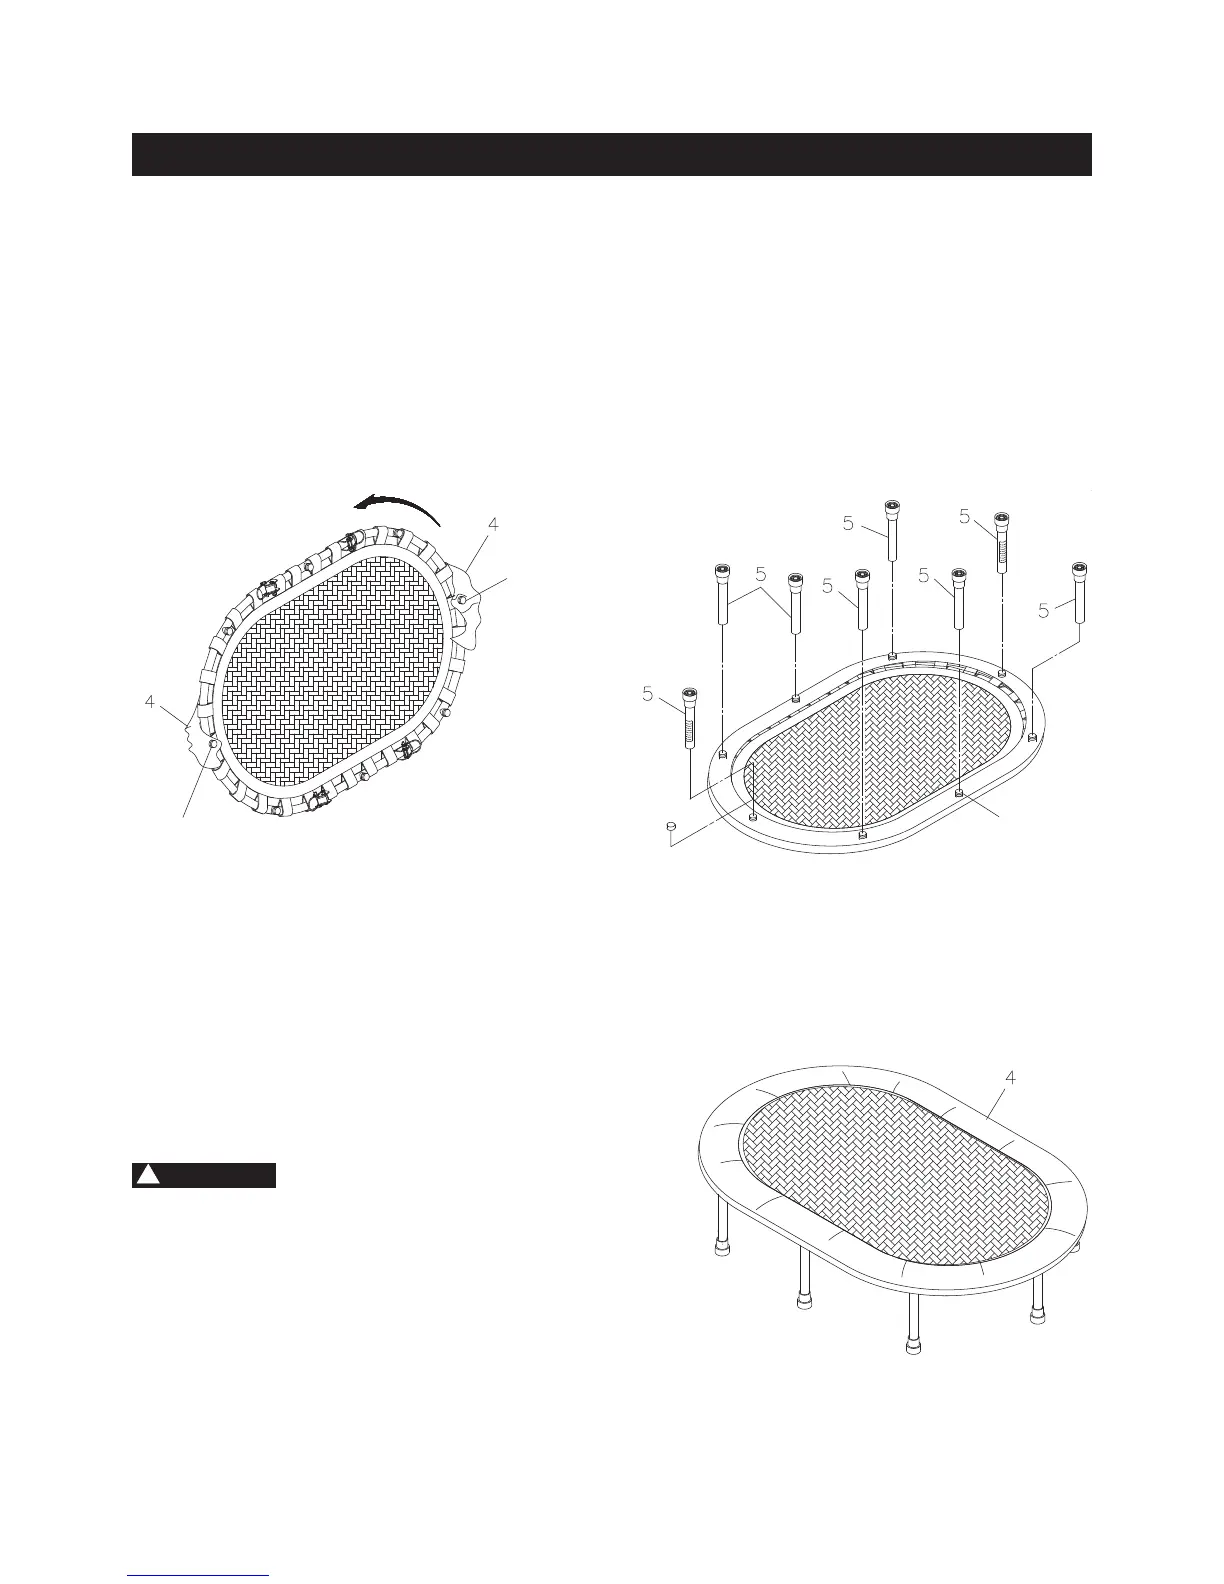
STEP 3
Slide the SAFETY PAD(4) over the rail frame. Make sure the holes in SAFETY PAD(4) t over the threaded
connectors properly. Refer to illustration 3.
HINT
: Install one hole over a threaded connector. The next hole installed should be on the connector on
the opposite side of the trampoline.
STEP 4
Remove the Plastic Caps from the threaded connectors. Refer to the position of the legs as shown in
illustration 4. First, screw the two LEGS(5) with Warning Labels into the threaded connectors on the rail
frame. Next, attach the remaining six LEGS(5).
A.
First step,
install the Safety
Pad(4) on this end
being sure the
hole ts over the
threaded connector.
B. Second step, install the
Safety Pad(4) on the opposite
end being sure the hole ts over
the threaded connector.
Threaded
Connector
Remove all of the
eight Plastic Caps from the
threaded connectors before
installing the LEGS(5).
Warning
Label
Warning
Label
5.
The SAFETY PAD(4) must be securely
attached to the frame before using the
trampoline. It must be properly positioned
as shown in illustration 5.
STEP 5
Place the trampoline in the normal use position. Make
sure that the SAFETY PAD(4) covers the Elastic Bands
on the Stamina® Oval Fitness Trampoline. Stand on
the trampoline to make all eight legs sit at on the oor.
STEP 6
Post the USE INSTRUCTIONS SIGN(16) in a highly visible
and safe location. The USE INSTRUCTIONS SIGN(16)
shall be placed such that it will be readily visible to the
intended viewer.
!
WARNING