Do you have a question about the Standard Horizon CP190i and is the answer not in the manual?
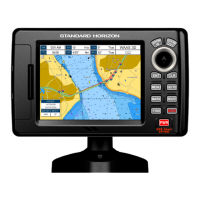
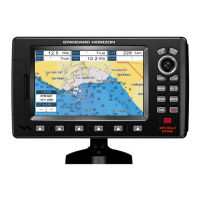
Overview of the CP190i and CPF190i GPS Chart Plotters and their features.
Details the contents included in the navigation device package for checking upon receipt.
Lists compatible radar antenna models supplied by SI-TEX for enhanced functionality.
Lists various optional accessories available for the GPS Chart Plotter, such as antennas.
Instructions for mounting the GPS Chart Plotter using bracket or flush mounting methods.
Guidance on securely attaching the mounting bracket to a suitable surface.
Instructions for installing the GPS Chart Plotter with a flush mount template.
Details on installing an external GPS antenna for improved satellite signal reception.
Explains how to connect power, NMEA, and other devices to the plotter.
Defines the function of each control and connection port on the device's front panel.
Guides users through initial operations and customization for using the GPS Chart Plotter.
How to power the device on/off and operate the ShuttlePoint knob for navigation.
Explains the differences and usage of Cursor Mode and Home Mode for chart interaction.
How to adjust the speed at which the cursor moves on the chart and within menus.
Steps to customize the visual representation of the vessel's icon on the chart display.
Adjusting the screen's backlight intensity and contrast for optimal viewing.
Setting the chart orientation to North Up or Course Up for navigation display.
How to set the device's time based on GPS satellite data and time zone offsets.
Customizing the display of coordinates, such as Latitude/Longitude, Loran TDs, or UTM.
Options to change the chart display colors for different lighting conditions.
Changing the display language of menus, data, and chart information.
Overview of various general setup options to customize the device's behavior.
Accessing information about the device's software, cartography, and storage capacity.
Utilizing the dedicated [FIND] key to search for various points of interest and services.
Locating nearby port services such as fuel, repairs, and customs using the chart.
Finding the 10 nearest ports to the vessel's current position and viewing their details.
Locating the 10 nearest tide stations and viewing tide height information.
Identifying the 10 nearest wrecks represented by icons on the chart display.
Locating the 10 nearest obstructions like snags or cribs shown on the chart.
Finding information on the closest lakes and viewing details like fishing spots.
Searching for specific lakes by name and displaying their location on the chart.
Locating points of interest by category and type, such as attractions or services.
Searching for user-created marks and waypoints by their stored names for quick access.
Entering specific coordinates (Latitude/Longitude) to view their position on the chart.
Obtaining detailed information about any position or object displayed on the chart page.
Details about the pre-loaded coastal navigation charts and their features.
Information on the geographical areas covered by the built-in charts and their detail level.
Procedure for purchasing and installing chart updates to keep cartography current.
Instructions for inserting the MAX C-CARD for expanded cartography features.
Accessing and configuring advanced map display features available with MAX C-MAP data.
Setting the chart zoom behavior to Standard or Flexi-Zoom for dynamic scaling.
Adjusting the size of icons displayed on the charts to Standard or Large.
Changing the font size for place names on the charts to Standard, Medium, or Large.
Enabling a 3D "bird's eye" view of the chart for a more realistic perspective.
Controlling the blinking behavior and color display of navigation aids on the chart.
Displaying a status bar indicating the status of certain functions and potential risks.
Overlaying satellite imagery onto the background chart for enhanced visual context.
Displaying tidal stream arrows indicating current direction and strength.
Selecting the display language for chart information, including non-Latin characters.
Showing pictures or diagrams associated with cartographic objects for identification.
Accessing additional port service details, location, and facilities from MAX C-CARDs.
Guide to placing marks on the chart at a specific location or cursor position.
Procedures for modifying the position, name, or icon of an existing mark.
How to remove a stored mark or waypoint from the device's memory.
Instructions for repositioning existing marks or waypoints on the chart.
Viewing, sorting, and managing all stored marks and waypoints in a list format.
Creating new marks by entering information directly into the User Points list.
Navigating to a cursor position, a saved route, or a specific mark.
Quickly storing the vessel's position in case of a man overboard situation.
Removing a MOB point from the chart and system after it is no longer needed.
Step-by-step guide to planning a route by linking multiple waypoints sequentially.
Assigning custom names to saved routes for easier identification and management.
Special route creation linking start and end points directly.
Creating multiple routes and selecting route numbers.
Planning routes by selecting existing marks directly from the chart display.
Adding a new waypoint into an existing route by placing it on the navigation line.
Initiating navigation to a selected route, guiding the vessel along its path.
Steps to select and activate a specific route for navigation.
Removing saved routes from the device to manage storage and clear data.
Accessing route management options like color and edit.
Analyzing routes for potential navigation hazards and safety issues.
Functionality for recording the vessel's path and location over time.
How to initiate, save, and manage new track recordings on the device.
Removing recorded tracks from the device's memory.
Using and resetting the trip log for distance and time tracking.
Interface for managing files and data stored on the optional User C-CARD.
Preparing the User C-CARD for use by formatting it to erase existing data.
Copying data such as marks, routes, and tracks to the User C-CARD for backup.
Restoring data from the User C-CARD back to the GPS Chart Plotter.
Removing specific files from the User C-CARD to free up storage space.
Updating the system's recognition of the User C-CARD when a new one is inserted.
The primary display for navigation, showing charts, vessel position, and objects.
Switching active window focus between the two chart displays in Dual Chart mode.
Understanding the layout and data fields displayed on the single chart page.
Customizing the layout and number of data windows displayed on various pages.
Selecting specific data fields to be shown in the available data windows.
Using icons on the chart page to access information about buoys, lights, and aids.
Controlling whether information pop-ups are displayed when interacting with icons.
Selecting pre-defined display modes (Full, Medium, Low, Radar) to optimize chart presentation.
Configuring the display of marine features like place names, nav-aids, and tides.
Adjusting depth range limits to control the display of depth soundings and data.
Managing the display of terrestrial features such as land elevations and roads.
Controlling various chart display elements like Latitude/Longitude grids and boundaries.
Configuring the display of underwater objects like rocks and wrecks based on depth.
Using a custom mode to individually configure chart display elements.
Displaying critical navigation information such as heading, speed, and bearing.
Visualizing vessel movement towards a destination in a 3D perspective view.
Accessing tide information, including height and draught, for navigation.
Monitoring GPS satellite reception quality, position accuracy, and status.
Enabling or disabling WAAS/EGNOS for improved GPS accuracy.
Accessing GPS setup options like internal GPS and navigation speed.
Displaying data received from external NMEA 0183 devices in customizable windows.
Viewing raw NMEA data transmitted by external devices or output by the plotter.
Monitoring trends for depth, temperature, speed, and wind data via NMEA.
Using DSC functionality for distress calls and position requests with VHF radios.
Configuring input and output ports for NMEA devices, AIS receivers, and RADAR systems.
Setting up the plotter's input ports to receive data from various marine electronics.
Configuring the plotter's output ports to transmit NMEA sentences to other devices.
Customizing navigation settings like coordinate systems, chart datum, and static navigation.
Setting up Loran TD coordinate system parameters for direct TD entry.
Configuring compass settings, including bearings and variation.
Setting up audible and visual alarms for arrival, XTE, depth, anchor, and grounding.
Using the built-in simulator to practice navigation and explore device functions.
Simulating navigation along a saved route to test data displays and pages.
Enabling or disabling features related to DSC (Digital Selective Calling) functions.
Defines key AIS terms such as Target, CPA, TCPA, MMSI, and types of targets.
Accessing and configuring AIS display, activation range, and alarm settings.
Connecting and configuring the AIS receiver for data reception.
Displaying detailed information about an AIS target by placing the cursor over its icon.
Showing the AIS List page with target ships and the ability to locate them on the chart.
Explains how the color of AIS target icons indicates the type of ship.
Accessing the C-Weather service menu for downloading and displaying weather forecasts.
Connecting to the weather server to download forecast data directly via C-COM.
Loading C-Weather data packages previously saved onto a User C-CARD.
Selecting specific weather data layers and adjusting date/time for forecast previews.
Viewing real-time weather data or disabling the display for current date and time.
Selecting the specific types of weather data to be displayed from the available options.
Connecting the MOBILARM system to the GPS Chart Plotter for crew monitoring.
Configuring the GPS Chart Plotter to communicate with the MOBILARM system.
Checking the operational status of the MOBILARM system via the "About" page.
Information about the MOBILARM PTX personal transponder and its alerts.
How the system handles MOB alerts, displaying PTX icons and issuing alarms.
Interacting with the PTX icon on the chart to show information or initiate actions.
Permanently removing a PTX from the MOBILARM status list and chart.
Navigating directly to the location of a received PTX MOB alert.
Reviewing a list of all PTX alerts received by the GPS Chart Plotter.
Enabling or disabling the internal Fish Finder functionality through the settings menu.
Explains the elements and readings displayed on the Fish Finder screen.
Detailed explanation of the Fish Finder display components like fish, thermoclines, and bottom echo.
How to select and customize different views of the Fish Finder display.
Automatically adjusting transmit frequency for depth display based on water conditions.
Selecting full screen or split screen views for 200kHz, 50kHz, or combined frequencies.
Zooming into specific areas of the Fish Finder display for detailed target analysis.
Displaying chart and fish finder information simultaneously on a split screen.
Accessing the Fish Finder setup menu to configure various operational parameters.
Selecting pre-configured settings optimized for fishing or cruising activities.
Choosing the operating frequency for the Fish Finder (Auto, 50 kHz, 200 kHz).
Selecting between Auto and Manual modes for adjusting receiver gain.
Configuring the depth range display using Manual, Auto, or Bottom Lock modes.
Activating a filter to reduce noise from nearby fish finders or depth sounders.
Adjusting receiver sensitivity settings for optimal target detection.
Controlling the receiver's sensitivity level to fine-tune signal clarity.
Adjusting echo attenuation based on depth to improve bottom finding.
Dynamically removing surface clutter to improve target visibility.
Customizing the appearance of the Fish Finder display, including color.
Changing the background color of the Fish Finder display for better visibility.
Adjusting how quickly the Fish Finder display updates and scrolls.
Controlling the display of the bottom hardness and distinguishing fish.
Customizing how fish targets are graphically represented on the display.
Enabling a real-time display of echo strength for immediate target analysis.
Calibrating transducer settings for water speed, temperature, and keel offset.
Configuring alarms for shallow water, deep water, fish detection, and temperature.
Saving current Fish Finder settings to a User C-CARD for backup.
Loading saved Fish Finder settings from a User C-CARD.
Resetting current settings to factory default values.
Performing an auto-test to diagnose potential problems with the GPS Chart Plotter.
Verifying memory integrity and performing a RAM clear to reset the device.
Adjusting screen brightness and keypad backlight settings.
Testing the C-CARD and its connector for proper function and data integrity.
Testing serial port communication parameters and displaying incoming data.
Detailed technical specifications for the CP190i and CPF190i models.
Technical specifications specific to the CPF190i's fish finder capabilities.
Physical dimensions and mounting details of the CP190i and CPF190i units.
Technical specifications for the optional FF525 Fish Finder when used with the CP190i.
Technical specifications for the optional WAAS GPS receiver.
| Brand | Standard Horizon |
|---|---|
| Model | CP190i |
| Category | Fish Finder |
| Language | English |