Assembly
1. Remove the pump and motor from packaging.
2. Inspect all contents for damage.
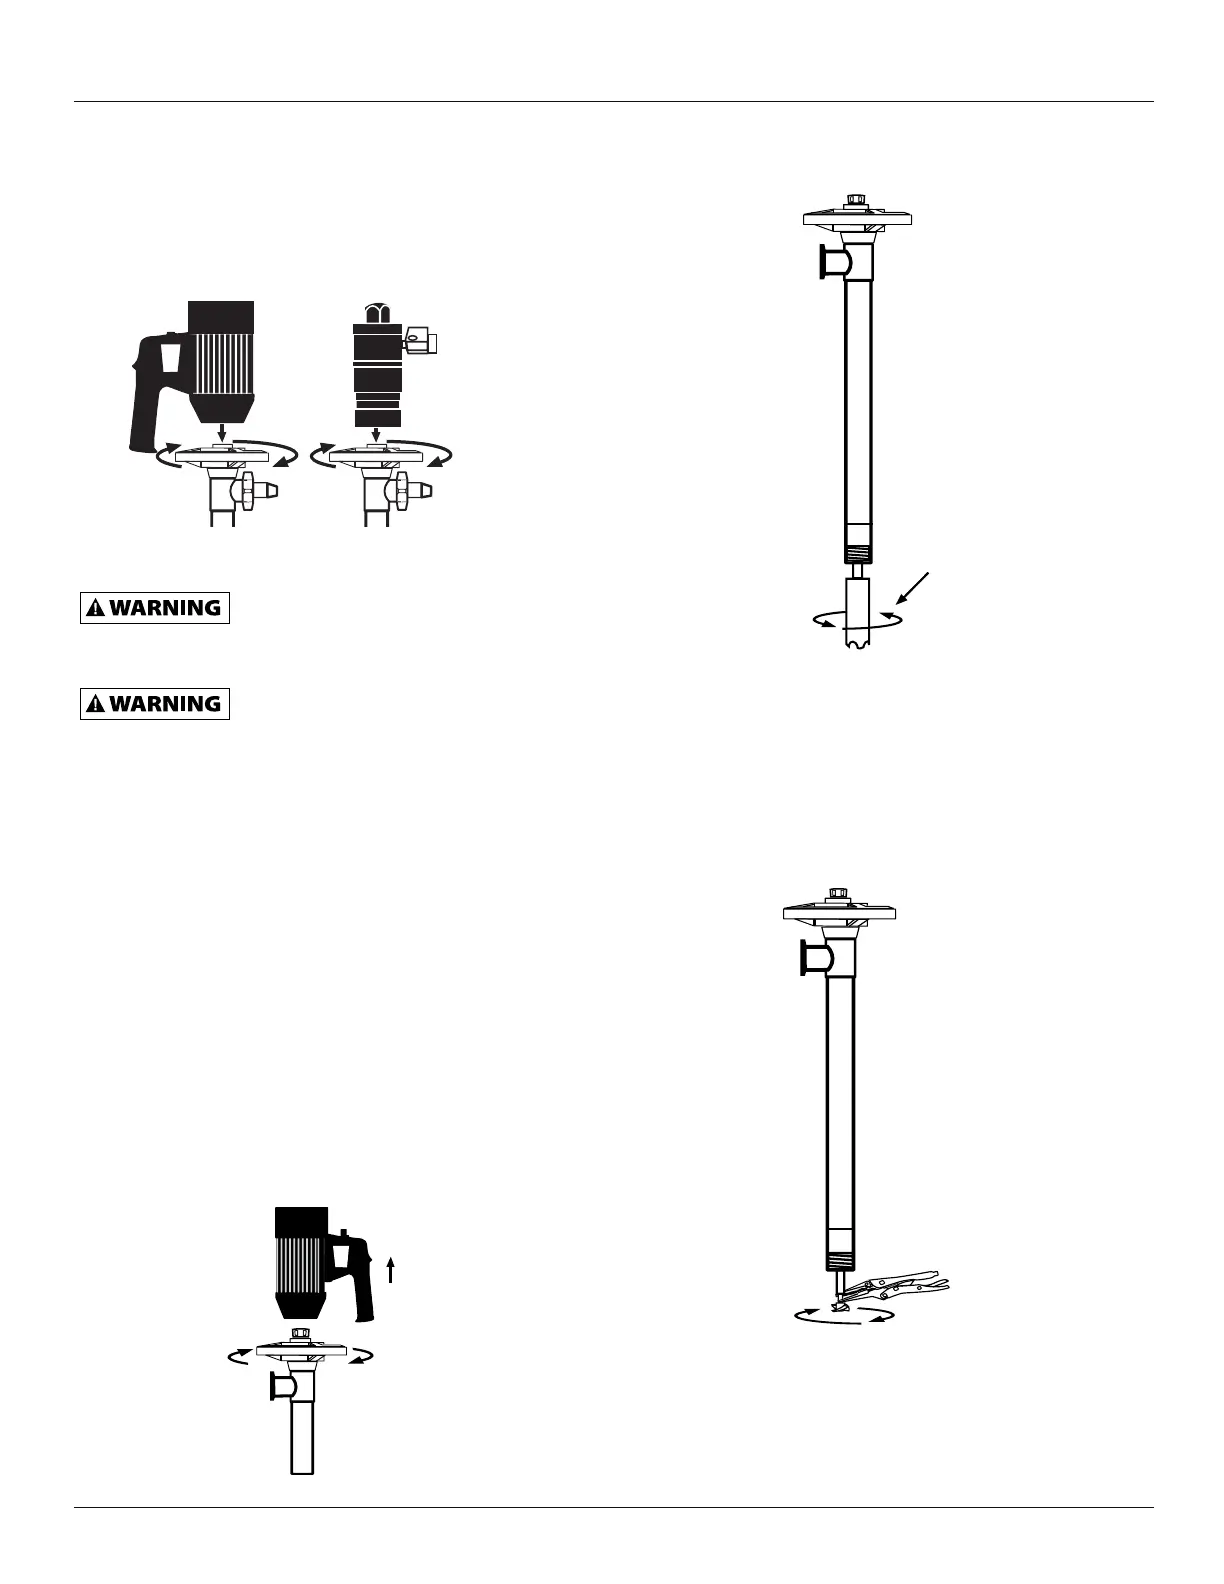
3. Couple the motor to the pump tube by using the Hand
Wheel. (See figure 1).
When using an SP-A1 or SP-A2 Series motor,
Standard Pump recommends the use of a
Filter Lubricator Regulator (FLR) in order to ensure a moisture
free supply of air to the motor.
SP-A1 and SP-A2 Series motors must be
lubricated daily to ensure proper functionality.
Operation
1. Once the pump is fully assembled and all connections are
securely fastened, insert the pump into the drum or tank.
2. Turn the motor switch to the “ON” position or open air inlet
valve.
3. If your package contains a flow meter (Package numbers
9500-9503 or 9510-9513) please reference the factory
operating instructions which are located in your carton.
4. After use, clean the pump and store vertically.
Maintenance
DISASSEMBLY / CLEANING PROCEDURES
1. In order to clean a majority of the residue from the pump
tube, immerse the pump into a 55 Gallon Drum of water.
Allow the pump to circulate the water for 3 minutes.
2. For a more thorough cleaning remove the motor from the
pump tube by loosening the hand wheel (see Figure 2).
3. Remove the pump foot. (see Figure 3)
4. While holding the drive shaft with pliers (factory suggests
using grip-locks to avoid scarring shaft) remove the impeller
by turning counter clockwise (see Figure 4).
Figure 2
NOTE: Use grip lock pliers to hold shaft while removing
impeller.
Figure 4
Pump Foot
Figure 3
NOTE: Remove pump foot by turning clockwise.
Figure 1
9
Standard Pump Operating Instructions and Parts Manual (OIPM-IND-1019)


 To Next Page
 Loading...