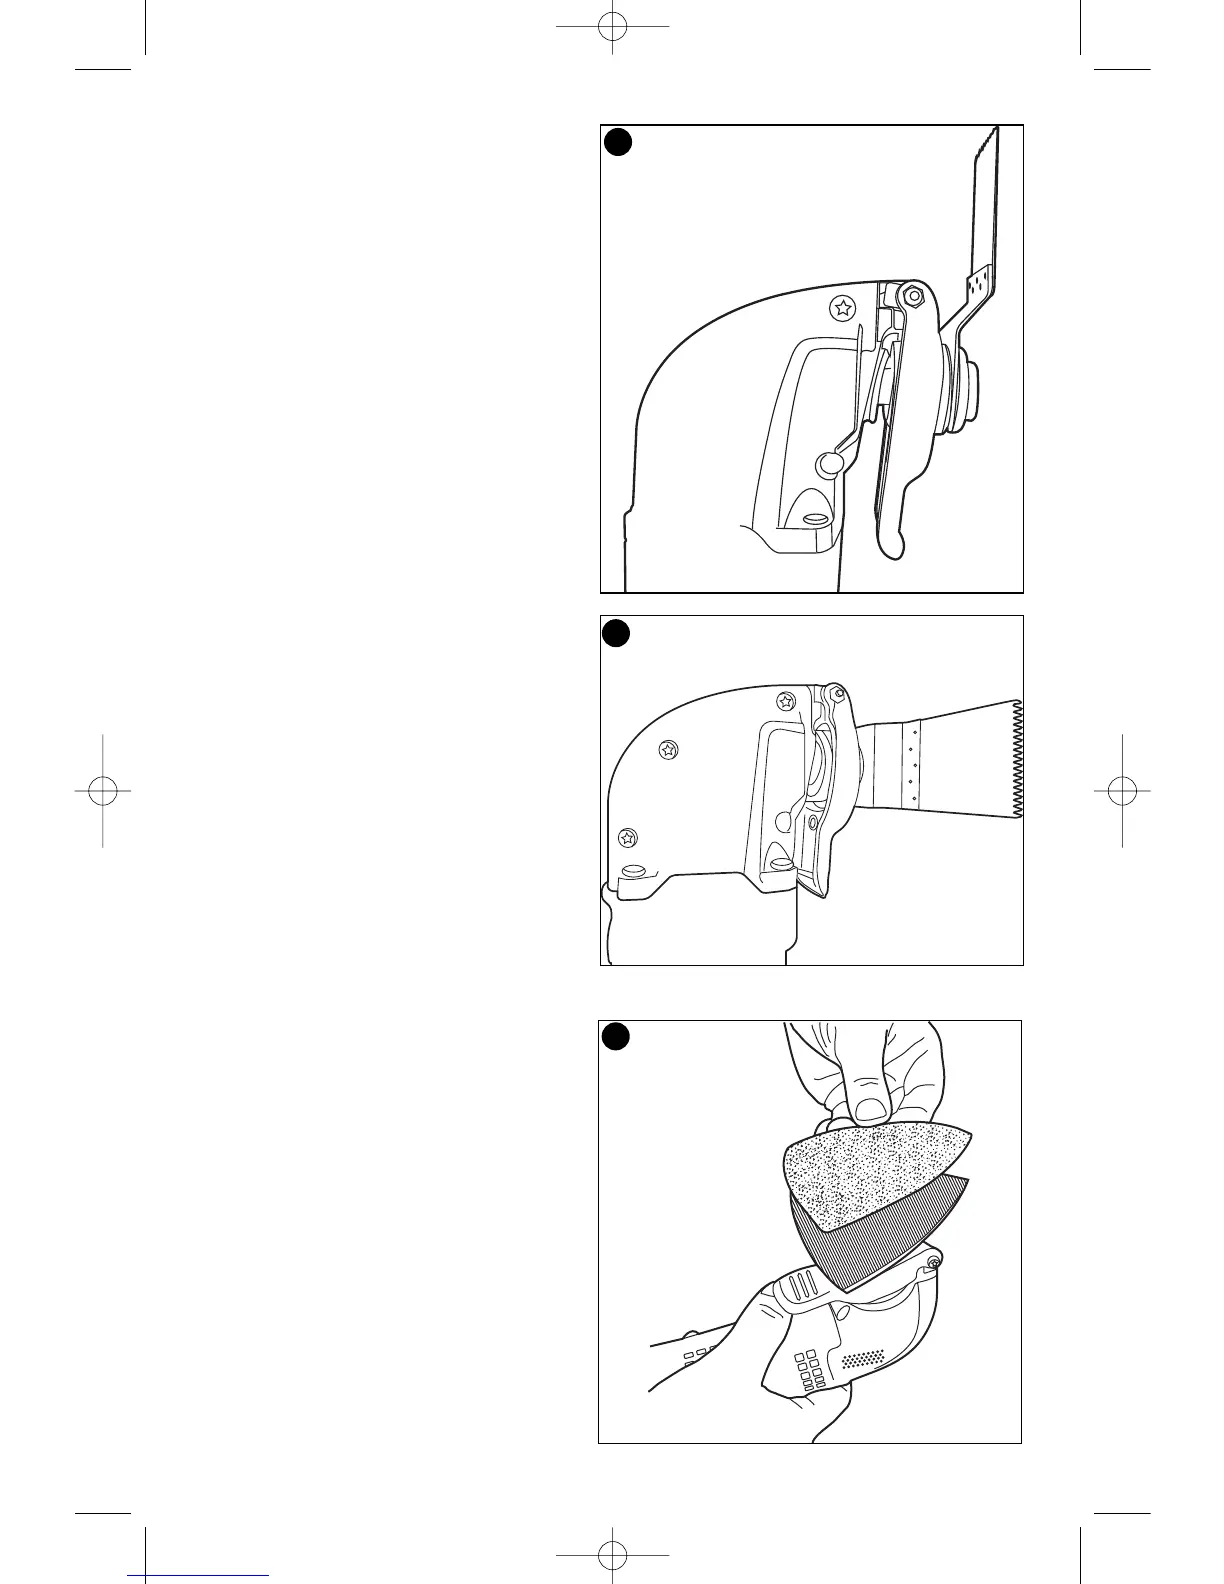
• Slide the accessory between the shaft
and the accessory holder making sure
the accessory engages all eight pins on
the holder and is flush with the shaft
(figure 3).
• Release the accessory clamp lever.
• Some accessories, such as scrapers
and blades can be mounted at an angle
if required as shown in figure 4.
Installing/Removing Sanding Sheets - Figure 5
A diamond shaped platen uses a hook
and loop adhesion system to attach the
sanding sheets. The platen allows you
to use it on large flat surfaces and tight
spots or corners.
• Attach the sanding platen as described
under “Installing/Removing
Accessories”.
• Align the edges on the sanding sheet,
with the edge of the sanding platen and
press the sanding sheet onto the platen.
• Firmly press the base with the sanding
sheet attached against a flat surface
and briefly switch the tool on. This
provides for good adhesion between the
platen and the sanding sheet and also
helps to prevent premature wear.
• When the tip of the sanding sheet
becomes worn, detach the sheet from
the platen, rotate and reapply.
8
4
5
3