5
77-132 / 77-133
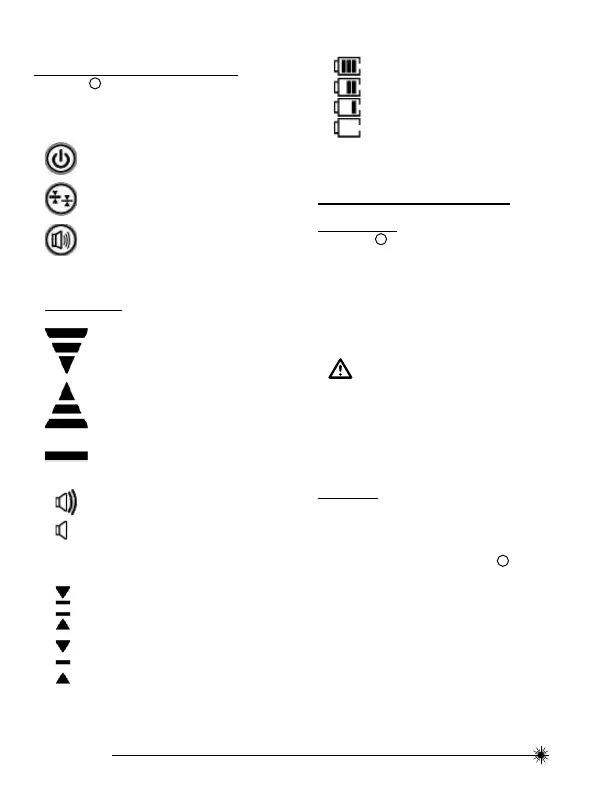
Keypad and LCD Icons
(See fi gure
B
)
Keypad
Power ON / OFF Key
Illumination ON / OFF Key
High / Low Accuracy Key
Speaker Volume Key
LCD Icons
Laser Detected - Datum Higher than Laser
Beam. Move the Detector the Direction Shown
(Down).
Laser Detected - Datum Lower than Laser
Beam. Move the Detector the Direction Shown
(Up).
Laser Detected - Datum In Line with Laser
Beam.
OFF
Buzzer Volume - Loud / Soft / Mute
Low Accuracy Setting
High Accuracy Setting
Battery Power - Solid
• Approximate Battery Life as Shown
Battery Power - Blinking
• Batteries Need to be Changed
Battery Installation /
Removal
(See Figure
C
to reference battery location)
Detector
• Open battery compartment by fl ipping open battery
cover.
• Install / Remove batteries. Orient batteries correctly
when placing into laser unit.
• Securely close and lock battery compartment cover.
WARNING:
• Pay close attention to the battery holder’s (+)
and (-) markings for proper battery insertion.
Batteries must be of same type and capacity. Do
not use a combination of batteries with different
capacities remaining.
Set Up
(Detector can be used in hand or with optional clamp to
mount the detector to a measuring rod, pole, or similar
object)
To mount clamp onto detector (See fi gure
D
) :
• Guide the clamp towards the detector using the
alignment hole.
• Tighten the fi xing screw.
 Loading...