22
ENGLISH
(Original instructions)
Line up the pegs (12) on the inside of the attachment with
the notches (13) of the housing opening.
Push the extension attachment (1) onto the blower
housing and turn left to lock. Pull on the attachment to
ensure it is securely in place.
To remove the extension attachment (1), turn right to
unlock and pull it off of the blower housing.
Defl ator (Fig. D)
To connect the infl ator/defl ator attachment 8 to the defl ator
intake (9):
Line up the detents on the attachment with the notches on
the top, bottom and sides of the intake.
Press the adapter onto the intake.
To remove the infl ator/defl ator attachment from the tube or
intake, pull the adapter away from the tool.
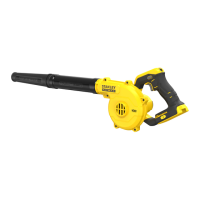
Installing and Removing the Battery Pack (Not Supplied)
from the tool
To install battery pack (Fig. E)
Insert battery pack (6) fi rmly into tool until an audible click
is heard as shown in fi gure E. Ensure battery pack is fully
seated and fully latched into position.
To remove battery pack (Fig. D)
Depress the battery release button (7) as shown in fi gure
Dand pull battery pack (6) out of tool.
Prior to Operation
Warning! Make sure the nozzle always points away from you
and any bystanders.
Warning! DO NOT drop anything into the nozzle.
Correct hand position (Fig. F)
Warning! To reduce the risk of serious personal injury,
ALWAYS use proper hand position as shown.
Warning!
To reduce the risk of serious personal injury,
ALWAYS hold securely in anticipation of a sudden reaction.
Proper hand position requires one hand on the main handle as
illustrated in fi gure F.t
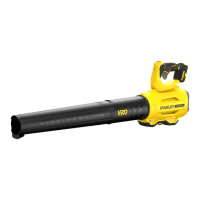
Switching on and off (Fig. G)
To turn the blower on, depress the trigger switch (3). As trigger
is pulled from min to max position (or full off to full on), the
airfl ow from the blower will increase
from min to max. Release the trigger fully to turn the blower
off.To lock the blower on, press the lock-on button (4) with the
variable speed trigger switch (3)depressed. To turn the blower
off when using the lock-on button, pull the trigger to release
the lock. Hold the blower with one hand, as shown in Figure F,
and sweep from side to side with tube output end several
inches above the hard surface. Slowly advance, keeping the
accumulated pile of debris in front of you.
Speed Selection (Fig. G)
The 3-speed toggle switch (5) sets the maximum airfl ow that
can be achieved when trigger is fully depressed. Push
the 3-speed toggle switch (5) up to increase air fl ow; push it
down to decrease air fl ow.
Storage hook (Optional extra) (Fig. H)
Warning! To reduce the risk of serious personal injury, place
the forward/reverse button in the lock-off position or turn tool
off and disconnect battery pack before making any
adjustments or removing/installing attachments or
accessories.
An accidental start-up can cause injury.
Warning!
To reduce the risk of serious personal injury, ensure
the screw (11) holding the storage hook is secure.
Note: When attaching or replacing the storage hook (12), use
only the screw (11) that is provided. Be sure to securely
tighten the screw in the accessory attachment location (10).
If the hook is not desired at all, it can be removed from the
tool.
To move the storage hook, remove the screw (11) that holds
the storage hook (12) in place in the Accessory attachment
location (10).
Note: Various trackwall hooks and storage confi gurations are
available.
Please visit our website www.stanley.eu/3 for further
information.
Accessories
Warning! Since accessories, other than those offered by
Stanley, have not been tested with this product, use of such
accessories with this tool could be hazardous. To reduce the
risk of injury, only Stanley recommended accessories should
be used with this product.
Recommended accessories for use with your tool are
available at extra cost from your local dealer or authorized
service center.
Maintenance
Your Stanley tool has been designed to operate over a long
period of time with a minimum of maintenance. Continuous
satisfactory operation depends upon proper tool care and
regular cleaning.
Your charger does not require any maintenance apart from
regular cleaning.
Warning! Before performing any maintenance on the tool,
remove the battery from the tool. Unplug the charger before
cleaning it.
Regularly clean the ventilation slots in your tool and
charger using a soft brush or dry cloth.
Regularly clean the motor housing using a damp cloth.
 Loading...