HORIZONTAL OR VERTICAL LINE PROJECTION ON A WALL
1). Hands free operation of the laser:
• Attach drywall pin to the wall per instructions under “Drywall Pin” section. Always make sure drywall pin is
securely attached to the wall.
• Attach the magnetic base (E) of the laser to drywall pin.
• Move on/ off switch (C) actuator to the “On” position to project the laser line.
• Rotate the laser to center horizontal (G) or vertical (F) bubble vials. Be sure the laser is firmly attached to
the drywall pin before removing support.
2). Operation of the laser:
• Hold the laser firmly against the wall.
• Move on/ off switch (C) actuator to the “On” position to project the laser lines.
• Align laser line with appropriate mark on your work surface, rotate the laser to center horizontal (G) or
vertical (F) bubble vials. Realign laser with mark if necessary.
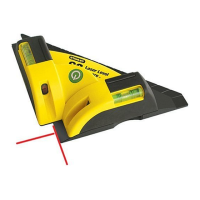
• Figure 2 illustrates a typical application for the Laser Level when it is wall mounted.
ANGULAR LINE PROJECTION ON A WALL
Operation of the laser:
• Attach drywall pin to the wall per instructions under “Drywall Pin” section. Always make sure drywall pin is
securely attached to the wall.
• Attach the magnetic base (E) of the laser to drywall pin.
• Rotate the laser to center horizontal (G) or vertical (F) bubble vials.
• Turn protractor ring to align “0” mark with Alignment Indicator (I).
• Rotate laser until indicator (I) is at desired angle.
• Move on/ off switch (C) actuator to the “On” position to project the laser line.
STRAIGHT LINE PROJECTION ON ANY FLAT SURFACE
Free hand operation of the laser:
• Hold the laser firmly against a flat surface.
• Move on/off switch (C) actuator to the “On” position to project the laser line.
• Align laser line with appropriate marks on your work surface (common use is laying tiles or marking
plywood for cutting purpose).
DANGER: Laser Radiation, avoid direct eye exposure.
Helpful Hints
• If the laser light becomes dim or is no longer visible when the switch is in the on position check or change
the battery.
• The laser lines are only level on the wall against which the unit is held or hung. The short line visible on
any adjacent wall is not level. The same is true for straight line projection on a floor or wall, the short line
on any adjacent wall is not level.
• The laser unit should never be used as a spirit (bubble) level. The levels are only calibrated to the laser
line when held or hung against a vertical surface.
• The laser unit only generates level lines when held or hung against a vertical surface.
• Make sure laser is as square as possible to flat surface to ensure proper line projection.
Storage
Always store the laser level indoors.
Maintenance
Use only mild soap and damp cloth to clean the tool. Never let any liquid get inside the tool; never immerse
any part of the tool into a liquid.
IMPORTANT: To assure product SAFETY and RELIABILITY, repairs, maintenance and adjustment (other
than those listed in this manual) should be performed by authorized service centers or other qualified service
organizations, always using identical replacement parts.
Accessories
WARNING: The use of any accessory not recommended for use with this tool could be hazardous.
WARRANTY
Two Year Warranty
Stanley warrants its electronic measuring tools against deficiencies in materials and / or workmanship for two
year from date of purchase. Deficient products will be repaired or replaced, at Stanley’s option, if sent together
with proof of purchase to:
Stanley Tools1000 Stanley Drive
Concord, NC 28027
Attn: Quality Assurance
This Warranty does not cover deficiencies caused by accidental damage, wear and tear, use other than
in accordance with the manufacturer’s instructions or repair or alteration of this product not authorised by
Stanley. Repair or replacement under this Warranty does not affect the expiry date of the Warranty. To
the extent permitted by law, Stanley shall not be liable under this Warranty for indirect or consequential
loss resulting from deficiencies in this product. This Warranty may not be varied without the authorisation
of Stanley. This Warranty does not affect the statutory rights of consumer purchasers of this product. This
Warranty shall be governed by and construed in accordance with the laws of the country sold where in and
Stanley and the purchaser each irrevocably agrees to submit to the exclusive jurisdiction of the courts of that
country over any claim or matter arising under or in connection with this Warranty. Calibration and care are
not covered by warranty.
NOTE:
• The customer is responsible for the correct use and care of the instrument. Moreover, the customer
is completely responsible for periodically checking the accuracy of the laser unit, and therefore for the
calibration of the instrument.
Subject to change without notice
TECHNICAL SPECIFICATIONS OF LASER LEVEL:
Laser diode wavelength: 630 - 680 nm (red color)
Laser Class: Class 2
Working range: Up to 15 feet (depends on light conditions)
Leveling accuracy:
Projecting right ±1/8 inch (3 mm) @ 10 feet (3 m)
Projecting up ±1/8 inch (3 mm) @ 10 feet (3 m)
Projecting left ±1/4 inch (6 mm) @ 10 feet (3 m)
Batteries: 2 AA (included)
Voltage: 3 Volts
Operating temperature: 50°F (10°C)- 104° F (40°C)
Complies with 21 CFR 1040.10 and 1040.11 except for deviations pursuant to Laser Notice No. 50, dated
June 24, 2007
 Loading...