6
ELECTRODES
FIXED HANDLE
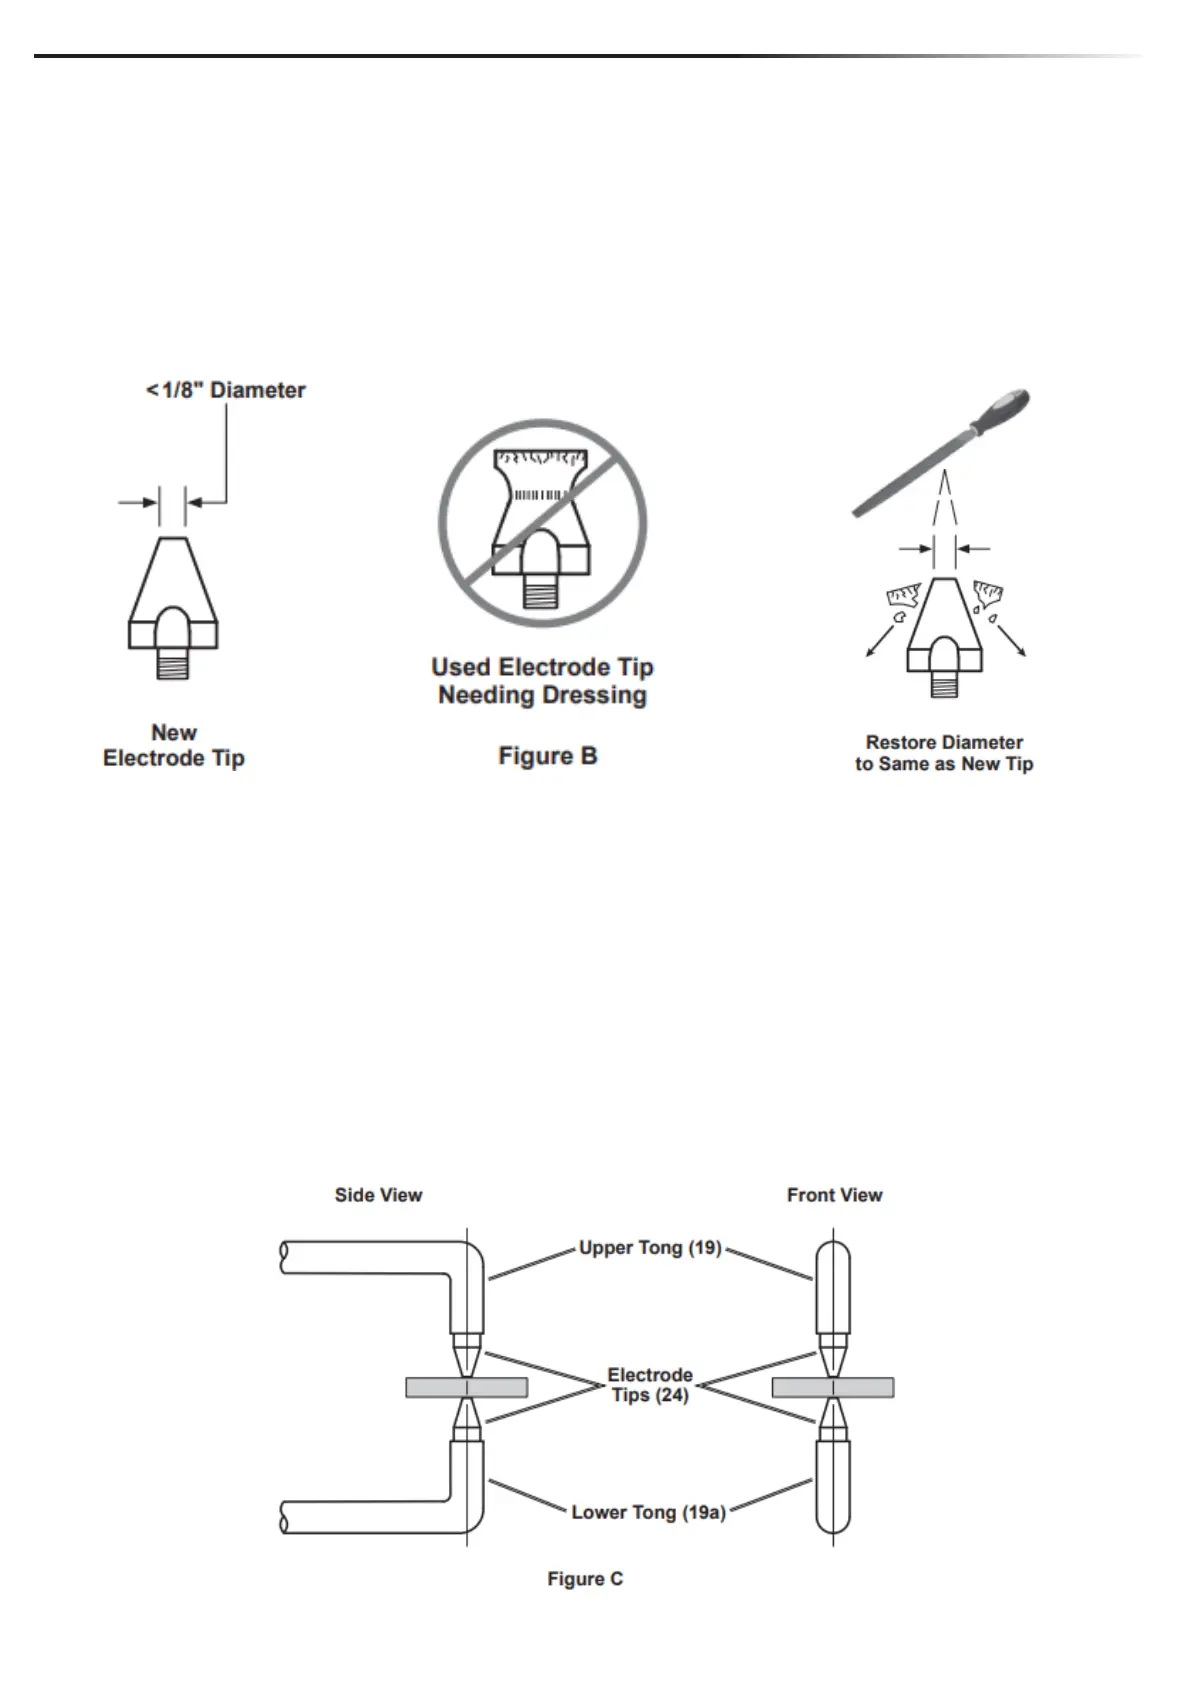
1. Electrode Tips (24) deform during use. For optimal weld quality, inspect Electrode Tips before use and
clean, dress (resurface), or replace as needed to maintain a proper contact surface.
2. Use a le or tip dresser tool (both not included) to dress Electrode Tips and restore the spot diameter
and face angle to a condition approximately the same as a new tip. See Figure B.
3. Used Electrode Tips that cannot be restored to a suitable condition by dressing will need to be
replaced.
NOTE: When welding thinner materials a smaller tip diameter is required than when welding thicker
materials.
ELECTRODE TIP ALIGNMENT
1. Correct Tong/Electrode Tip alignment is necessary to create a proper weld. Check to make sure
the Upper Tong (19) is aligned correctly with the Lower Tong (19a) and that the Electrode Tips (24) are
centered and touch each other exactly prior to welding operation. See Figure C
2. To adjust the Upper Tong, loosen the four Cap Screws (15) located at the top/front of the tool.
3. To adjust the Lower Tong, loosen the four Cap Screws (30) located at the bottom/front of the tool.
4. Align the Upper and Lower Tongs and Electrode Tips as shown in Figure C.
5. When alignment is complete re-tighten the Cap Screws.