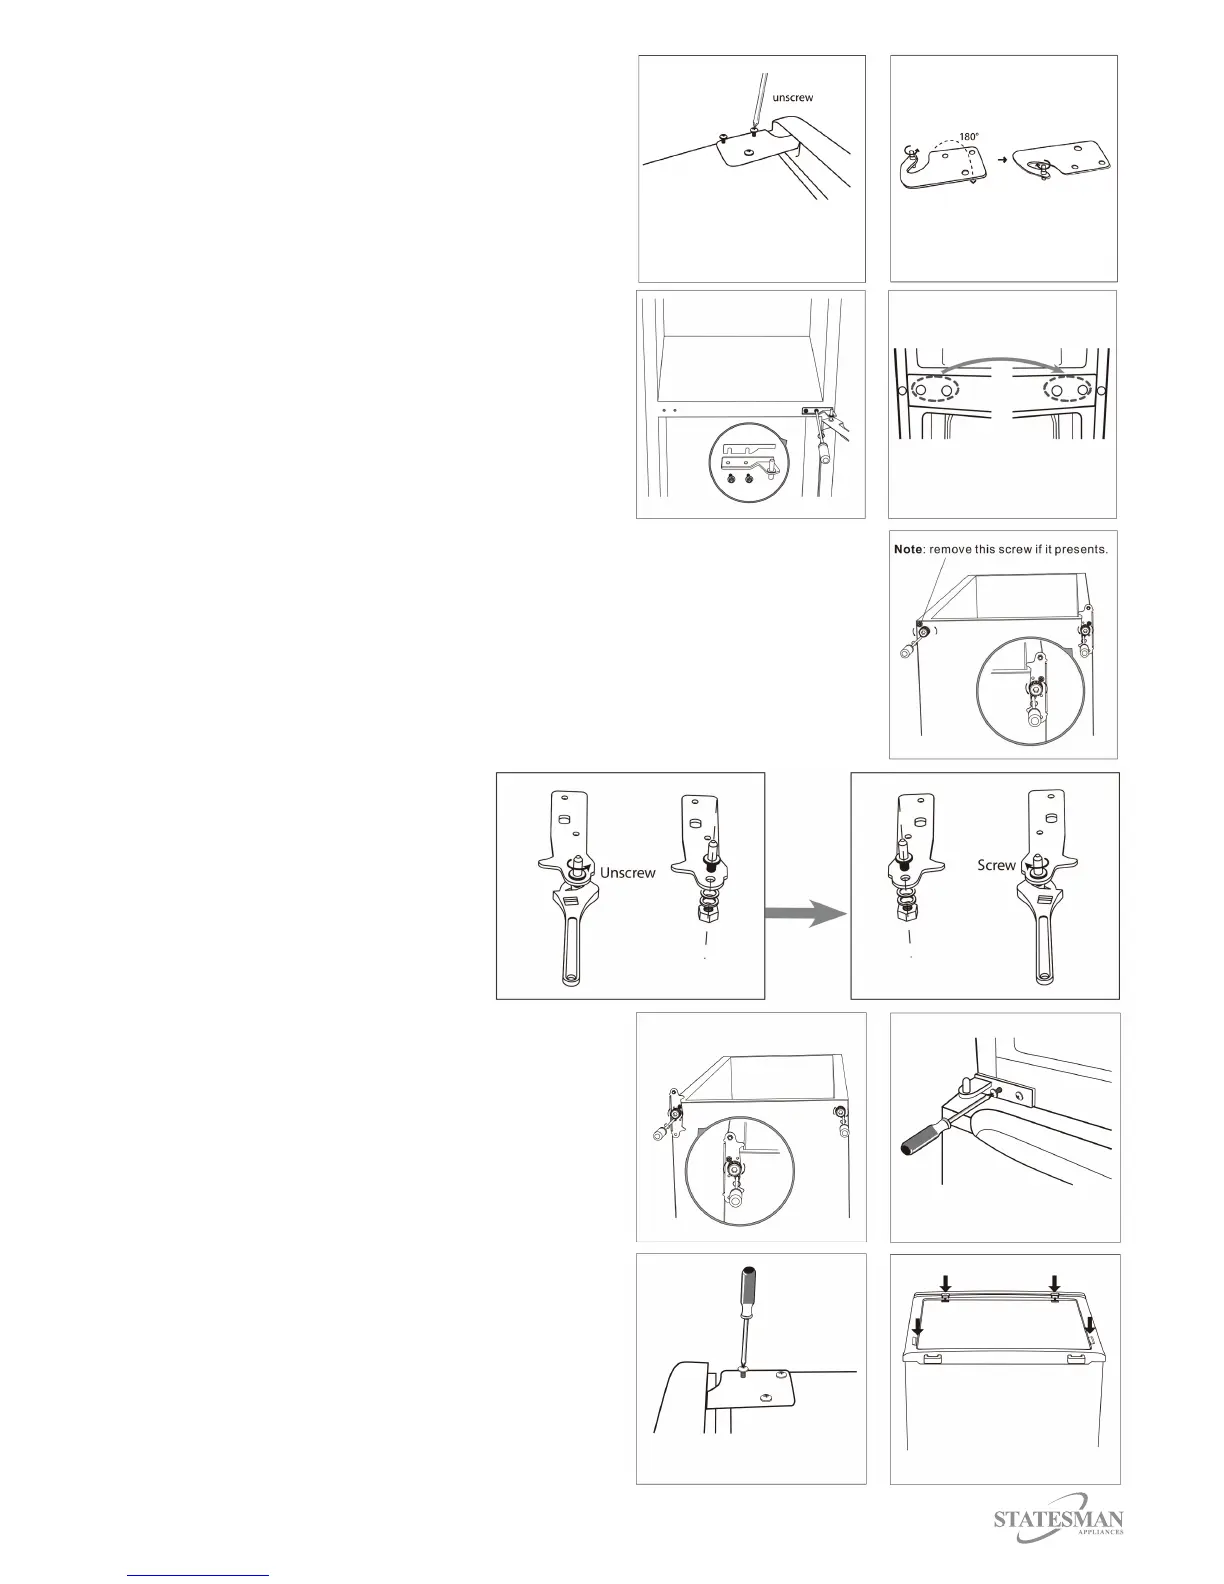
7
4. Remove the pin from the top hinge with a
screwdriverandturnoverthehingebracket
andthenretthepintothehingebracket
(Fig3).
5. Remove the 2 screws from the middle hinge
and remove hinge, the lower door can now
beremovedandstoredsafely(Fig4).
6. Removeandswaptheblankingpinsfromthe
opposite side to the middle hinge screw
holes(Fig5).
7. Gentlyleantheappliancebackbutnomore
than 45°C, remove the screws from the
bottom hinge and remove the levelling feet
(Fig6).
8. Remove the pin from the bottom hinge
bracketandturnthehingebracketoverand
thenretthepintothehingebracket(Fig7).
9. Re-tthebottomhingebracketscrewsand
replace both levelling feet. The lower door
cannowbereplacedonthehingepin(Fig8).
Fig 2. Fig 3.
Fig 4. Fig 5.
Fig 6.
Fig 7.
10. Re-install and secure the middle
hinge on the opposite side
(Fig9).
11. The upper door can now be
replaced on the hinge.
Replace the top hinge and
3screws(Fig10).
12. Replace the lid and the 4 screws
onthetop(Fig11).
13.Checkthatthedoorisaligned
horizontally and vertically and that the seals
are closed on all sides before tightening the
bottom hinge.
14. Re-adjust the levelling feet to minimise
operation noises caused by vibration.
15. Allow 4 hours for the appliance to stand
upright before turning on, to allow coolant
gases time to settle after the
appliance is in place.
Fig 11.
Fig 10.
Fig 9.Fig 8.