ENGLISH
21
21
Pay attention that the clamping band of the auxiliary handle
is positioned in the groove on the housing as intended for.
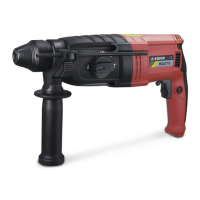
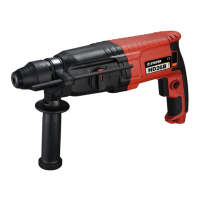
3.2 Changing the Tool
The dust protection cap 3 largely prevents the entry of
drilling dust into the tool holder during operation. When
inserting the tool, take care that the dust protection cap 3
is not damaged.
A damaged dust protection cap should be changed
immediately. We recommend having this carried out
by an after-sales service.
Inserting SDS-plus Drilling Tools
The SDS drill chuck allows for simple and convenient
changing of drilling tools without the use of additional
tools.
Clean and lightly grease the shank end of the tool. Insert
the tool in a twisting manner into the tool holder until it
latches itself.
Check the latching by pulling the tool.
As a requirement of the system, the SDS drilling tool can
move freely. This causes a certain radial run-out at no-
as the drill bit centres itself upon drilling.
Removing SDS Drilling Tools
Push back the locking sleeve 4 and remove the tool.
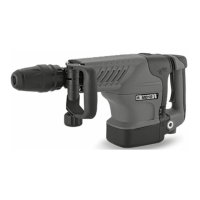
3.3 Carrying Handle (MD15K)
The carrying handle 13 can be turned to any position.
Loosen the knurled nut 14 , turn the carrying handle
13 around the machine axis to the desired position and
tighten the knurled nut 14 again.
The carrying handle 13can also be mounted facing to the
other side. Completely unscrew the knurled nut 14 and
handle 13 to the side and tilt the remaining clamping
element by 180°. Mount the carrying handle 13 in reverse
order.
3.4.- Changing the Tool (HD7BK / MD15K / MH6BK)
Before any work on th e machine itself, pull the mains
plug.
Clean the tool shank 16 and apply a light coat of grease.
Pull out the lock bolt 15 and turn it 180° in anticlockwise
direction. Allow the lock bolt 15 to latch again.
Insert the tool into the tool holder to the stop. The groove
of the tool shank 16 must face upward as shown in the
Check the latching by pulling the tool.
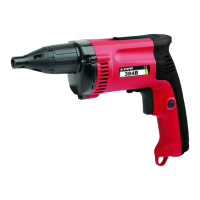
3.5 Changing the Tool (TD-800)
The TD-800 model allows rapid tool coupling both circular
rod. (Example: A drill HSS) and tool shank SDS-PLUS.
the tool.
the outside and then the key ring fastener.
With the SDS-PLUS tool simply insert thoroughly. Lock
4. Operation
4.1 Starting Operation
Observe correct mains voltage! The voltage of
the power source must agree with the voltage
specied on the nameplate of the machine.
Power tools marked with 230 V can also be
operated with 220 V.
Setting the Operating Mode
With the selector switch for drilling/hammer drilling 9 , the
operating mode of the machine is selected. To change the
operating mode, press the release button 8 and turn the
drilling/hammer drilling selector switch 9 to the desired
position until it can be heard to latch.
Note: Only change the mode of operation while
disconnected from the machine! Otherwise you may
damage the machine.
Position for hammer drilling in concrete or stone, HD5CK,
Position for drilling without impact in wood, metal, ceramic
and plastic as well as for screwdriving and thread cutting.
and 17).
Position for chiselling, HD5CK,
Reposition Chiseling Vario-lock (MD10K)
The chisel 12 may be positioned at angles.
Thus, the optimal working position can be set for each
application.
Insert the chisel in the tool holder
- Push the ring 18 forward and turn the chisel in
the desired position.
- Release the ring 18 to lock the position.
Reversing the Rotational Direction
The rotational direction switch 5 is used to reverse the
rotational direction of the machine. However, this is not
Right rotation: Turn the selector switch for drilling/
hammer drilling 5 on both sides to the stop in the position.
Left rotation: Turn the selector switch for drilling/hammer
drilling 5 on both sides to the stop in the position.