COPYRIGHT STEEDA AUTOSPORTS 2011 MUSTANG SHIFTER 10/03/10 10/03/10
Steeda Tri-Ax Shifter Installation:
8. Transfer the plastic cup attached to the bottom of the factory shifter lever onto the bottom of the
Tri-Ax lever, by carefully prying it off of the lower lever and snapping it onto the Tri-Ax lower lever.
See figure 6.
Note: Apply some general purpose grease to the inside of the cup before transferring it.
9. With the factory shifter base gasket set back in place, feed the Tri-Ax shifter assembly through the
floor pan and set it onto the factory base.
Note: Be sure the plastic cup, now attached to the Tri-Ax lower lever, is seated properly inside
the linkage rail.
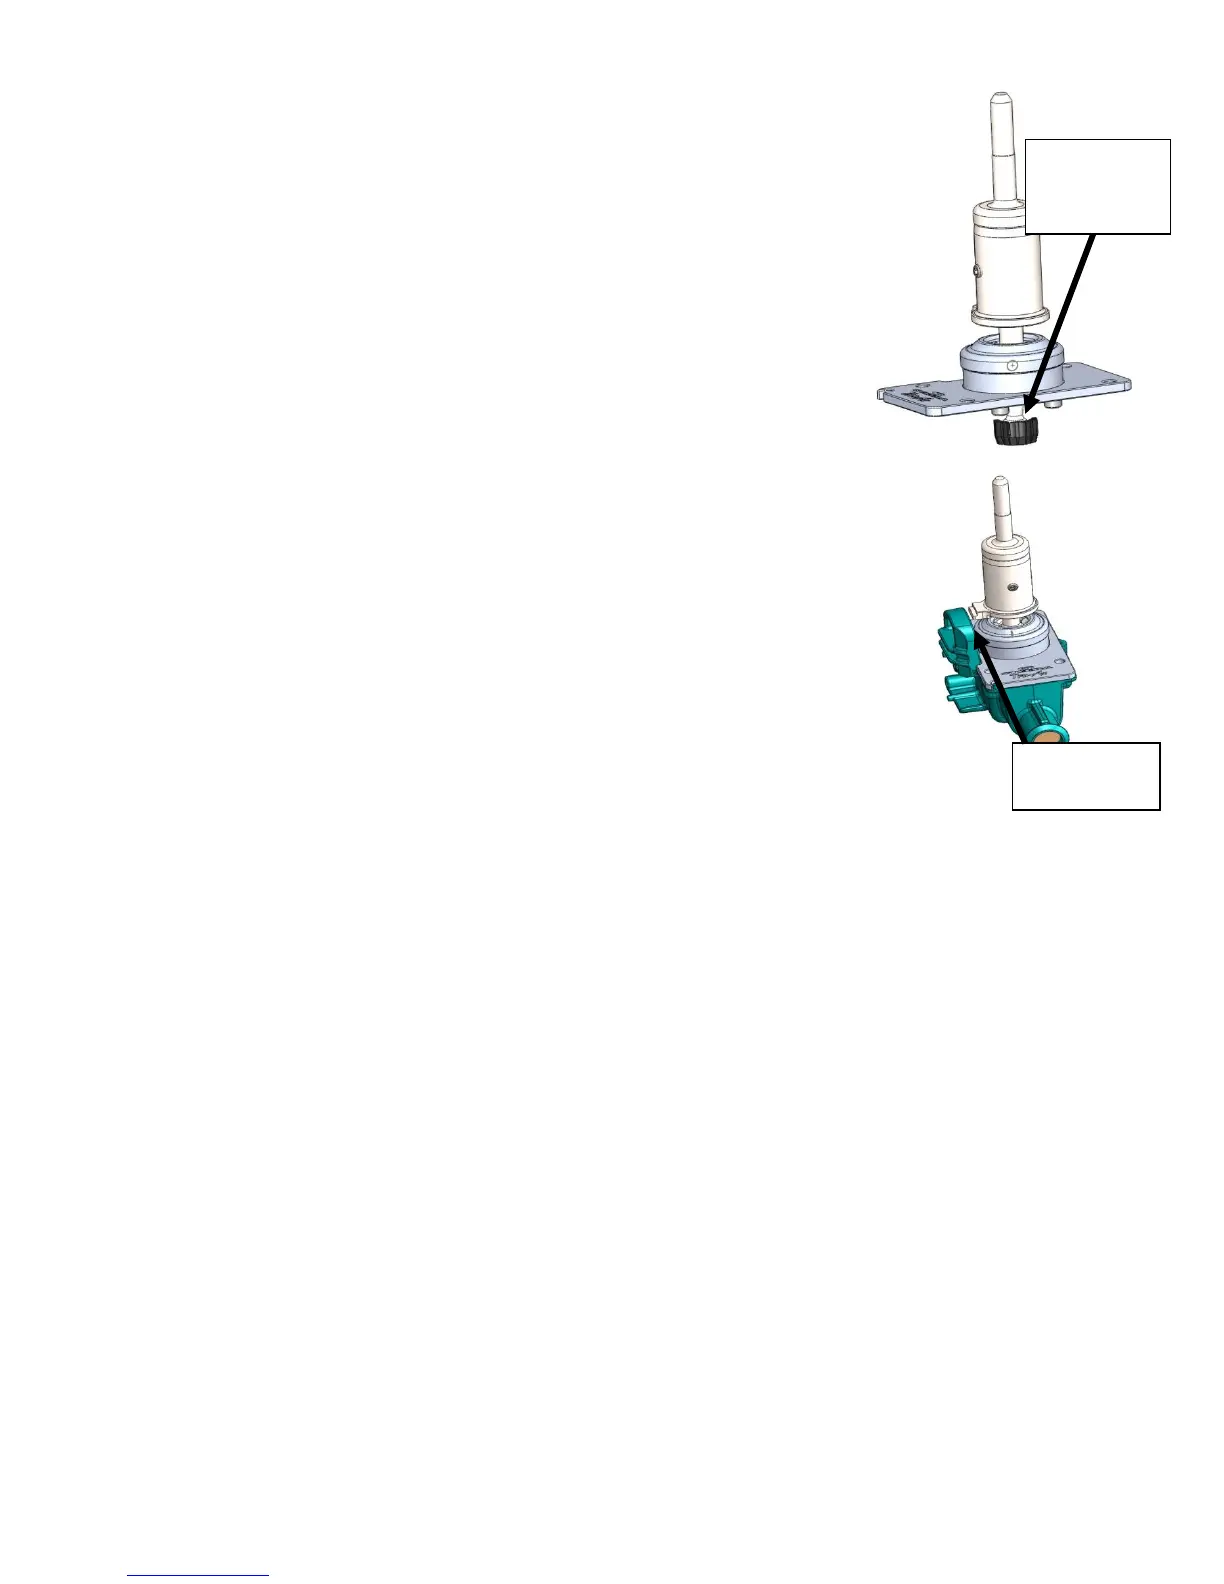
10. Reinstall the four 10mm head bolts back into the shifter base.
Note: Before tightening the bolts, place the shifter in first gear and gently pull the upper lever
away from the reverse lockout ear on the base. Then finish tightening the bolts. There should
be around .02-.03 inches of clearance when in first and second gear. See figure 7.
11. From under the car, reinstall the rubber bushing back onto the base of the shifter and secure the
shifter assembly back into place with the two 10mm nuts you previously removed. Leave the nuts
loose with about half an inch of thread between the nut and floor pan for reinstalling the rubber
boot.
12. From inside the car, reinstall the rubber boot over the shifter and the floor pan.
Note: MAKE SURE the bottom hole of the rubber boot fits securely over lip on the shifter
bearing cage and the lip on the reverse lockout boss. It cannot just rest on top of the shifter.
Note: MAKE SURE the lips on the outside, around the middle of the rubber boot fit around the
hole in the floor pan.
Note: MAKE SURE the boot fits over the upper shifter lever just as it did with the factory shifter
lever.
13. From under the car, finish tightening the nuts for the rear bushing.
14. From inside the car, reinstall the insulation/sound deadening material back over the shifter and the
floor pan.
15. Place the center console cover back over the center console and reconnect any electrical connectors that
were disconnected.
16. Clip the center console back into place.
Note: Make sure all the clips snap back into place.
17. Reinstall the shift knob. You are done!!
Reverse Lockout Spring Replacement:
The design of the shifter allows for the amount of force required to shift the car into reverse to be changed. A small coil spring and several
preloading shims are now in the shifter. The provided spring has a higher spring rate than the spring installed in the shifter to allow more force to
be used to engage reverse. To change the spring, remove the set screw from the upper shifter lever, and push the pin behind the set screw out
through the set screw hole. You will need to insert a small tool into the 1/8 inch hole behind the pin to extract it through the set screw hole. Now
lift the upper lever from the lower lever and remove the spring and shims (they may still be in the bore of the upper lever). If the plastic sleeve is
still in the upper lever use your finger, or a small screwdriver, to gently pull it out. BE CAREFUL not to scratch the bore of the sleeve. Do not re-use
any of the shims currently in the shifter if you are going to use the higher rate spring. Be sure to install the upper lever in the correct orientation
and reinstall the pin and set screw into the lever. The pin must be fed through the slot in the lower lever to function properly.
Snap Cup Onto
Tri-Ax Lower
Lever
This Gap Must
Be Adjusted
 Loading...