EasyManua.ls Logo

Steelcraft STX100 User Manual

Steelcraft STX100
4 pages
To Next Page IconTo Next Page
Page #1 background imageLoading...
Page #1 background image
STX100 RUNNING BOARDS
2021-22 GRAND CHEROKEE L
Page 1 of 4 REV1 6/14/22 (CC)
Driver/Left Front
Mounting Bracket
Driver/Left Rear
Mounting
Bracket
Passenger/Right
Running Board
Front
PARTS LIST:
1
Driver/Left Running Board
1
10mm x 40mm Hex Bolt
1
Passenger/Right Running Board
3
10mm Lock Washers
1
Driver/Left Front Mounting Bracket
3
10mm x 30mm OD x 2.5mm Flat Washers
1
Passenger/Right Front Mounting Bracket
1
10mm x 27mm OD x 3mm Flat Washer
1
Driver/Left Center Mounting Bracket
1
10mm Hex Nut
1
Passenger/Right Center Mounting Bracket
1
10mm Threaded Insert
1
Driver/Left Rear Mounting Bracket
1
10mm Insert Tool
1
Passenger/Right Rear Mounting Bracket
6
6mm x 30mm Hex Bolts
3
12mm x 50mm Hex Bolts
12
6mm x 20mm T-Bolts
3
12mm Lock Washers
24
6mm x 20mm OD x 2mm Flat Washers
3
12mm x 32mm OD x 3mm Flat Washers
18
6mm Lock Washers
3
10mm x 50mm Hex Bolts
18
6mm Hex Nuts
PROCEDURE:
1. REMOVE CONTENTS FROM BOX. VERIFY ALL PARTS ARE PRESENT. READ INSTRUCTIONS
CAREFULLY. USE ILLUSTRATION TO IDENTIFY BRACKETS AND TYGER FURY STEPS.
2. Starting on the Driver/Left front of the vehicle, remove the cover on the bottom of the vehicle. Select the
Driver/Left Front Mounting Bracket. Attach the Mounting Bracket to the threaded insert in the front
location with (1) 12mm Hex Bolt, (1) 12mm Lock Washer and (1) 12mm Flat Washer, (Figures 1 & 2).
Do not tighten hardware.
3. Attach the Mounting Bracket to the pinch trim with (1) 6mm Flat Washer, (1) 6mm Lock Washer and (1)
6mm Hex Nut, (Figure 3). Do not tighten hardware.
4. Move along the body panel to the center mounting location, (Figure 4). Select the Driver/Left Center
Mounting Bracket. Repeat Step 2 to install the Bracket, (Figures 3 & 4). Do not tighten hardware.
5. Continue to the rear mounting location in front of the rear tire, (Figure 5). Select the Driver/Left Rear
Mounting Bracket. Attach the Bracket to the threaded insert with (1) 10mm Hex Bolt, (1) 10mm Lock
Washer and (1) 10mm Flat Washer, (Figures 5 & 6). Do not tighten hardware. Repeat Step 3 to attach
the Bracket to the pinch trim.
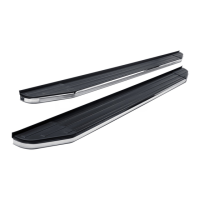
6. Select the Driver/Left Viewpoint Running Board. Insert (6) T-Bolts into the channels in the bottom of the
Running Board, (3) per channel, (Figure 7). Place the Running Board onto the Mounting Brackets and
line up the T-Bolts. Attach the Running Board to the Mounting Brackets with (6) 6mm Flat Washers, (6)
6mm Lock Washers and (6) 6mm Hex Nuts, (Figure 8). Do not tighten hardware.
7. Level and adjust the Running Board and tighten all hardware.
8. Move to the Passenger/Right side. Repeat Steps 1,2 & 5 to attach the Passenger/Right Front and Rear
Mounting Brackets.
Passenger/Right
Rear Mounting
Bracket
Passenger/Right
Center Mounting
Bracket
Driver/Left
Center Mounting
Bracket
Question and Answer IconNeed help?

Do you have a question about the Steelcraft STX100 and is the answer not in the manual?

Steelcraft STX100 Specifications

General IconGeneral
BrandSteelcraft
ModelSTX100
CategoryAutomobile Accessories
LanguageEnglish

Summary

Running Board Installation Procedure

Driver/Left Front Mounting Bracket Installation

Attaches the driver/left front mounting bracket to the vehicle.

Driver/Left Center Mounting Bracket Installation

Attaches the driver/left center mounting bracket to the vehicle.

Driver/Left Rear Mounting Bracket Installation

Attaches the driver/left rear mounting bracket to the vehicle.

Driver/Left Running Board Attachment

Secures the driver/left running board to its mounting brackets.

Passenger/Right Center Mounting Bracket Installation

Installs the passenger/right center mounting bracket using a threaded insert.

Passenger/Right Running Board Attachment

Attaches the passenger/right running board to its mounting brackets.

Final Adjustment and Tightening

Levels and adjusts the running boards, then tightens all hardware.

Maintenance and Care

Provides guidance on periodic inspections and cleaning of the running boards.

Related product manuals