Do you have a question about the STEELGREEN SG52 and is the answer not in the manual?
The supplied vibration brackets must be installed to avoid voiding the warranty.
Instructions are the same for both right and left sides; rear tire may need removal for access.
Remove the safety shield from the tank support.
Loosen front four and rear three tank bolts; do not remove them completely.
Install the vibration brackets, ensuring tanks remain loose for alignment.
Tighten the four front and three rear tank bolts.
Reattach the safety shield to the tank support.
This manual describes the installation of the SG52 Vibration Bracket, an accessory designed for Steel Green Mfg. equipment. The primary function of these brackets is to mitigate vibrations, which is crucial for maintaining the integrity and longevity of the equipment, particularly the tanks. The manual explicitly states that "The supplied vibration brackets MUST be installed or warranty will be void," underscoring their importance for warranty compliance and potentially the safe and effective operation of the SG52 unit.
The SG52 Vibration Bracket serves as a critical component in reducing the impact of vibrations on the equipment's tanks. In machinery that experiences significant operational vibrations, such as the SG52, components like tanks can be subjected to stress that may lead to premature wear, leaks, or structural fatigue. By installing these brackets, the vibrations are absorbed or dampened, thereby protecting the tanks and associated connections from damage. This protective function extends the lifespan of the tanks and ensures the reliable containment of liquids, which is essential for the equipment's intended use. The brackets are designed to be installed on both the right and left sides of the equipment, indicating a balanced approach to vibration management across the unit.
The kit includes a variety of components, each with specific part numbers and quantities, indicating a precise engineering design for the vibration mitigation system.
Vibration Brackets:
R21-166: VIBRATION BRACKET (Quantity: 1) - This is likely the main bracket for one side.R21-166-L: VIBRATION BRACKET, LEFT (Quantity: 1) - This specifies a dedicated bracket for the left side, implying a mirrored design for the right side, or that the R21-166 is for the right side. The instructions confirm that the process is the same for both sides, suggesting a symmetrical setup.Fasteners (Bolts and Nuts): These are crucial for securely attaching the vibration brackets to the equipment and for re-securing the tanks. The specific types and sizes of fasteners are important for ensuring proper fit and structural integrity.
HFSSC-3813: HEX BOLT, 3/8" X 3/4" (Quantity: 4) - These hex bolts are likely used for attaching the vibration brackets to the frame or tank support.HFSSC-51675: HEX BOLT, 5/16" X 3/4" (Quantity: 4) - Another set of hex bolts, possibly for different attachment points or for securing the tanks.CB-3751SS: CARRIAGE BOLT, 3/8 X 1 (Quantity: 2) - Carriage bolts are often used in applications where a smooth, unthreaded head is desired on one side, and they provide a strong, secure connection.HFNCS-516S: HEX NUT, 5/16 (Quantity: 4) - These hex nuts will correspond to the 5/16" bolts, ensuring a tight fastening.The precise dimensions and types of fasteners highlight the engineered approach to securing the brackets and maintaining the structural integrity of the equipment. The use of specific bolt lengths and diameters ensures that the components are correctly mounted without interfering with other parts or compromising the strength of the assembly.
The manual provides a step-by-step guide for installation, emphasizing precision and proper sequence.
Preparation (STEP ONE): "Remove the safety shield from the tank support." This initial step clears the work area, providing access to the tank mounting points. It's a standard practice in maintenance to remove obstructions before proceeding with component installation.
Loosening Tank Bolts (STEP TWO): "Loosen the four tank bolts on the front & 3 tank bolts on the rear, do not completely remove the bolts." This is a critical step. By loosening but not removing the bolts, the tanks become mobile enough to allow for the insertion and alignment of the new vibration brackets, as highlighted by the note: "The tanks should be loose from step two and able to move for proper alignment with the brackets." This flexibility is essential for achieving a correct fit. The note "If necessary, remove the rear tire for easier access" indicates a potential challenge in accessing the rear tank bolts, providing a practical tip for installers.
Bracket Installation (STEP THREE): "Install the vibration brackets." This is the core of the process, where the R21-166 and R21-166-L brackets are positioned and secured. The diagrams clearly illustrate the placement of the brackets and the associated fasteners (items 1, 2, 3, 4, 5, 6 from the kit). The "LEFT SIDE" and "RIGHT SIDE" sections with detailed views (DETAIL A) guide the installer through the specific attachment points and fastener usage for each side. The note "HOSE REEL PLATE (HOSE REEL NOT SHOWN FOR CLARITY)" indicates that other components might be present but are omitted from the diagrams for better visibility of the bracket installation area.
Tightening Tank Bolts (STEP FOUR): "Tighten the four tank bolts on the front & 3 tank bolts on the rear." After the vibration brackets are in place, the loosened tank bolts must be re-tightened to secure the tanks firmly to the equipment, now with the added vibration dampening provided by the new brackets. This step ensures that the tanks are properly seated and that the entire assembly is robust.
Reattaching Safety Shield (STEP FIVE): "Reattach the safety shield to the tank support." This final step completes the installation by restoring the protective cover, which is important for operational safety and preventing debris from affecting the tank area.
While the manual primarily focuses on installation, the very nature of the vibration brackets contributes to a reduction in maintenance needs over time. By mitigating vibrations, the brackets:
In summary, the SG52 Vibration Bracket is a crucial accessory for Steel Green Mfg. equipment, designed to enhance durability and reliability by effectively managing operational vibrations. Its installation is a straightforward process, clearly outlined in the manual, and is a prerequisite for maintaining the product's warranty. The kit's detailed component list and step-by-step instructions ensure a proper and secure installation, ultimately contributing to the longevity and efficient operation of the SG52 unit.
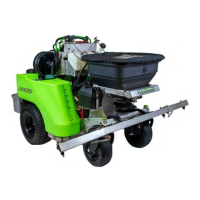
| Brand | STEELGREEN |
|---|---|
| Model | SG52 |
| Category | Paint Sprayer |
| Language | English |