5 2
TURNTABLE OPERATION
1. Rotate the ON-OFF VOLUME SWITCH located on the front panel to switch the unit ON.
2. Release the TONE ARM from the ARM LOCK and place it on the ARM REST.
Important Note: The ARM LOCK is taller than the turntable and needs to be folded down
to allow larger records to be played.
3. Set the SPEED CONTROL SWITCH to the desired speed (33
1
/
3
or 45 rpm).
4. Place the record on the turntable*.
5. Lift the TONE ARM and move it by hand to the record - the turntable will start turning
automatically - then slowly lower it onto the desired starting point.
Note: At the end of the record, the turntable will still be rotating. You must lift the
TONE ARM and return it back to the ARM REST manually.
6. Re-adjust the ON-OFF VOLUME SWITCH to the desired sound level and rotate the TONE
control knob as required.
Note: After use and removing the record, always push the ARM LOCK upwards again before
placing the TONE ARM back on it – then lock it and close the cover.
*Accessory: Spindle Adaptor for 45rpm records
Note: The spindle adaptor disc is stored on the turntable deck and s
hould only be used if the centre clip on the 45rpm record is missing!
1. Place the 45rpm adaptor on the spindle before placing the record
on the turntable.
2. Place your 45rpm record onto the turntable.
3. Follow the steps under TURNTABLE OPERATION to play your record.
NEEDLE REMOVAL & INSTALLATION
The record player is already fitted with a universal needle (or stylus) suitable for playing 33
1
/
3
and 45 rpm records. The procedure for removing and re-fitting the needle is as follows:
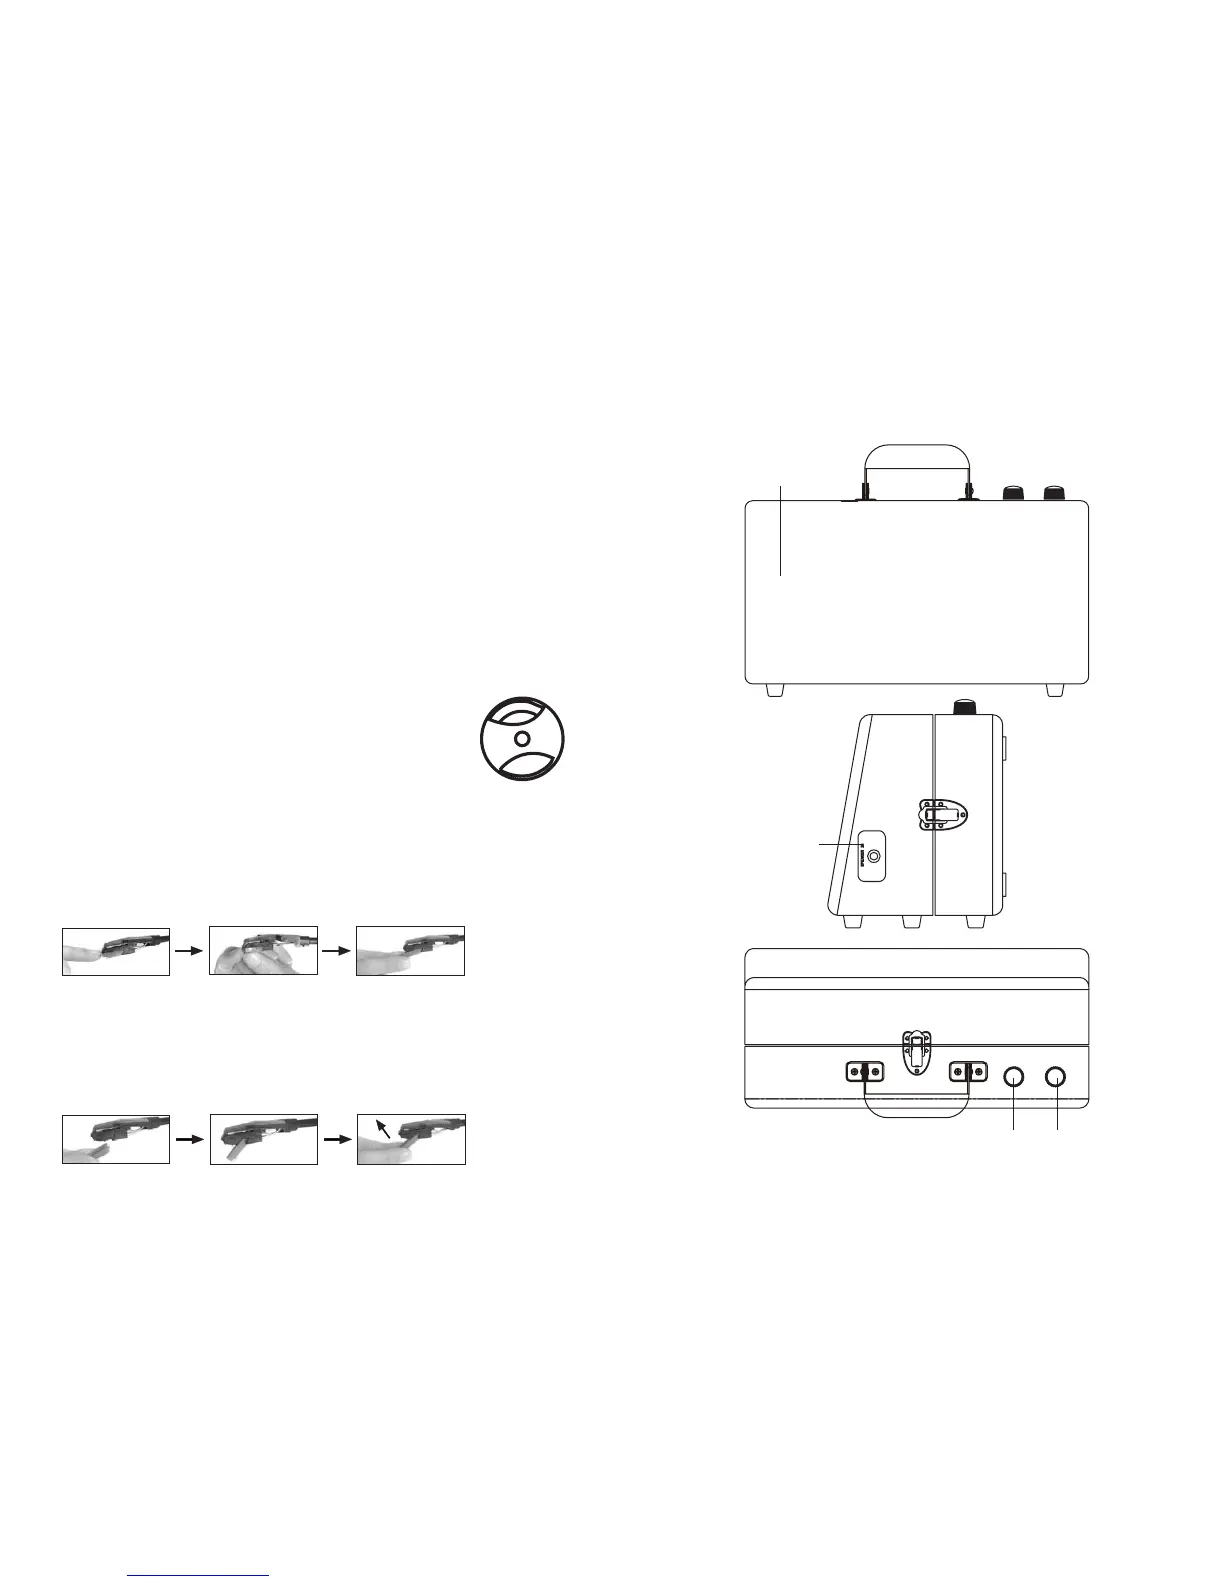
REMOVING THE NEEDLE HOLDER (OR STYLUS)
Gently pull down the tip of the stylus holder (1).
Pull the cartridge forward (2). Pull it out and remove it from the tone arm head (3).
FITTING A STYLUS CARTRIDGE
After following the “Removing the Needle Holder” instructions above, follow steps 1 to 4 below
to refit it:
1. Position the red stylus holder with the Sapphire stylus tip facing down.
2. Line up the tab at the back of the stylus holder with the tone arm cartridge (see picture 1).
3. Insert the stylus holder with its front end at a downward angle (see picture 2 below).
4. Lift the front end of stylus holder upward until it snaps into place.
LOCATION OF PARTS
SPEAKERS
SPEAKER IN JACK
ON-OFF SWITCH /
VOLUME CONTROL
TONE
CONTROL
TONE VOLUME
ON/
OFF
1
2
3
2
1
2
3
TURN UPWARDS
 Loading...