3
1.
pallet. Place the shipping box aside until the brick loading
2.
tool. These items are shipped on the top of the heater.
3. Remove the base (Figure 3) from the back of the heater. This
4. Remove the screws along the lower edge of the painted
front panel.
5. Pull the lower edge of the panel forward and unhook it from
the top panel. Carefully place the painted front panel aside
to avoid damage.
NOTE: No heater panel, with the exception of the painted front
panel and painted right side panel, can ever be removed
from the heater. Should any other exterior panel(s)
be removed, the heater must be taken out of service
permanently. All panels must be in place when operating
the heater.
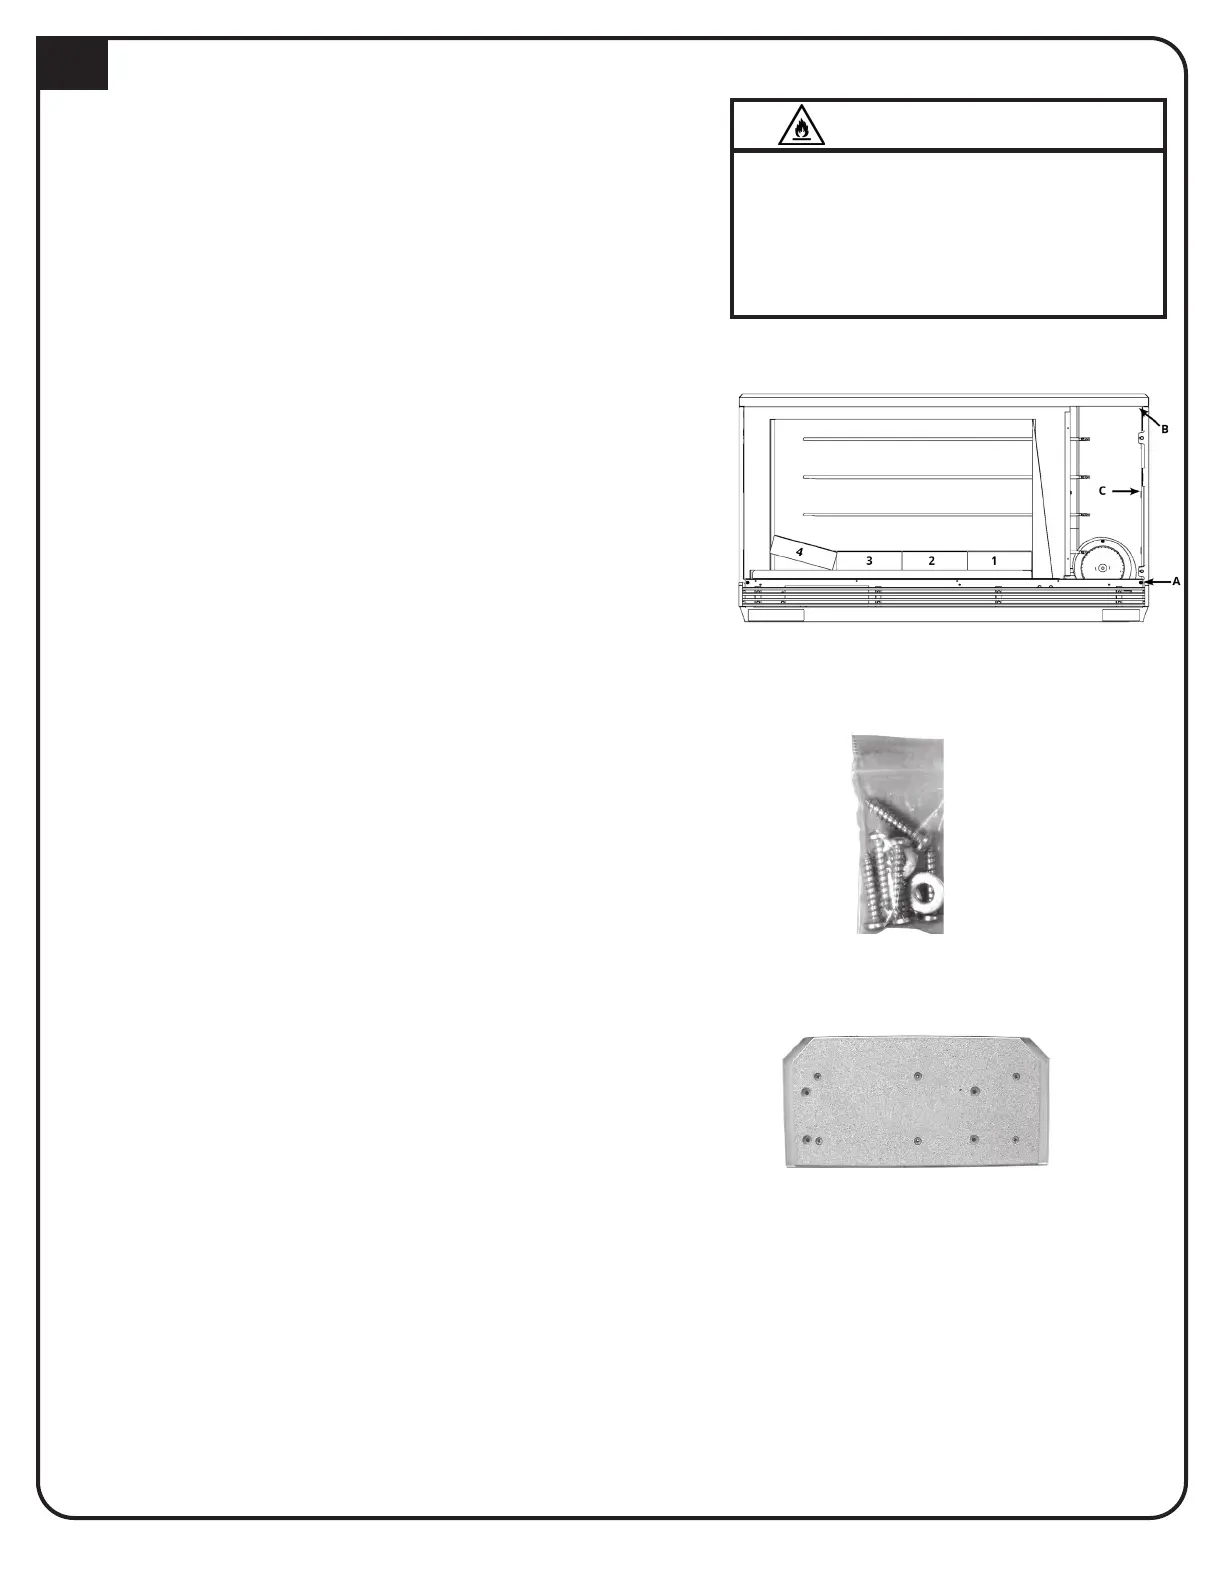
the screw located above the grill slats on the
lower right side of the heater, B) loosening the
screw located at the top right corner of the
electrical compartment, and C) pushing out the
right side panel. Refer to Figure 1.
7. Remove the security base hardware kit (Figure 2)
from inside the electrical compartment.
8.
installation, slightly elevate the bottom of the
heater.
provided in the mounting hardware package,
attach the security base to the painted bottom
panel.
NOTE: The angled corners of the security base will be towards the front of the heater and the painted side of the
security base faces up.
10.
energize the heater until installation is complete.
INSTALLATION
FIGURE 1
WARNING
Risk of re. Can cause injury or death.
Failure to secure the heater can cause
the heater to fall over. Properly secure
the heater by using the wall support
bracket to mount it to the wall.
5
FIGURE 2
FIGURE 3