3
MX3
POWERED STUDIO MONITOR PAIR
CONNECTIONS
1. Turn off power on all devices. Set all volumes to minimum.
Now it is safe to connect all devices and power up.
2. The MX3 uses a stereo amplifier and the right speaker is
passive. Connect the included speaker cable from the jack
labeled “output to right speaker” on the left speaker to the jack
labeled “input from left speaker” on the right speaker.
3. Turn on the power to all connected devices such as
computers, outboard gear and audio interfaces.
4. Turn on the power to your MX studio monitors by turning the
knob on the front of the active MX3 clockwise. The backlit
LED will light up to indicate it is on.
5. Play music or sound through your audio system and then
slowly increase the volume of the monitors to the desired
level.
6. When turning off your audio system, make sure to follow
these steps in reverse. You can choose to leave your volume
levels where you set them originally, so long as the output on
your mixer, audio interface or sound system outputs remains
the same as well.
FRONT PANEL
SPEAKER INPUT AND RESPONSE CONTROL
1
LEVEL CONTROL
Adjusts the output level of the speaker. When fully
counterclockwise, the speakers will be off. When turned to
the right, the speakers will be on and the backlit LED will light.
CAUTION
• Turning the power switch ON and OFF in rapid succession
can cause the device’s electronics to malfunction. Please
wait for 3 seconds or more after turning the power OFF
before turning it ON again.
• Even when the power switch is turned off, electricity is still
flowing to the product at a minimum level. When you are
not using the product for a long time, make sure to unplug
the power cord from the wall AC outlet.
2
STEREO MINI CONNECTOR
This connector is a 3.5mm stereo input that allows quick
connection of mobile devices such as computers, tablets
and phones. When this input is used, the input signal will
supersede the inputs plugged into the RCA connectors on
the rear panel.
3
HEADPHONE CONNECTOR
This connector is a 3.5mm stereo output used to connect
headphones when a quiet listening environment is needed.
When headphones are connected to this input, the sound
will be routed directly to the headphones and will not play
through the speakers.
NOTE: Refer to “Connection and Cable Types” on page 4 and 5
for more connector details.
4
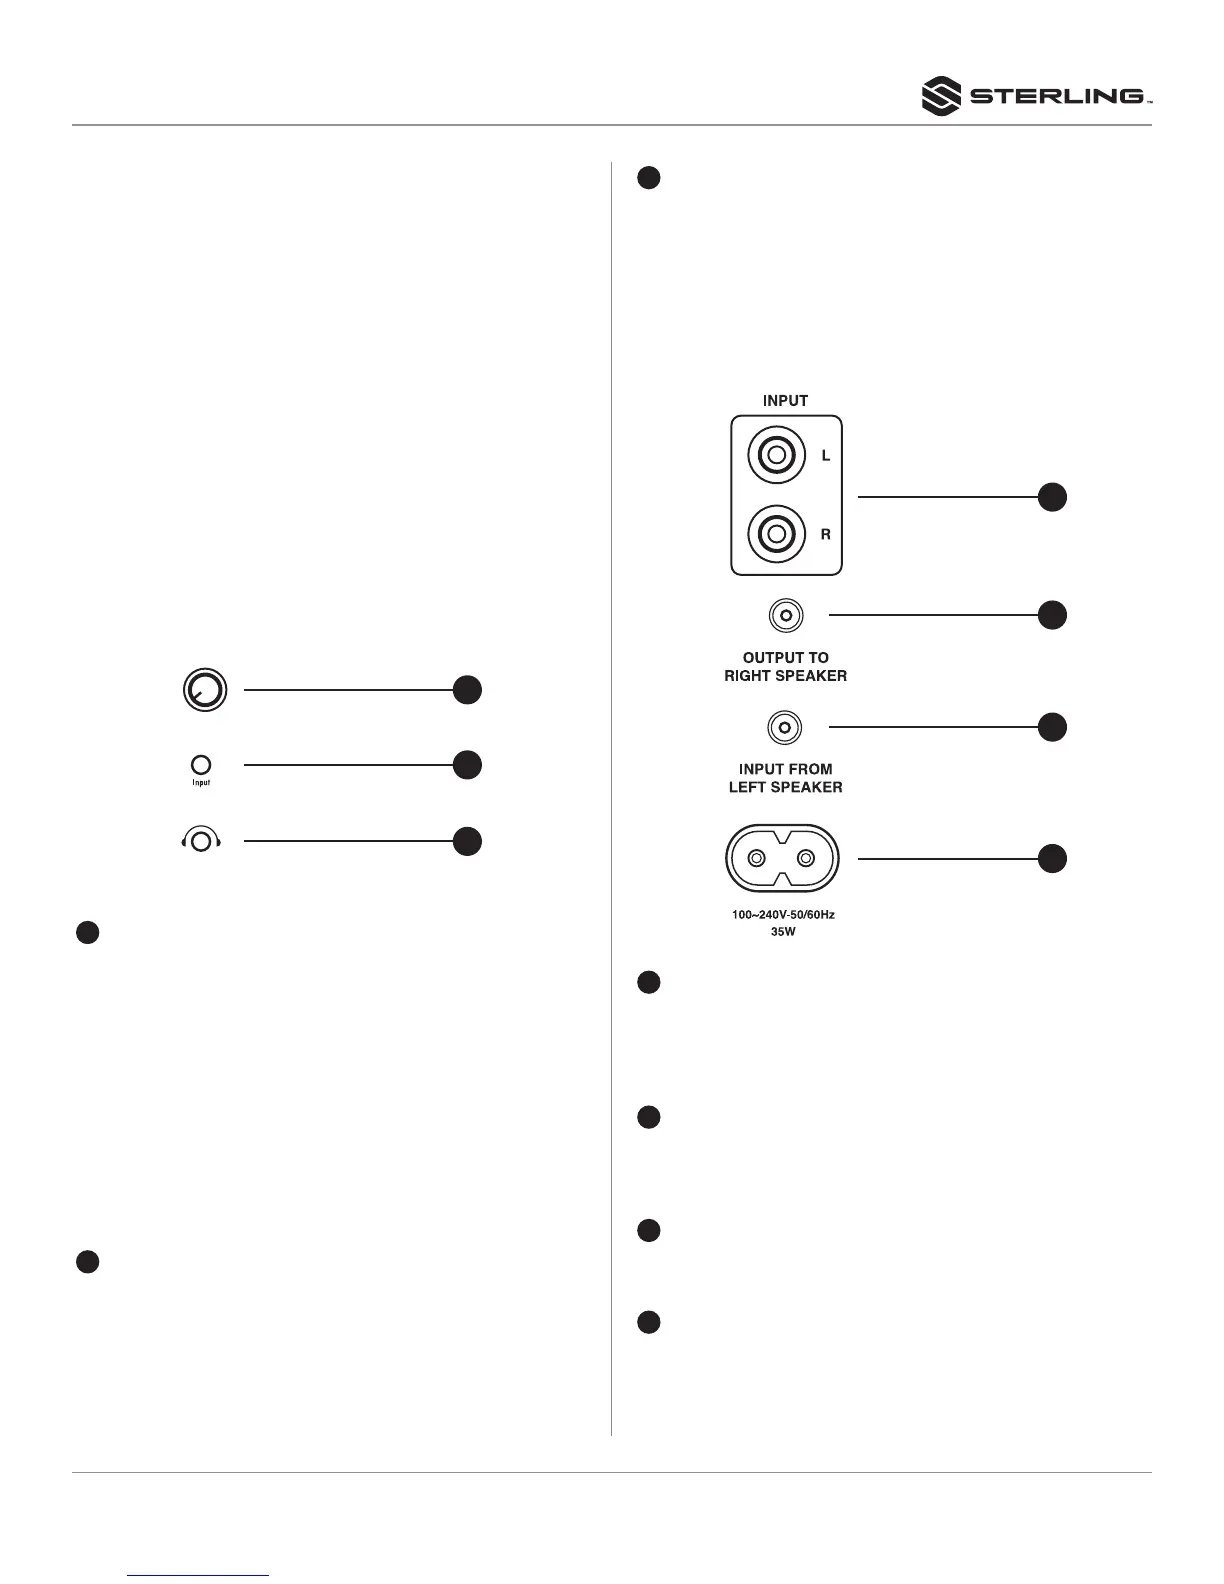
RCA INPUTS
These unbalanced stereo RCA inputs are the main inputs
and accept RCA connectors found on the included stereo
1/8” to dual RCA cables. These inputs accept the signal for
both the left and right speakers.
5
OUTPUT TO RIGHT SPEAKER
This is a mono output of the stereo amp located in the left
speaker that connects to the right speaker by use of the
included speaker cable.
6
INPUT FROM LEFT SPEAKER
This is a mono mini input on the right speaker that connects
to the output of the stereo amp on the left speaker.
7
AC IN CONNECTOR
Connect the supplied power cable here. First connect the
power cord to the speaker, then insert the power cord plug
into the AC outlet.
1
2
3
6
5
7
4

 Loading...