3
MX5
|
MX8
POWERED STUDIO MONITOR
CONNECTIONS
1. Turn off power on all devices. Set all volumes to minimum.
Now it is safe to connect all devices and power up.
2. Turn on the power to all connected devices such as
computers, outboard gear and audio interfaces.
3. Turn on the power to your MX studio monitors.
4. Play music or sound through your audio system and then
slowly increase the volume of the monitors to the desired level.
5. When turning off your audio system, make sure to follow
these steps in reverse. You can choose to leave your volume
levels where you set them originally, so long as the output on
your mixer, audio interface or sound system outputs remains
the same as well.
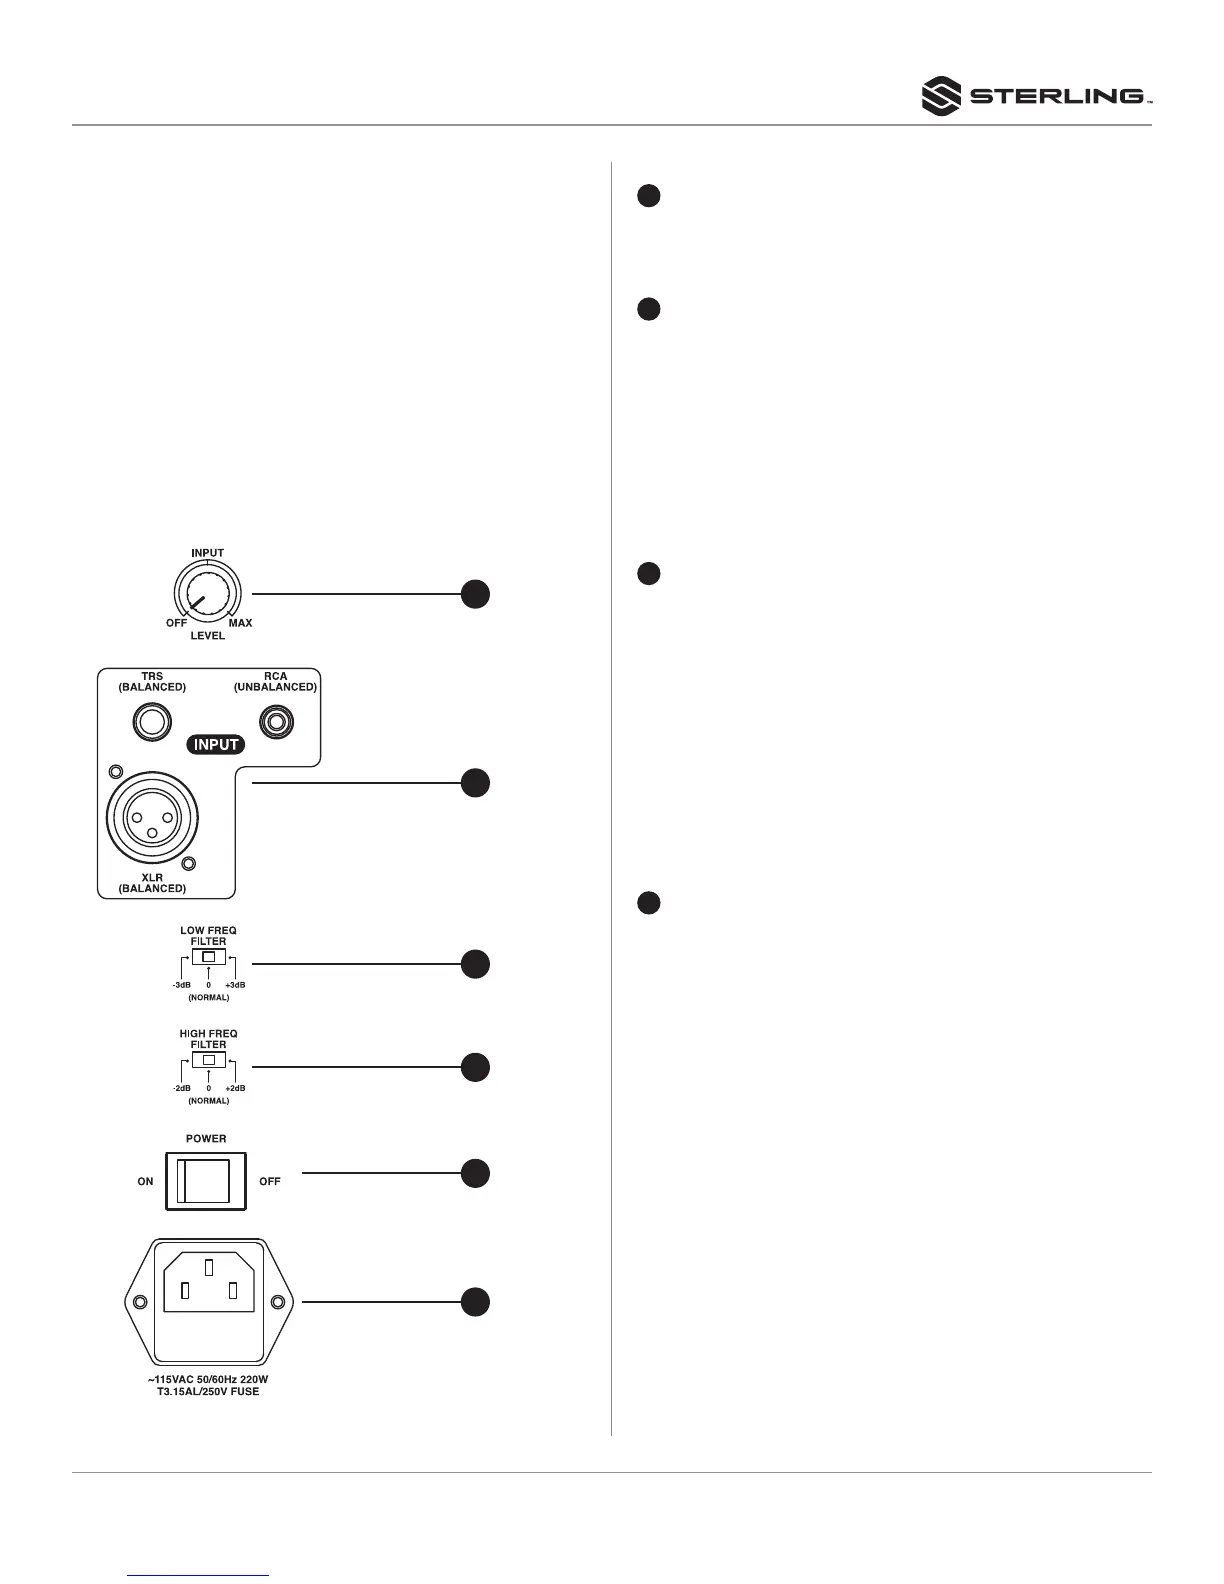
REAR PANEL
The MX switches and connectors are located on the rear panel,
as described below.
SPEAKER INPUT AND RESPONSE CONTROL
1
LEVEL CONTROL
Adjusts the output level of the speaker. When fully
counterclockwise, the speakers will be off. When turned to
the right, the speakers will be on and the backlit LED will light.
2
INPUT CONNECTORS
These connectors receive the input signal to the speaker.
Three input connectors are provided: one balanced
XLR connector, one balanced (TRS) phone jack, and an
unbalanced RCA connector.
NOTE: The XLR and phone jack input connectors can not be
used simultaneously. Use only one input connector at a time.
NOTE: Refer to “Connection and Cable Types” on page 4 and 5
for more connector details.
3
LOW FREQUENCY FILTER
This switch adjusts the low frequency performance of
the speaker by -3db or +3dB at 75Hz. The switch is in the
neutral position in the center at 0dB. The -3dB setting can be
used to compensate for increased bass response resulting
from the speaker being close to reflective surfaces in your
listening environment. With each adjacent reflective surface,
there is +3dB increase in low frequency response. So if the
speaker must be placed next to a wall, for example, there
will be a +3dB boost in low frequency performance which
can be accounted for by using the -3dB switch. You can also
choose to use the +3dB setting if you are using the speakers
primarily for listening rather than as reference monitors or if
you prefer more bass as part of your listening experience.
4
HIGH FREQUENCY FILTER
This switch adjusts the high frequency performance of the
speaker by -2dB or +2dB at 10kHz and above. This filter
can be used when compensating for listening environments
based on their reflective properties. Listening environments
with a large proportion of hard, reflective surfaces such as
concrete, brick or drywall tend to sound abnormally bright
or harsh in the high frequencies. The -2dB setting may be
helpful here. Rooms with a high proportion of absorptive
materials such as carpet or foam tend to sound duller. The
+2dB setting may be more appropriate. Try the low and high
frequency filters to determine which settings are correct for
your listening environment and personal preference.
1
2
3
4
5
6
 Loading...