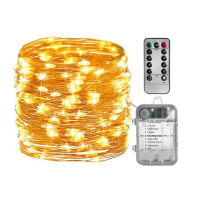
Indoor - Outdoor Stringlight
5021-GL40736-EN_120618
CUSTOMER SERVICE
1-888-867-6095 • customerservice@sternohome.com • www.sternohome.com
Ill. 1
READ, FOLLOW AND SAVE THESE INSTRUCTIONS
MODEL #GL40736
BATTERY INSTALLATION (ill. 1)
Your stringlight requires three (3) AA alkaline 1.5V batteries (not included) to achieve
maximum battery life.
Clean the battery contacts and also those of the device prior to battery installation.
1. To open battery compartment, push clip up.
2. Insert three (3) AA alkaline batteries into the compartment in the proper polarity as shown.
3. Close the battery compartment.
HOW TO OPERATE THE STRINGLIGHT USING BATTERY BOX (ill. 2)
Press the button on the battery box to select from 8 pre-programmed sequences.
HOW TO OPERATE THE STRINGLIGHT AND TIMER USING
REMOTE CONTROL (ill. 3)
“TIMER” MODE”
Push “TIMER” button to activate the timer. The stringlight will automatically turn off after
6 hours.
If the ON or OFF button is pressed, the timer function will be reset and the lights will
not turn on at the desired time. To re-start the timer function, press the timer button at the
desired time to re-initiate this setting.
Note: If the “ON” or “OFF” button on either remote or battery box is pressed, the timer
function will be reset and the lights will not turn on at the desired time.
“ON/OFF” MODE
1. Push the “ON” button to turn stringlight on.
2. Choose a sequence mode by pressing button 1 to 8.
3. Push the “+” or “–” button to adjust the light intensity
4. Push the “OFF” button to turn stringlight off.
FIND A LOCATION FOR THE BATTERY BOX (ill. 4)
Note: Do not place the controller directly on the ground as water could penetrate if it is
soaking in water.
1. The controller is designed for outdoor use and is weather resistant.
2. Make sure that the controller can be installed in a location that will allow a direct
line of sight with the remote to operate properly.
3. Any objects between the front of the control box and the remote control will
reduce the range.
4. Mount the controller in the best location and do not place it close to the electrical outlet.
Button
Ill. 3
Ill. 4
Ill. 2
a
Battery box
8 METRES/26 FEET
MAXIMUM
4 MÈTRES
MAXIMUM
4 METROS
MÁXIMO
Bushes
r
Battery box