EasyManua.ls Logo

STERWINS 110C EPW.3 User Manual

STERWINS 110C EPW.3
20 pages
To Next Page IconTo Next Page
Page #1 background imageLoading...
Page #1 background image
110C EPW.3
EAN CODE : 3276000229698
Traduction de la version originale du mode d’emploi / Traducción de las Instrucciones originales / Tradução das Instruções Originais /
Traduzione delle istruzioni originali / Μετάφραση των πρωτότυπων οδηγιών / Tłumaczenie instrukcji oryginalnej / Перевод
оригинала инструкции / Переклад оригінальної інструкції / Traducerea instrucţiunilor originale / Original Instructions
2016/09
FR
ES
PT
IT
EL
PL
RU
UK
RO
EN
Notice de Montage -
Utilisation - Entretien
Instrucciones de Montaje,
Utilización y Mantenimiento
Instruções de Montagem,
Utilização e Manutenção
Istruzioni per il Montaggio,
l'Uso e la Manutenzione
Εγχειρίδιο συναρμολόγησης,
χρήσης και συντήρησης
Instrukcja Montażu,
Użytkowania i Konserwacji
Руководство По Сборке
и Эксплуатации
Керівництво По Збірці
і Експлуатації
Manual asamblare,
utilizare și întreținere
Assembly - Use -
Maintenance Manual
Question and Answer IconNeed help?

Do you have a question about the STERWINS 110C EPW.3 and is the answer not in the manual?

STERWINS 110C EPW.3 Specifications

General IconGeneral
Max Pressure110 bar
Flow Rate390 L/h
Power1400 W
Voltage230 V
Frequency50 Hz
Hose Length5 m
Water Flow390 L/h

Summary

Product Components and Safety Symbols

Component Identification (A-J)

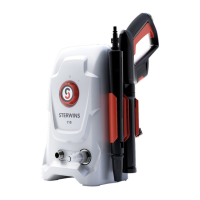
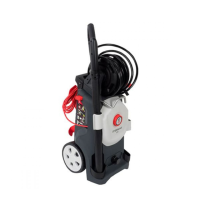
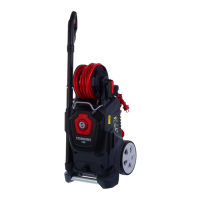
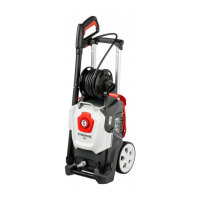
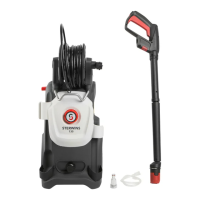
Identifies all parts of the pressure washer with letter labels for easy reference.

General Safety Icons

Displays and explains common safety symbols used throughout the manual.

Initial Setup and Preparation

Connecting the High-Pressure Hose

Step-by-step guide to connecting the high-pressure hose to the main unit.

Attaching Accessory G

Instructions for inserting accessory G into the pressure washer unit.

Assembly of Spray Components

Assembling the Spray Gun and Lance

Detailed steps for connecting the spray gun, lance, and nozzle.

Securing the Nozzle

How to properly attach the spray nozzle to the lance.

Connecting Water Supply

Connecting Hose to Spray Gun

Guide to connecting the high-pressure hose to the spray gun handle.

Connecting Inlet Hose to Tap

Steps for connecting the water inlet hose to a garden tap.

Finalizing Water and Unit Connection

Connecting Water Hose to Unit

Connecting the water inlet hose to the pressure washer machine.

Connecting Water Inlet Connector

Attaching the water connector (E) to the pressure washer inlet (A).

Starting the Pressure Washer

Powering On Procedure

Step-by-step instructions for turning on the pressure washer.

Using the Spray Gun

Demonstrates the correct way to operate the spray gun during use.

Operating Controls and Shutting Down

Trigger Lock and Unlock

Explains how to lock and unlock the spray gun trigger for safety.

Turning Off the Unit

Safe procedure for powering down the pressure washer.

Routine Maintenance and Cleaning

Cleaning the Lance and Nozzle

Instructions for cleaning the spray lance and nozzle assembly.

Cleaning the Water Inlet Filter

Guide to cleaning the filter at the water inlet.

Component Inspection and Care

Checking Components for Wear

Visual inspection of parts for damage or wear.

Preparing for Winter Storage

Disconnecting and Draining System

Steps to disconnect components and drain residual water.

Adding Anti-Freeze Solution

How to add anti-freeze to protect the unit from freezing.

Winterization Procedure

Draining Remaining Water

Ensuring all water is removed from the internal components.

Circulating Anti-Freeze

Running the unit to distribute the anti-freeze throughout the system.

Finalizing Winter Storage

Powering Down After Anti-Freeze

Safely shutting down the unit after the anti-freeze process.

Post-Winterization Checks

Performing final checks after completing winterization.

Storing the Pressure Washer

Disconnecting Hoses from Unit

Detaching the high-pressure hose from the machine and gun.

Proper Storage Guidance

Recommendations for storing the pressure washer safely.

Important Safety Information

Safety Symbols and Meanings

Explains the various safety icons used in the manual.

Manufacturer and Warranty Details

Provides company contact information and warranty terms.

Related product manuals