13
The solder joints you’ll make on the circuit boards
are very small, and too much heat can damage the
board. The idea is to make joints quickly, without scorching the holes.
SOLDERING
Here’s a few more
soldering tips that
might be helpful:
• Keep your soldering tip
clean by wiping it often on
a damp sponge.
• Also keep it tinned by
occasionally melting a little
solder onto it.
• Don’t blow on the hot
solder or touch anything
until the joint has cooled
completely. A good solder
joint is shiny – a sign that it
was left to cool undisturbed.
• Plan so each joint is only
soldered once. Resoldered
joints are messy and more
likely to fail.
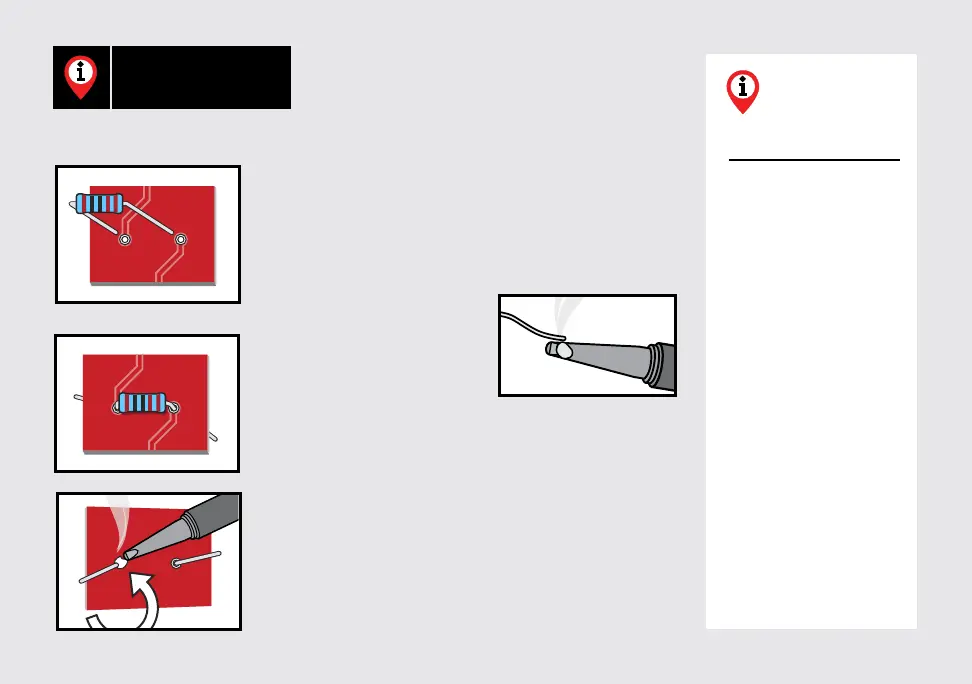
1. Hold components in place for soldering by
threading the leads through the board and bending
them apart on the reverse side. You will be making
your solder joints on the reverse side of the board.
2. Tin the iron by melting a
small amount of solder onto
the tip of the iron.
3. Insert the tip into the hole and let it heat for 4-5
seconds before touching it with solder. This heats the
contact enough for the solder to ow nicely without
damage. Feed the solder to the hole, not the iron, and
you don’t need much solder, just enough to ll the
holet. Keep the iron on the connection for a second
longer; this pause gives time for all of the ux to cook
out of the joint. After the joint has cooled, trim away
the excess lead wire.
14
 Loading...