ORIGINAL INSTRUCTIONS
8
EN
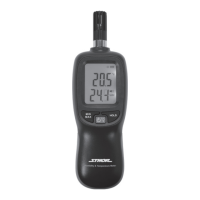
Pressing and holding the power switch for approx. 2 seconds will result in turning off the meter.
The meter will display “OFF” and then turn off the display. To reduce battery consumption, the
meter will turn off automatically after approx. 15 minutes from the last pressing of the button.
Pressing the MIN/MAX button will result in displaying the maximum measurement value with
the MAX mark and another pressing of this button will lead to displaying the minimum value
with the MIN mark. Pressing this button again will cause returning to the instantaneous value
measurement mode.
Pressing the HOLD button will save the measurement value displayed at the moment on the
display. In this mode, the HOLD mark will also be visible on the display. Press the HOLD but-
ton again to return to the continuous measurement – the HOLD mark will disappear from the
screen.
After turning on the meter, pressing and holding the HOLD button will cause entering the set-
tings mode. Press this button again to change the temperature measurement unit and auto-
matic turn-off settings.
The unit and temperature measurement mode will be changed by subsequent presses of the
MIN/MAX button – the display will show the “unit” indication. The user can set degrees Celsius
(
O
C), degrees Fahrenheit (
O
F), dew point measurement mode in degrees Celsius (
O
C DP) and
degrees Fahrenheit (
O
F DP), as well as the wet bulb temperature measurement mode in de-
grees Celsius (
O
C WB) and degrees Fahrenheit (
O
F WB). The mode selection is confi rmed by
displaying the mark on the display.
When the HOLD button is pressed again, the display will show “OFF” and it will only be possible
to deactivate or activate the automatic turn-off . The meter operation in the automatic turn-off
mode is indicated by a clock symbol on the display.
Press and hold the HOLD button to exit the settings mode and return to the measurement
mode.
After turning on the meter, pressing and holding the MIN/MAX button will result in entering the
measurement results save mode. The display will show the READ indicator. The next press
of the MIN/MAX button will start the measurement results save mode. The display will show
a fl ashing REC indicator. The results are saved automatically every 10 seconds. Pressing the
MIN/MAX button again will stop saving the measurement results. Press and hold the MIN/MAX
button to return to the instantaneous value measurement mode.
The meter can save up to 1000 measurement results.
Reading the stored data is possible after entering the measurement mode – the display will then
show the READ indicator. Pressing the HOLD button will result in displaying the subsequent
saved measurement results. If the “null” indication is displayed in this mode, it means that no
measurement results have been saved in the meter.
The measurement results will be deleted if the HOLD button will be pressed and held in the
reading mode. The display will show the DEL indicator and then “null”. It is only possible to
delete all the saved measurement results at the same time.
The meter has a battery charge indicator. If the battery symbol on the display is full, the battery
is fully charged. Gradual discharging of the battery is indicated by the reduction of the number
of icons in the battery symbol. If the battery symbol is empty, the batteries must be replaced
with a new set.
Maintenance and storage
The product does not require any special maintenance. Clean the housing and measuring
sensor with a soft and slightly damp cloth. Then wipe the product dry or leave it to dry. Store
the product in the conditions specifi ed in the table. Do not store the product together with other
tools, e.g., in a toolbox. Protect the product from moisture, dust, and direct sunlight.
 Loading...