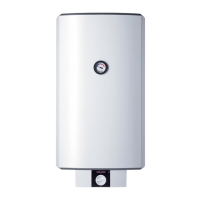
10 | SBP 100 classic www.stiebel-eltron.com
INSTALLATION
Preparations
7. Preparations
7.1 Installation site
Always install the appliance in a room free from the risk of
frost.
Ensure the floor has sufficient load bearing capacity and
evenness (see chapter "Specification/ Data table").
Observe the room height and height when tilted (see chapter
"Specification/ Data table").
Minimum clearances
≥100
≥100
≥400
≥100
≥800
D0000056166
8. Installation
8.1 Positioning the equipment
Use the adjustable feet provided to compensate for any uneven-
ness in the floor.
Undo the 3screws from the non-returnable pallet.
Tilt the appliance and screw the 3adjustable feet provided
into the appliance.
Lift the appliance off the pallet.
When installing, observe minimum clearances (see chapter
"Preparations/ Installation site").
8.2 Heating water connection
!
Material losses
Carry out all water connection and installation work in
accordance with regulations.
Observe the heat pump operating and installation instructions
when making the heating water connection.
Oxygen diffusion
!
Material losses
Avoid open heating systems and plastic pipes in under-
floor heating systems which are permeable to oxygen.
In underfloor heating systems with plastic pipes that are per-
meable to oxygen and in open vented heating systems, oxygen
diffusion may lead to corrosion on the steel components of the
heating system (e.g. on the indirect coil of the DHW cylinder, on
buffer cylinders, steel heating elements or steel pipes).
!
Material losses
The products of corrosion (e.g. rusty sludge) can settle in
the heating system components and can result in a lower
output or fault shutdowns due to reduced cross-sections.
9. Commissioning
9.1 Initial start-up
Fill and bleed the appliance (see chapter "Specification/ Di-
mensions and connections").
Carry out a tightness check.
9.1.1 Appliance handover
Explain the function of the appliance to users and familiarise
them with its operation.
Make the user aware of potential dangers, especially the risk
of scalding.
Hand over these instructions.
9.2 Recommissioning
See chapter "Commissioning/ Initial start-up".
10. Shutdown
Drain the appliance. See chapter "Maintenance/ Draining the
appliance".
11. Maintenance
No special maintenance is required for the appliance. A regular
visual check is sufficient.
11.1 Draining the appliance
WARNING Burns
Hot water may escape during draining.
If the appliance needs to be drained for maintenance or to protect
the whole installation when there is a risk of frost, proceed as
follows:
Drain the appliance using the appliance drain connection
(see chapter "Specification/ Dimensions and connections").
 Loading...