12
AFTER SALES SUPPORT
1300 886 649
info@tempo.org
AUS
MODEL: STR-CD50 PRODUCT CODE: 700688 04/2020
Wall-mounted installation
CAUTION! This appliance is heavy. Ensure you have at least one helper to move and
install it. Move cautiously when moving the dryer. Do not grasp any salient parts of the
machine. Do not attempt to lift it by the door.
WARNING! Ensure the dryer is unplugged from the power supply before installation.
The plug must be accessible after installation.
• To mount this dryer directly to your laundry wall, please use the supplied wall-
mounting kit, which contains installation hardware and an additional printed control
panel sticker (if required).
• Additional tools required are a drill with an M10 drill bit and a Phillips head
screwdriver. You will also need someone to help you lift the dryer onto the wall.
Clearances
If mounting above a washing machine, allow sufficient room to open the lid of a top
load washer. You will need at least 5cm space between the top of the dryer and the
ceiling for ease of installation. This dryer is not suitable for placement directly on top
of a washing machine.
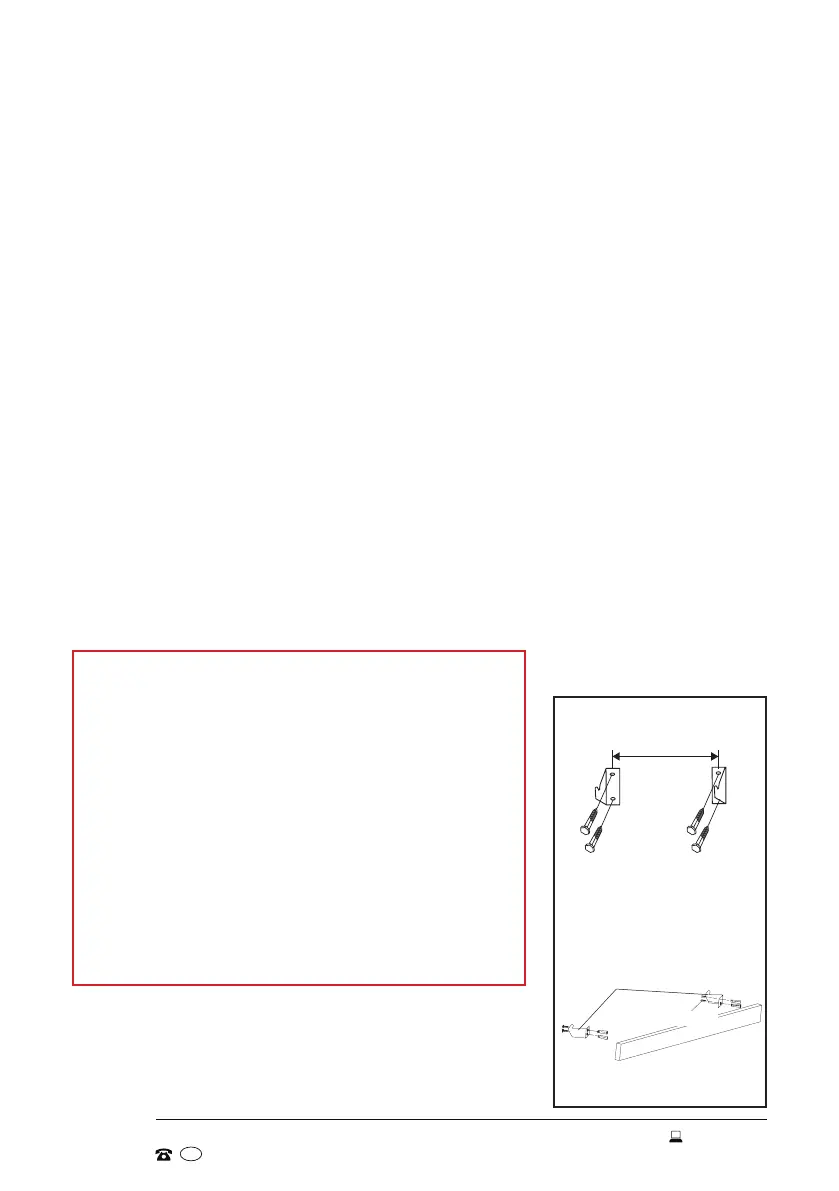
Wall-mounting the appliance
Determine the dryer position on the wall and mark the required bracket position, 537mm
apart, using the wall brackets as a template for the screw holes (Fig. 1).
Installation (Cont.)
IMPORTANT!
• Your wall must be structurally sound and sturdy
enough to support the weight of the dryer with a
full load (40kg). If in doubt, consult a builder.
• To mount the appliance to a solid (brick or
concrete) wall, affix the brackets to the wall using
the supplied expansion bolts.
• To mount the appliance to a plasterboard wall,
affix the brackets securely to a timber stud using
the supplied 50mm wood screws 10mm Ø and
wall plugs.
• Installation hardware is supplied for both wall-
mounting options.
NOTE: Ensure the screw holes are in an appropriate
position: they must not overlap with any power outlets,
cabling or taps.
537mm
Ensure brackets are
securely fastened. Fit
timber slats, if necessary.
Fig. 1
Hanging brackets
Timber (not included)