13
AFTER SALES SUPPORT
1300 886 649
info@tempo.org
AUS
MODEL: STR-CD50 PRODUCT CODE: 700688 04/2020
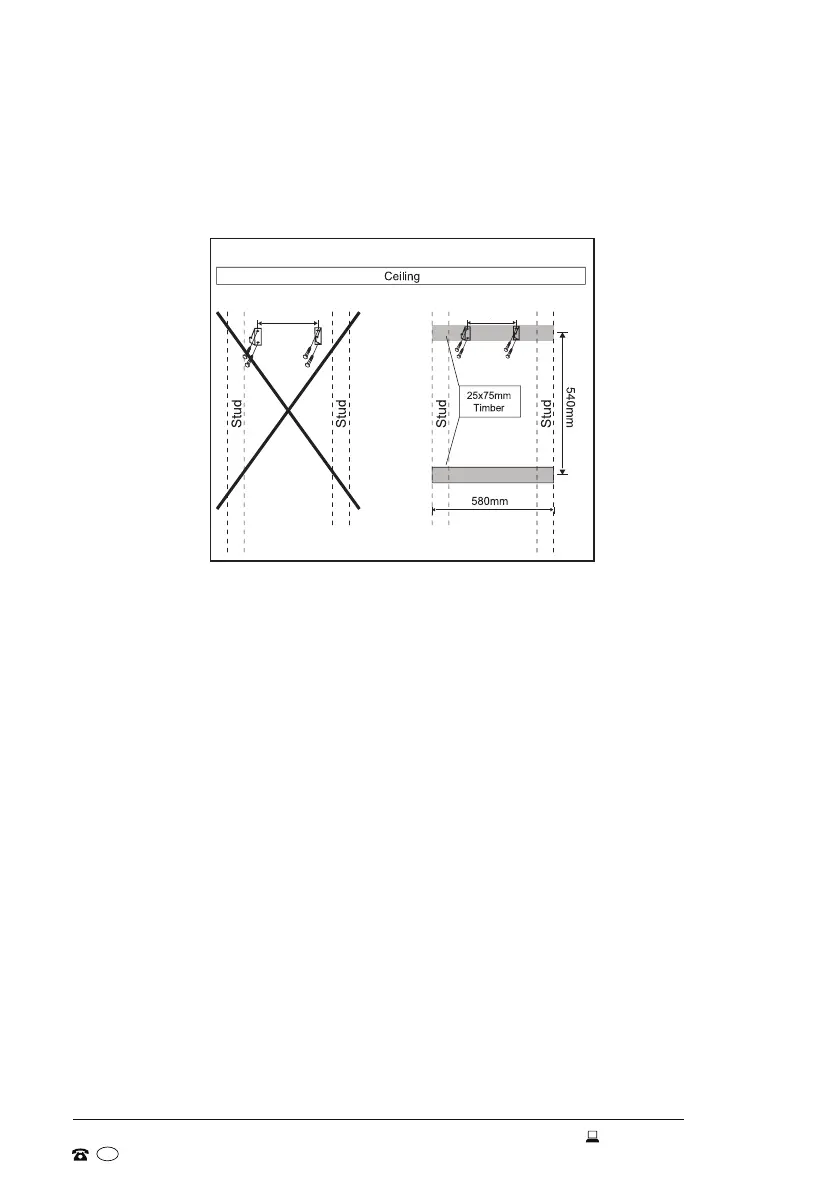
Wall-mounting to a plasterboard wall
1. If mounting to a plasterboard wall and the space between two timber studs is too
wide, fit a timber slat between the studs to mount the brackets securely onto the
studs (Fig. 2).
537mm
537mm
Fig. 2
Installation (Cont.)
2. Drill four holes in the timber studs (slat) and insert the wall plugs into the holes.
3. Align the two hanging brackets with the screw holes over the wall plugs and fasten
them securely to the wall using the timber screws.
Wall-mounting to a solid (brick or concrete) wall
1. If mounting to a solid wall, drill four 70mm deep holes for the expansion bolts using a
drill with a Ø10mm drill bit.
NOTE: Use a special Ø10mm drill bit for use on tiles if installing the appliance onto a
tiled wall.
2. Attach the brackets to the wall using the four expansion bolts. The expansion bolts
consist of a bolt, an expansion tube, a nut and washers. First insert a bolt and
expansion tube into each of the four drilled holes and then thread a nut onto the end
of the bolts. To prevent the thread being damaged, do not expose the end-thread of
the bolt. Then hammer the four bolts into the holes.
3. After you have hammered the bolts into the wall, remove the nut and washers.
Attach the hanging brackets to the bolts, then put the washers back on: first the flat
washer, then the spring washer, then the nut.
4. Tighten the brackets with a socket or a wrench.