28
AFTER SALES SUPPORT
1300 886 649
info@tempo.org
AUS
MODEL: STR-PEO PRODUCT CODE: 10927 09/2019
• Oven exterior: Clean the oven exterior with a wrung out soft cloth or
sponge, dampened with warm soapy water. Do not any abrasive cleaners.
• Oven door: If the glass oven door is splattered with fat or other food
residues, remove them with a cloth dampened in warm, soapy water.
Then use a dry, lint-free cloth to remove any streaks. Do not use harsh or
abrasive cleaners or sharp metal scrapers to clean the oven door glass
since they can scratch the surface, which may result in shattering of the
glass. You may remove the door for thorough cleaning, if required; see the
next pages for instructions.
• Oven cleaners: If you use any form of oven cleaner on your appliance, you
must check with the manufacturer of the cleaner that it is suitable for use on
your appliance. Any damage caused to the appliance by a cleaning product
will not be covered under your warranty.
Other Useful Information (Cont.)
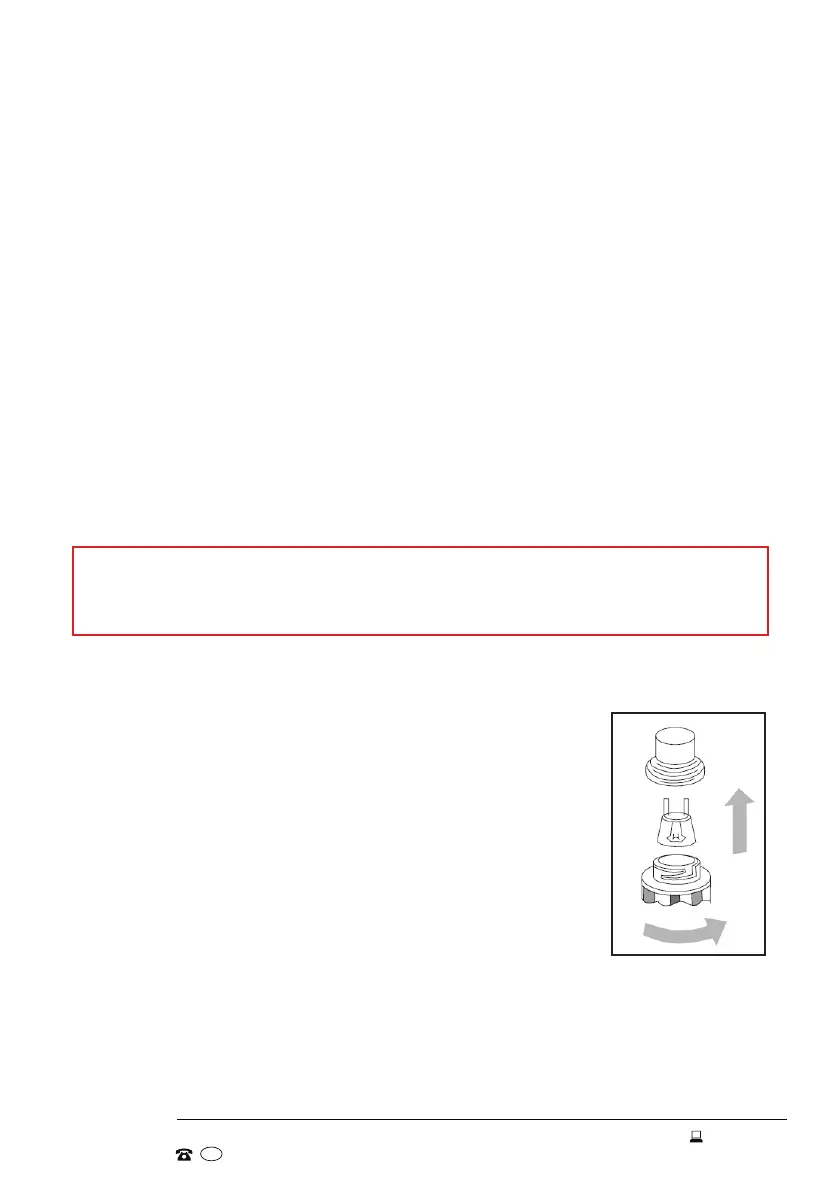
Replacing the oven light bulb
IMPORTANT!
To avoid the possibility of electric shock, make sure the oven is switched off before
removing or replacing the oven light bulb.
When the lamp in the oven fails and needs replacement, proceed as follows
(Fig.9). (Bulb replacement is not covered by warranty.)
• Remove the oven rack and baking tray and the side
rack that is on the same side as the oven light.
• Unscrew and remove the protective lamp cover. Wash
the lamp cover and wipe it dry.
• Unscrew the light bulb and carefully remove it from the
socket. Replace the bulb with a new high-temperature
bulb (300°C) of the same size and wattage (G9, 230V,
25W). Do not use any other type of bulb.
• Screw the bulb back in, making sure it is properly
inserted into the ceramic socket.
• Screw the lamp cover back into position.
Fig. 9
 Loading...