SUPPORT@STOREITCOLD.COM
2020 © Store It Cold, LLC. 23 Rev 2020-8A. All Rights Reserved.
INSTALLATION OF OUTDOOR PACKAGE (OUTDOOR UNITS ONLY)
Your walk-in cooler panels, door, screeding, hardware, or outdoor package might differ in design or
looks from the ones shown in this manual and the installation video.
Electrical Installations and other penetrations should be done AFTER your outdoor membrane has
been installed. Make absolutely no roof penetrations for electricity or other services. All
penetrations on outdoor coolers must go through the side walls on outdoor coolers.
Install the A/C hood before your roof membrane.
Included items of your outdoor package:
1. A/C hood
2. Door cap - rain gutter
3. Roof Membrane – pre-cut about 1 ft larger on each side
4. Membrane Trim - Flat bars
5. Installation Hardware:
a. black long screws: For Truss-Plate anchors and for Trim
b. S/S or hex sheet metal screws: For A/C hood
c. Truss Plates (only to be used in coolers with a side equal or greater than 10 ft)
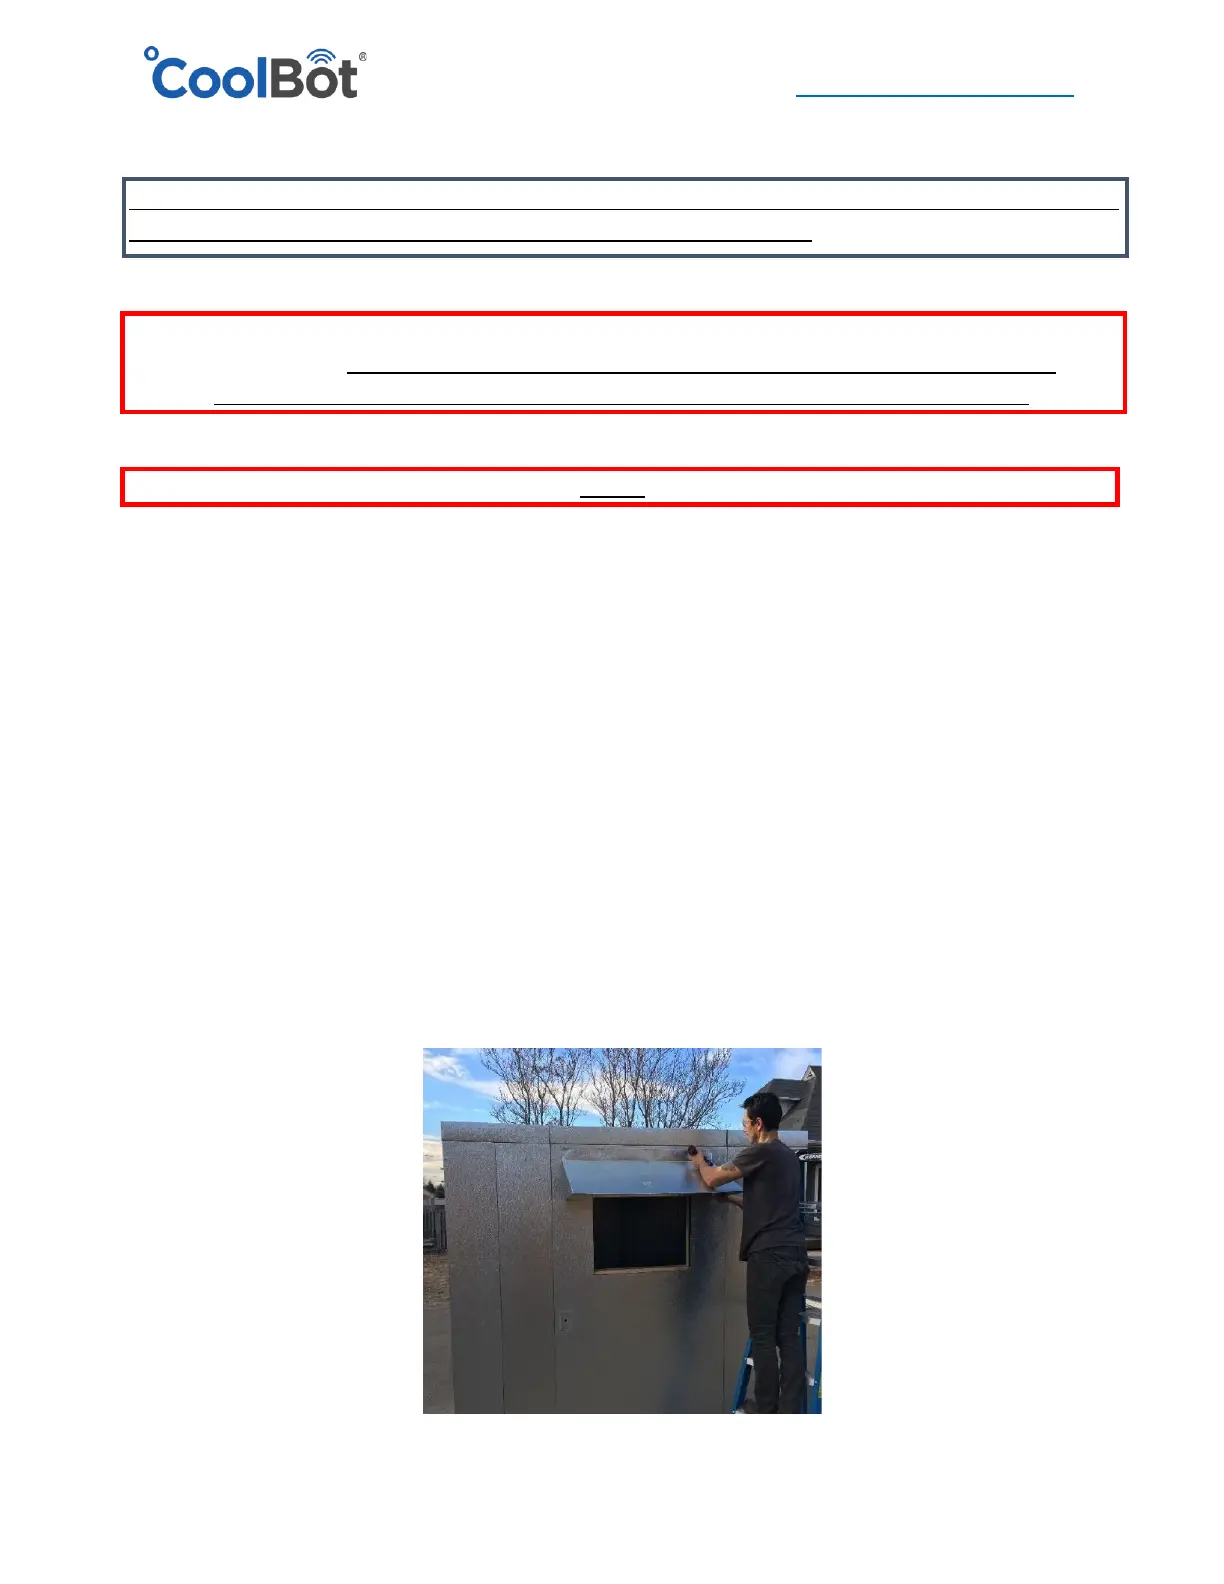
RAIN HOOD (OUTDOOR UNITS ONLY)
Align the top edge of the hood about 2” to 3” below the horizontal joint in between the ceiling
panel and the wall panel. Make sure it’s center in position with respect to the A/C opening. Screw
in place with the self-drilling metal screws.