If you choose to vary from these instructions
your warranty will be impaired.
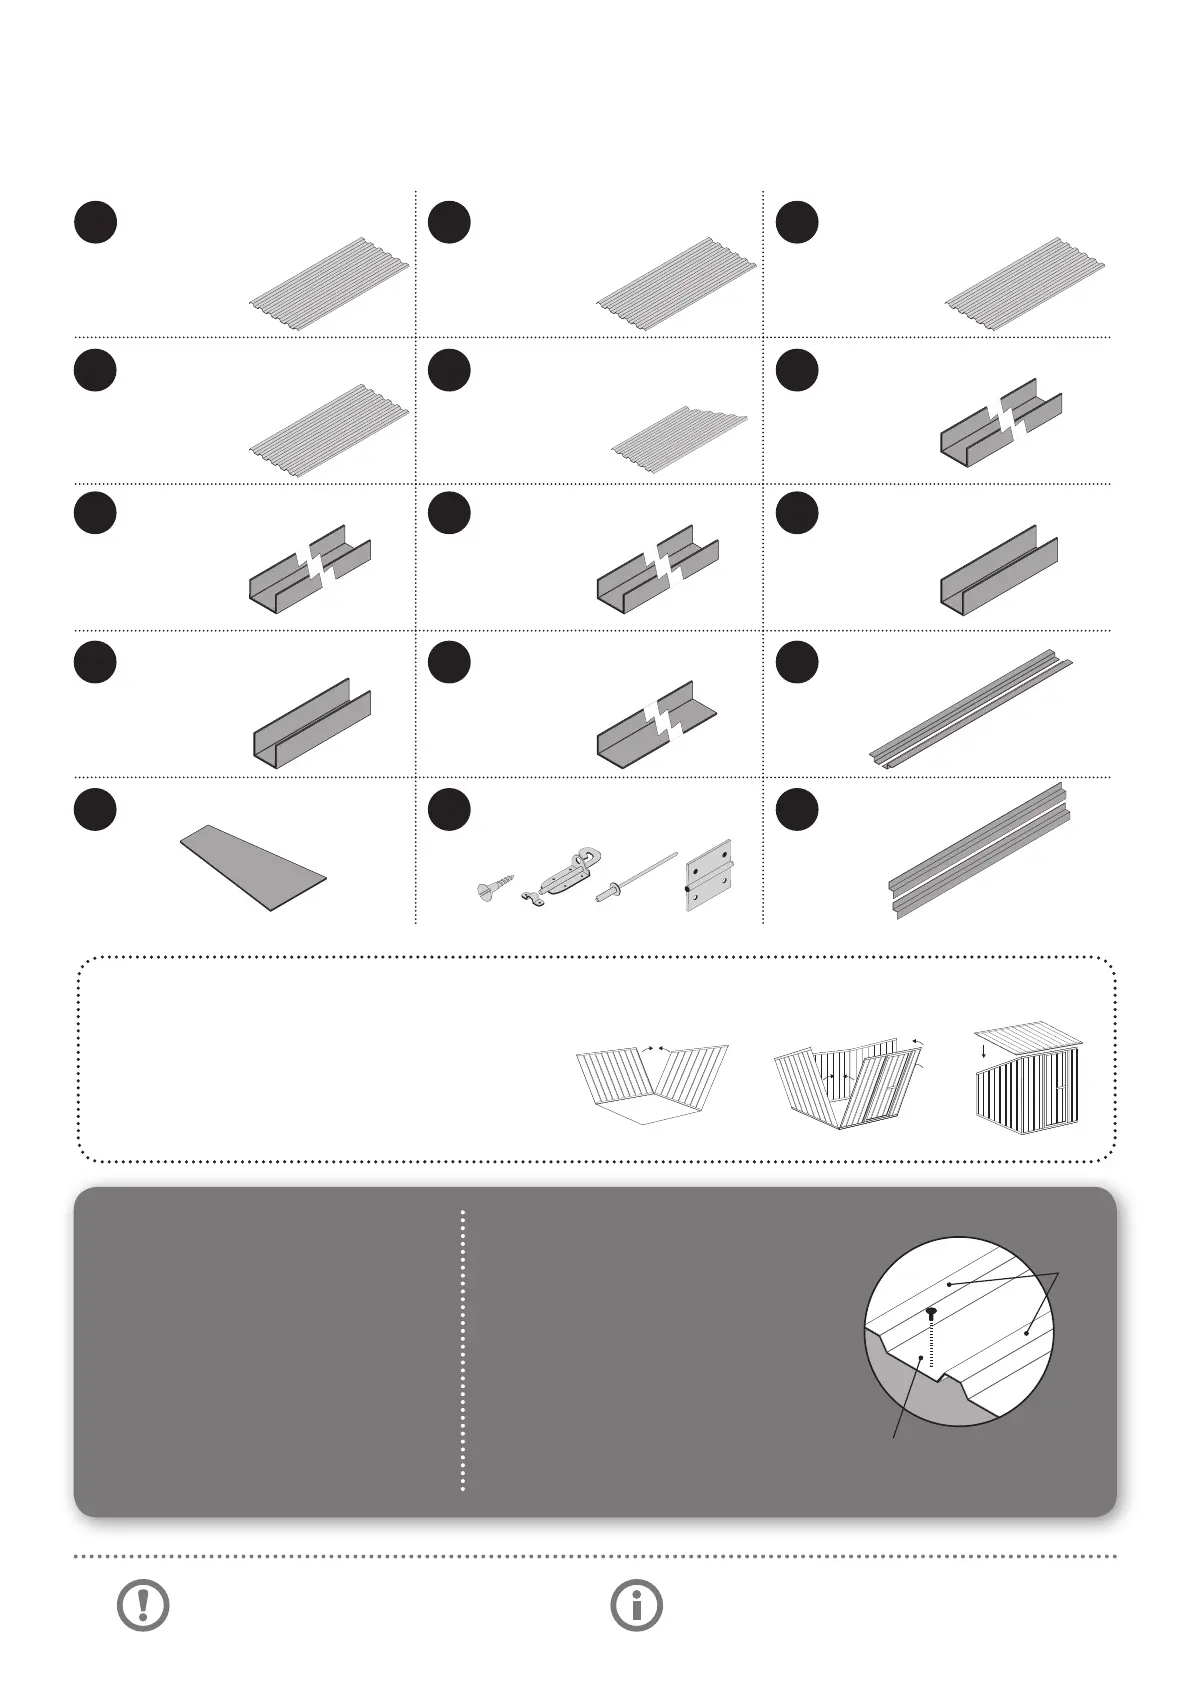
1
1 x 1920 x 780mm door sheet. 2 x 1980 x 740mm sheets
(Beside door - front)
3 x 1830 x 780mm (back wall)
3 x 1980mm x 780mm sheets
(roof)
4 and 2 half x sloping sheets
(side walls, 2
1/2
left & 2
1/2
right)
6 x 2255mm “U” channels for
front, back
and roof.
4 x 1785mm “U” channels
for side walls.
2 x 1920mm “U” channels for
door sides.
2 x 793mm “U” channels (door
spacers).
2 x 780mm “U” channels (door
top and bottom).
2 x 1980mm “L” ashings (roof
to side ashings).
2 x 1980mm “Z”
door jambs.
(front)
1 x 310mm door plate. 1 x pack screws with padbolt.
1 x pack of rivets and hinges.
Door bracing.
Components checklist
Please check the parts carefully and advise immediately if any are damaged or missing.
A
B
C
D E F
G
J
M
H
K
N
I
L
O
Building your shed
The basic task is to join the sheets together to
form your panels, and t the channels to the top
and bottom of these panels. They will then join
together to form your shed (diagram 1, 2 and 3).
Pan
Rib
Important
• Remove the swarf (drill lings) from
the panels as you assemble them.
• All components are cut to length. Do
not cut any parts unless instructed.
• Fixings through the inside of the
channels into the sheeting are just
as important as xings from the
outside.
Ribs and Pans
• Generally most xings are spaced at
300mm apart.
• Keep the xings in the pans as close to
the ribs as possible for added strength.
• Ribs will always protrude to the outside
of the shed.
• Extra internal xings are strongly
recommended in high wind areas.
diagram 1 diagram 2 diagram 3
If you need advice, call us FREE on 0800 807 433
or email us at info@storite.co.nz
 Loading...