If you choose to vary from these instructions
your warranty will be impaired.
4
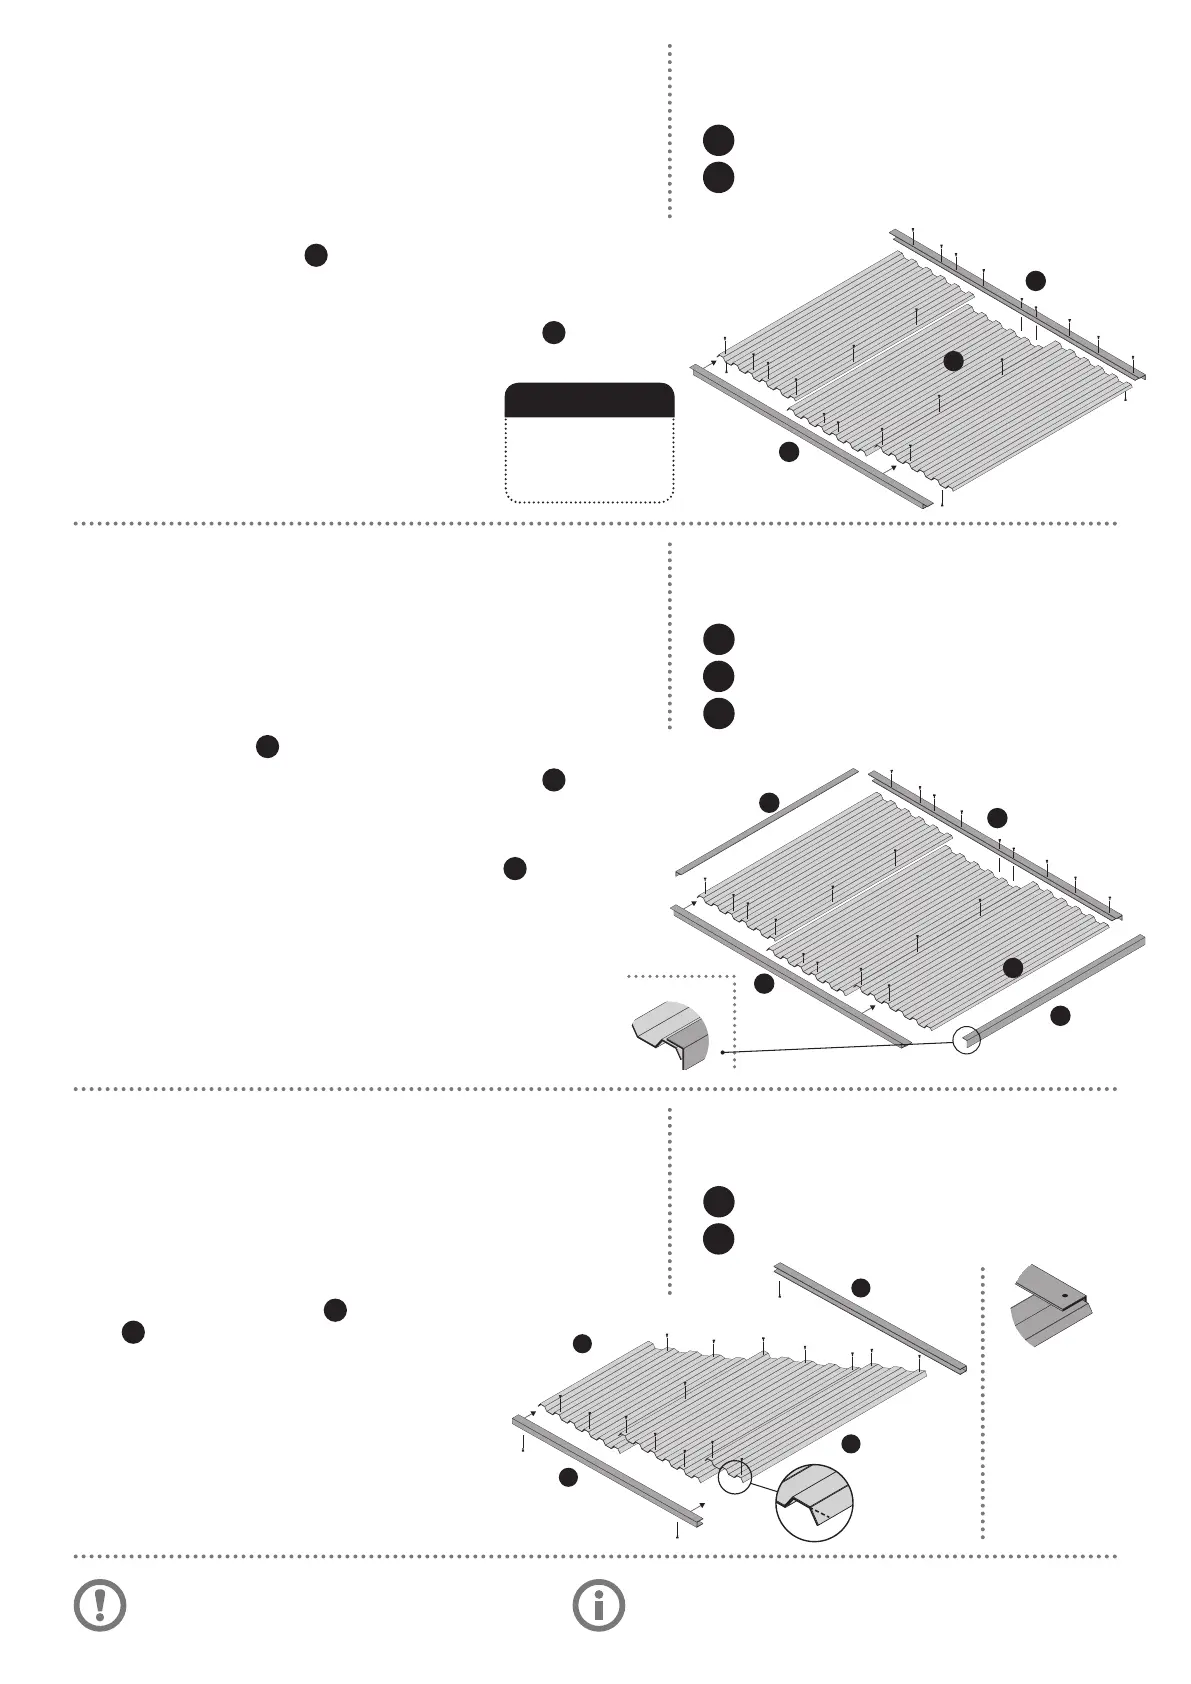
1. Join the three sheets
C
together with 2 xings
through the overlapping ribs, making sure the ends of
the sheets are ush.
2. Cap the sheeting with the 2255mm “U” channels
F
.
3. Fix the channels through the end ribs and
every second rib in between.
4. Make sure you put at least one xing per
sheet up through the underside of the
channel into the pan of the sheet.
1. Cap the sloping sheets
E
with the “U” channels
G
.
2. Fix the channels through the end ribs and every
second rib in between.
3. Make sure you put at least two xings up
through the underside of the channel
into the pan of the sheet.
4. Repeat for other side wall with opposite slope.
1. Join the sheets
D
together, same as the back.
2. Cap the sheeting with the 2255mm “U” channels
F
.
3. Fix the channels at every second rib but not the corners
at this stage.
4. Place the short ange of the rst “L” ashing
K
on
top of the rib at one end. Make sure the ends are ush
with the sheeting (diagram 1) and put one xing in the
centre to hold the “L” ashing. Fix the corners through
the channels and one more between the corner and the
centre xing.
5. Perform the same at the other end.
6. Five xings each “L” ashing.
Step 4:
Back wall
Step 5:
Roof
Step 6:
End walls
C
F
F
F
3 x 1830 x 780mm sheets.
2 x 2255mm “U” channels.
D
D
E
F
F
F
G
K
K
K
3 x 1980 x 780mm sheets.
2 x 2255mm “U” channels.
2 x 1980mm “L” ashings.
2 & 1/2 x sloping sheets per side.
2 x 1785mm “U” channels.
You will need:
You will need:
You will need:
diagram 1
Channels
will end
15-20mm
short at
tops of end
walls and
10-15mm at
bottoms.
E
E
G
G
Tip
Put extra xings in
for high wind areas,
particularly on the
underside.
C
Trim or fold corner
If you need advice, call us FREE on 0800 807 433
or email us at info@storite.co.nz
 Loading...