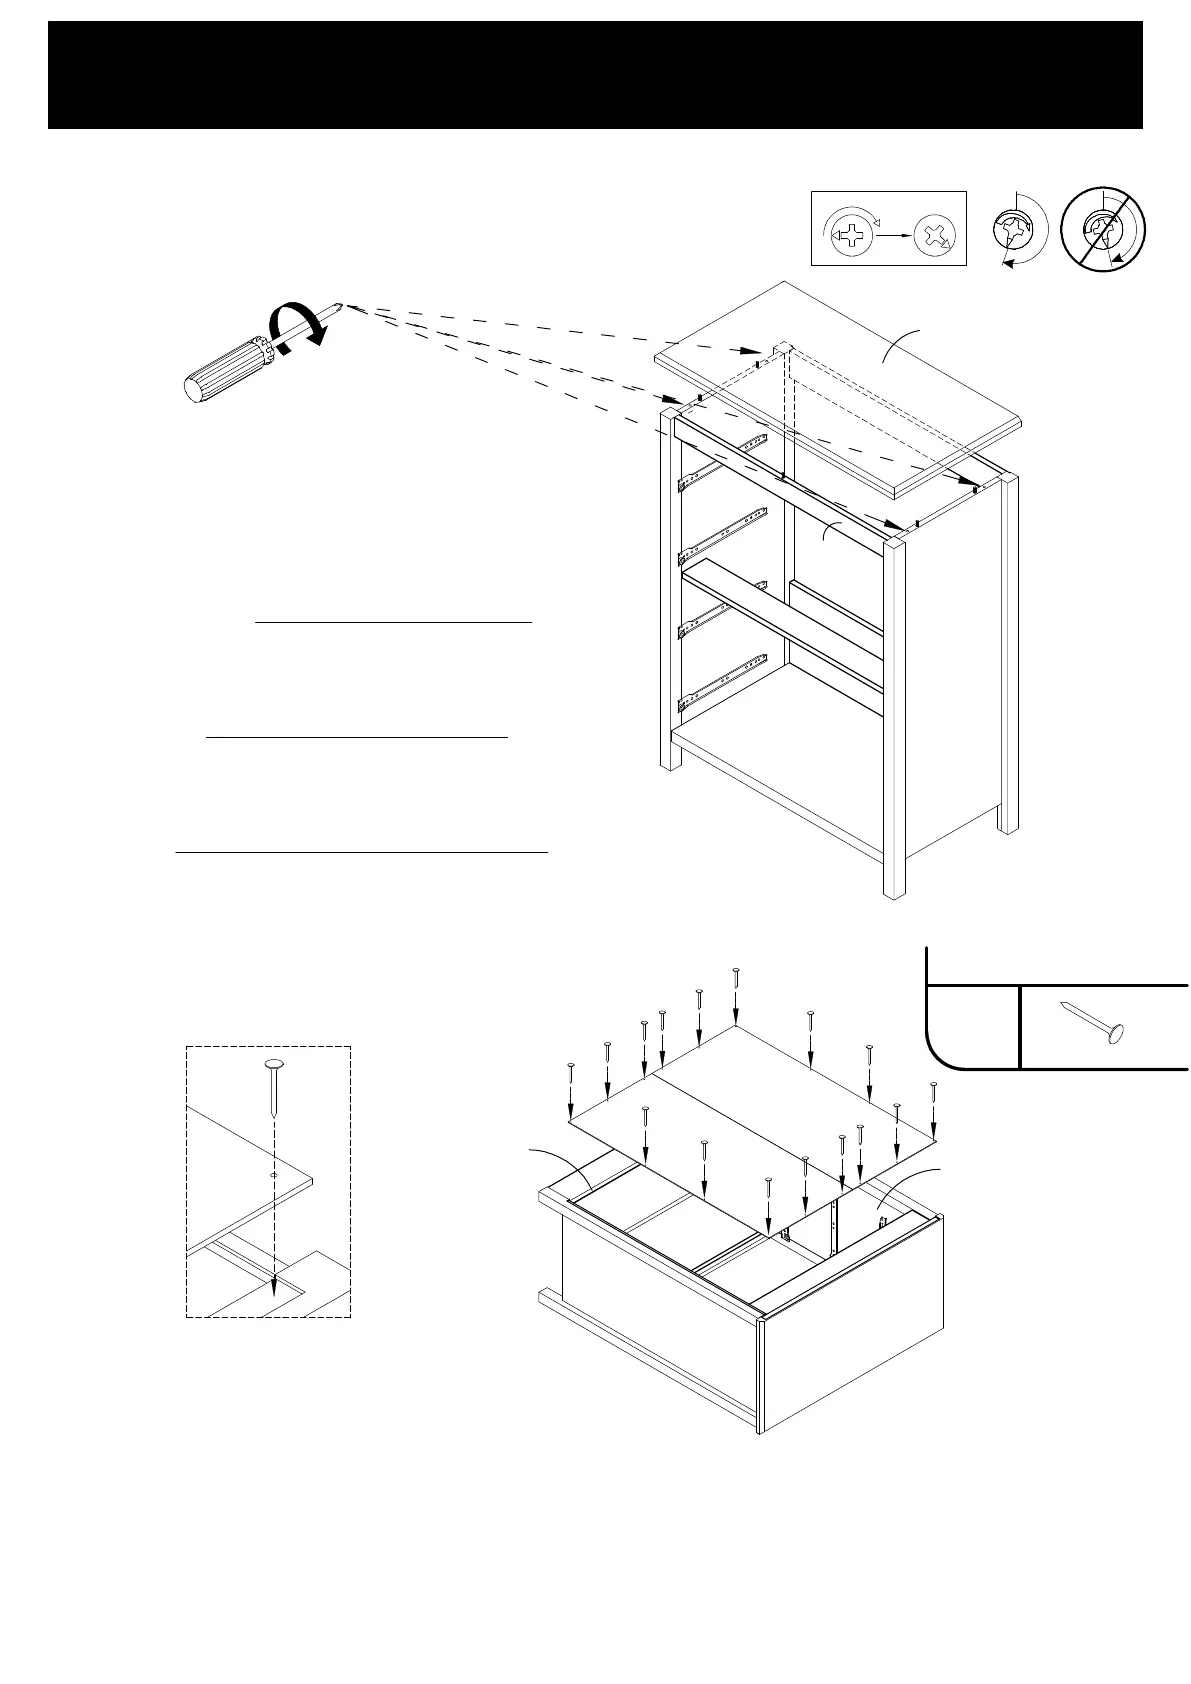
- Insert N into G, K and H.
- Tighten right 1(X4) little more than a half turn
on G and H to lock them together.
- Insérer N dans G, K et H.
- Tourner 1(X4) un peu plus qu'un demi tour à droite
sur G et H pour les barrer ensemble.
- Insertar N en G, K y H.
- Girar 1(X4) un poco màs que una media vuelta
hacia la derecha sobre G y H para trancarlos juntos.
G
H
41
X16
10
11
- Make sure the unit is level (squared).
- In beginning by the corners, nail P to N, H, M and G with 41 (X16).
- Assurez vous que l'unité soit au niveau (à l'équerre).
- En commençant par les coins, clouer P à N, H, M et G avec 41 (X16).
- Cerciorarse de que la unidad se encuentre a nivel.
- Comenzando por las esquinas, clavar P a N, H, M y G con 41 (X16).
41
correct/
correcto
incorrect/
incorrecto
1
LOCK
N
K
M
H
P
P
N
G
ASSEMBLY INSTRUCTIONS / INSTRUCTIONS D'ASSEMBLAGE /
INSTRUCCIONES DE ENSAMBLAJE
Required/Requis/Requerido