18.Thermal cut out switch (manual
reset, L120C)
a. Release appliance from housing unit (1).
b. Unscrew the top / rear panel securing
screws. Ease the panel backwards,
remove both fan leads and lift panel
clear.
c. Remove 2 screws securing thermal
cutout switch to inner grill cover and
replace.
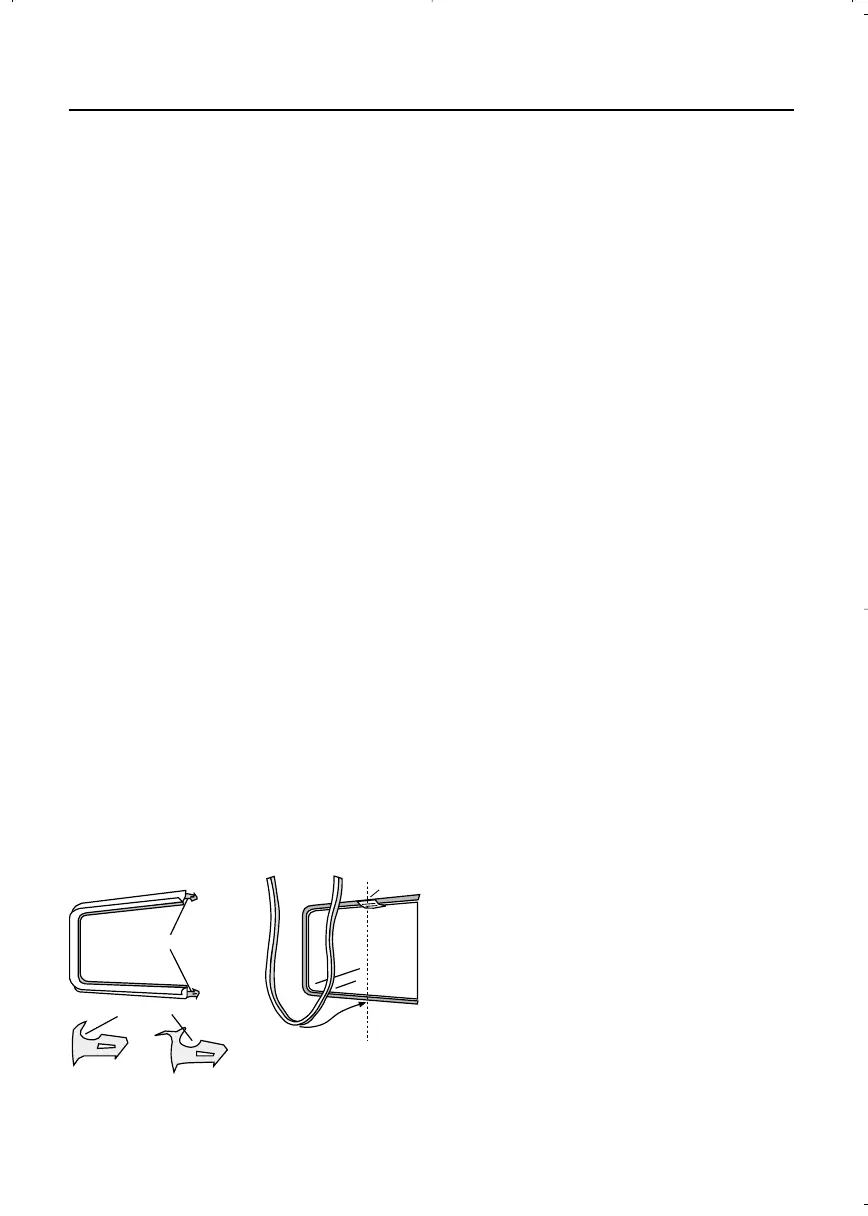
19.Door seal
a. Pull off the old seal.
b. Slacken the screws in the stainless
steel flue cover at the front of the oven
/ grill roof, to ease insertion of the seal.
c. Partly open the door to obtain best
access for the seal all around the oven
/ grill.
d. Applying washing up liquid to the rear
tongue of the seal will help insertion.
e. Locate the middle of the new seal and
start to push into place at the middle of
the bottom edge of the cavity.
f. Make sure the narrow gap goes to the
inside & locates onto the oven cavity.
g. Do not stretch the seal.
h. Make sure the seal is fitted correctly as
show, and cut to fit.
i. Re-tighten the screws in the flue cover.
20. Fan control PCB
a. Release appliance from housing unit (1).
b. Unscrew the top / rear panel securing
screws. Ease the panel backwards,
remove both fan leads & lift panel clear.
c. Note the position of, the remove each
wire from the PCB.
d. Remove PCB from plastic mounts.
e. Fit new PCB and reconnect wires.
39
SERVICING INSTRUCTIONS